4-2 Factory (“Service”) Mode
Alignment and Adjustments (Electrical)
Samsung Electronics
4-1
4. Alignment and Adjustments (Electrical)
4-1 Preadjustment
4-1-1 Factory Mode
1. Do not attempt these adjustments in the Video
Mode.
2. The Factory Mode adjustments are necessary
when either the EEPROM (IC901) or the CRT
is replaced.
3. Do not tamper with the “Adjustment” screen
of the Factory Mode menu. This screen is
intended only for factory use.
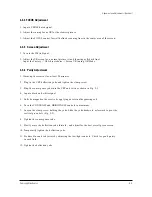
4-1-2 When EEPROM (IC901) Is Replaced
1. When IC901 is replaced all adjustment data
revert to initial values. It is necessary to re-
program this data.
2. After IC901 is replaced, warm up the TV for
10 seconds.
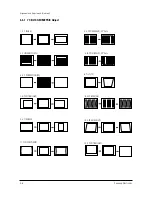
4-1-3 When CRT Is Replaced
Make the following adjustments after setting up
purity and convergence:
White Balance
Sub-Brightness
Vertical Center
Vertical Size
Horizontal Size
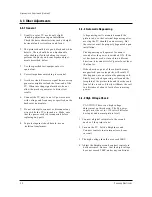
4-2-1 Procedure for the “Adjustment” Mode
1. This mode uses the standard remote control.
The Service Mode is activated by: (1) pressing
the “FACTORY” service key on the local-key-
board, or (2) by entering the following remote-
control sequence (within 2 seconds):
STAND-BY
→
MUTE
→
1
→
8
→
2
→
POWER ON
2. The “SERVICE (FACTORY)” message will be
displayed. The Service Mode has three compo-
nents: Adjustment, Option Bytes and Reset.
3. Access the Adjustment Mode by pressing the
“SELECT” keys ( ). The adjustment para-
meters are listed in the accompanying table,
and selected by pressing the “SELECT” keys
(
s
,
t
).
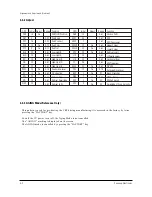
4. Selection sequences for the NTSC systems:
down or up key:
CAP>SBT>SCT>SCR>STT>BLR>BLG>RG>
GG>BG>PWL>SC>VSL>VA>NVS>NHS>
EW1>EWP>EWUC>EWLC>VSC>HP>HB>
TC>EW2>CDL>BKS>NDL>WS>VM
5. The “SELECT” keys (
s
,
t
) increase or decrease
the adjustment values, (stored in the
non-volatile memory) when Adjustment Mode
is cancelled.
Summary of Contents for CFTD2083TX/SMS
Page 2: ...ELECTRONICS Samsung Electronics Co Ltd JULY 2002 Printed in Korea AA82 00093A ...
Page 9: ...Samsung Electronics 3 1 2 Specifications ...
Page 10: ...MEMO 3 2 Samsung Electronics ...
Page 91: ...8 4 Samsung Electronics MEMO ...
Page 92: ...Schematic Diagrams 9 1 Samsung Electronics 9 1 MAIN 1 9 Schematic Diagrams ...
Page 93: ...Schematic Diagrams Samsung Electronics 9 2 9 2 MAIN 2 ...
Page 94: ...Schematic Diagrams Samsung Electronics 9 3 9 3 MAIN 3 ...
Page 95: ...Schematic Diagrams 9 4 Samsung Electronics 9 4 MAIN 4 ...
Page 96: ...Schematic Diagrams 9 5 Samsung Electronics 9 5 POWER BLOCK ...
Page 97: ...Schematic Diagrams 9 6 Samsung Electronics 9 6 DEFLECTION BLOCK ...
Page 98: ...Schematic Diagrams 9 7 Samsung Electronics 9 7 INTERFACE BLOCK ...
Page 99: ...Schematic Diagrams 9 8 Samsung Electronics 9 8 CRT BLOCK ...
Page 100: ...Schematic Diagrams 9 9 Samsung Electronics 9 9 Main Micom ...
Page 101: ...Schematic Diagrams 9 10 Samsung Electronics 9 10 AV Decoder ...

