18
Installation Procedure
English
Installation Pr
oc
edur
e
4
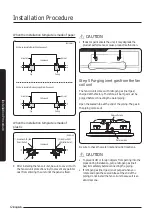
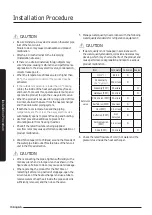
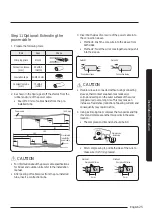
Fully insulate the drain pipe inside the building (on site).
If the drain pipe is sloped insufficiently, install the drain
pipe vertically from the hose connection port (on site).
CAUTION
• When connecting the flexible hose to the main drain
pipe, make sure that the elbow is installed vertically.
(Horizontal installation is prohibited.)
Elbow
Main drain pipe
Flexible hose
Elbow
Main drain pipe
Flexible pipe
5
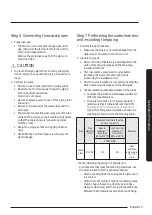
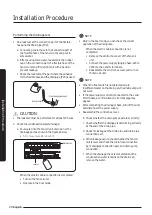
Remove the accessory vinyl attached to the drain pan.
Connect the air vent hose, and then secure it with a
cable tie so that it does not come out.
Accessory
Drain pan
Cable tie
Air vent hose
Cable tie
Air vent hose
Individual drainage
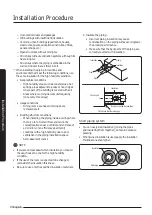
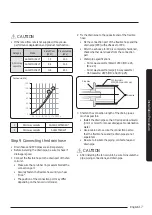
Use a leveler to check that the fan coil unit is parallel to
the ceiling.
1
If the slope of the drain pipe is less than 1/100, be sure
to install an air vent at the inlet of each drain hole to
smooth the flow of condensation water.
2
If the drain pipe is installed higher than the connection
port, install the drain pipe vertically within a distance
of 300 mm from the flexible hose connection port.
(Slim 1 way cassette)
• However, because the water may leak, the height of
the drain pipe should not exceed 550 mm.
3
Install the drain pipe at a slope of 1/100 or more.
4
Make sure that the distance between the supports is
1 to 1.5 m.
5
In order to prevent odor from the outlet of the drain
pipe, install a trap at the end of the drain pipe or install
an indirect drain.
6
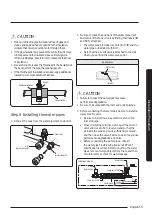
Do not apply force to the hose when connecting the
drain pipe.
• Make sure that the hose connection is not loosened
and as close as possible to the wall or other
support, as shown in the figure.
Summary of Contents for AGTN1DKH Series
Page 41: ...41 English Appendix Memo ...
Page 42: ...42 Memo English Appendix ...
Page 43: ...43 English Appendix ...
Page 44: ...DB68 09309A 00 ...

