17
English
Installation Pr
oc
edur
e
CAUTION
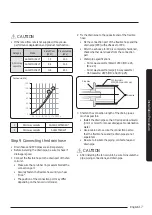
• If the rated flow rate is not supplied, it may cause
performance degradation and product malfunction.
Category
Mode
Rated flow
(LPM)
Pressure drop
(kPa)
Slim 1 way
cassette
AG026TN1DKH*
7.5
23.0
AG032TN1DKH*
9.6
34.5
AG042TN1DKH*
11.9
45.0
ߢߢ
ߤߢߢ
ߦߢߢ
ߨߢߢ
ߪߢߢ
ߣߢߢߢ
ߣߤߢߢ
ߤߧ ߧ ߩߧ ߣߢ ߣߤߧ ߣߧ ߣߩߧ ߤߢ ߤߤߧ
Pressure loss (kPA)
1
2
1
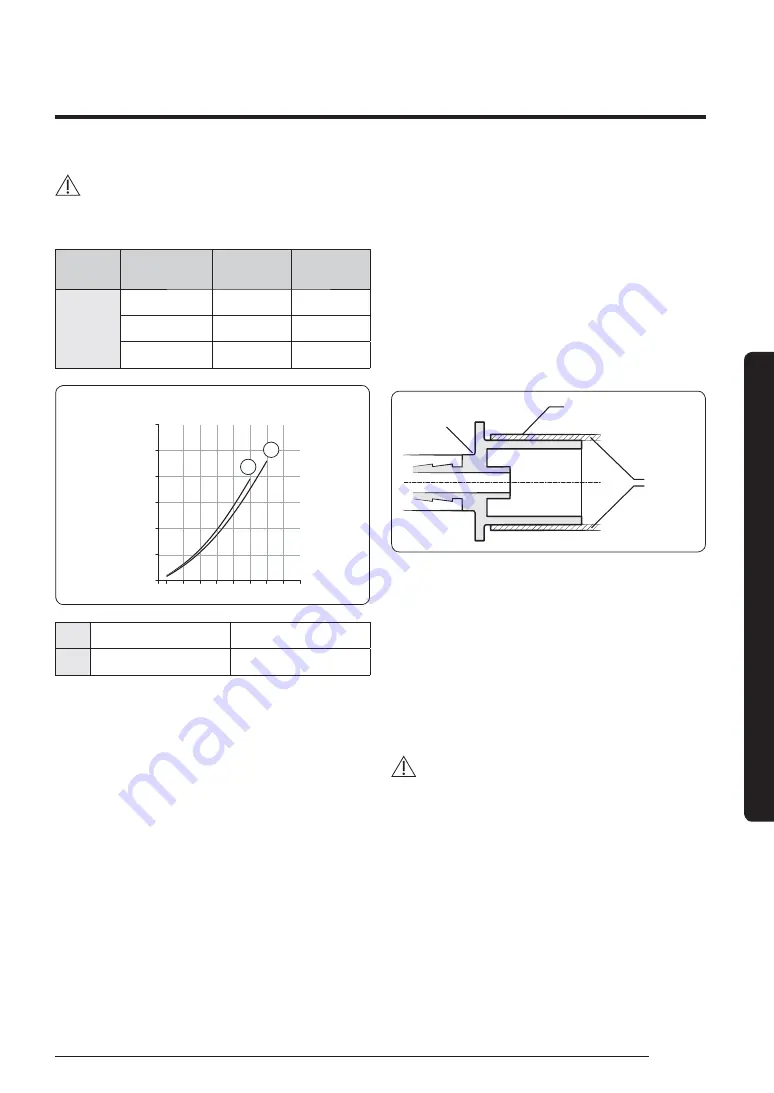
Slim 1 way cassette
AG026/032TN1DKH*
2
Slim 1 way cassette
AG042TN1DKH*
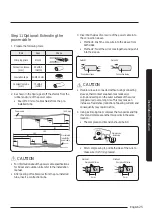
Step 9 Connecting the drain hose
• Drain hoses and PVC pipes are sold separately.
• Before installing the drain pipe, be sure to check if
drainage is good.
1
Connect the flexible hose to the drain port of the fan
coil unit.
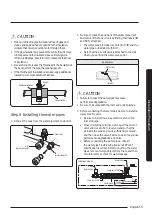
• Make sure that a rubber ring is assembled at the
connection port.
• Securely fasten the flexible hose until you hear
"click."
• The position of the connection port may differ
depending on the fan coil unit model.
2
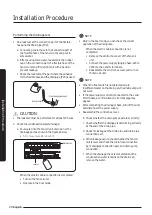
Fix the drain pipe to the opposite end of the flexible
hose.
• Fix the connection port of the flexible hose and the
drain pipe (PVC) with adhesive for PVC.
• After the adhesive for PVC is completely hardened,
check whether water leaks from the connection
part.
• Water pipe specifications
– Slim 1 way cassette (Small): VP20 (OD: ø 26,
ID: ø 20)
– Slim 1 way cassette (Large)/ 4 way cassette /
360 cassette: VP25 (OD: ø 32, ID: ø 25)
Drain hose
PVC Tube Joint +
VP25 (OD: 32 mm, ID: 25 mm)
Drain pipe
3
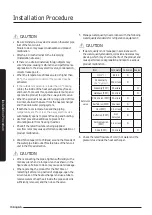
Shorten the connection length of the drain pipe as
much as possible.
• Install the drain pipe so that it is sloped downward
(3 mm or more) for proper drainage of condensation
water.
• Use a cable tie to secure the connection part so
that the flexible hose and tje drain pipe are not
separated.
• Be sure to insulate the piping, contact area, and
drain pipe.
CAUTION
• After installing the fan coil unit, be sure to insulate the
pipe, piping connections, and drain pipe.
Summary of Contents for AGTN1DKH Series
Page 41: ...41 English Appendix Memo ...
Page 42: ...42 Memo English Appendix ...
Page 43: ...43 English Appendix ...
Page 44: ...DB68 09309A 00 ...

