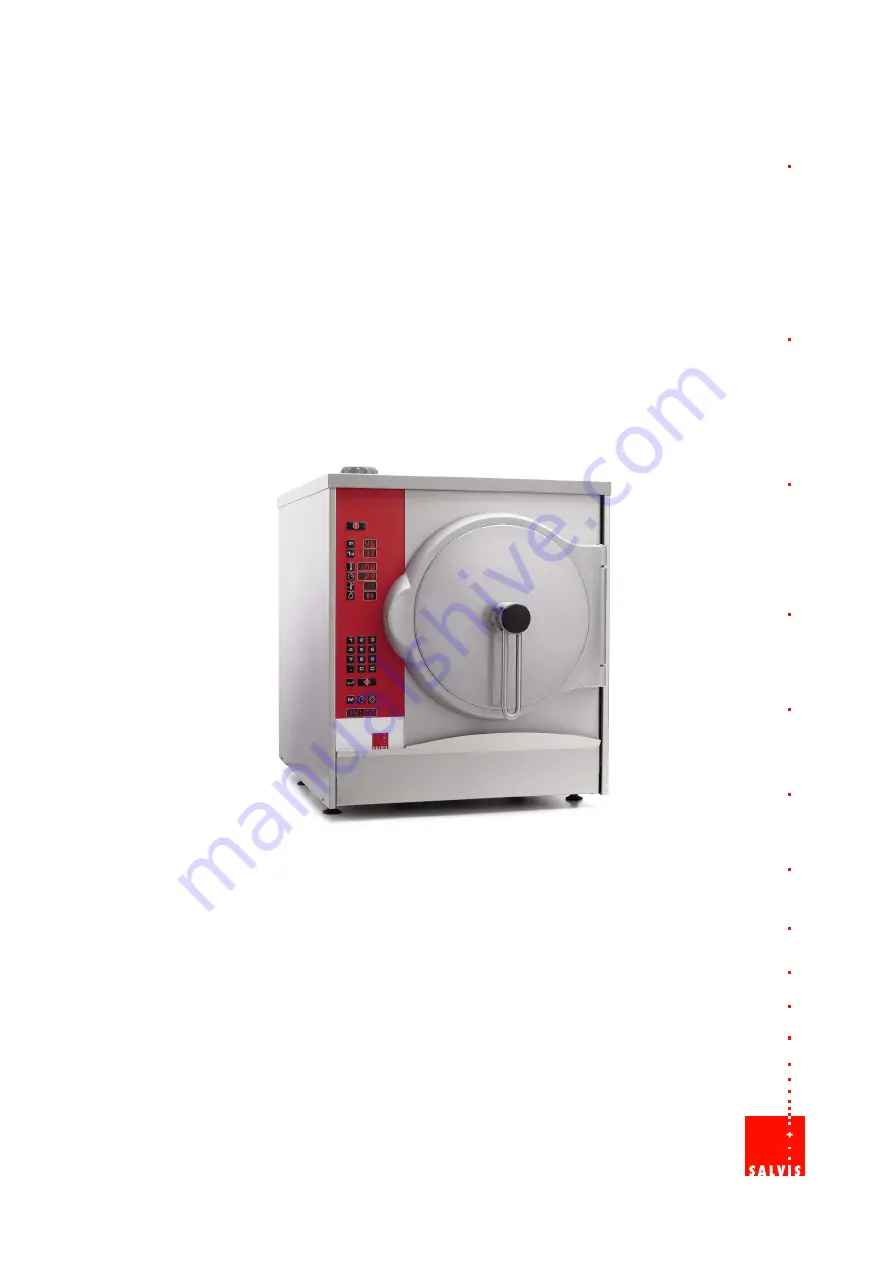
SALVIS Druck‐Steamer Vitality Pro
SALVIS Pressure Steamer Vitality Pro
SALVIS Cuiseur à vapeur Vitality Pro
Installations‐ und Gebrauchsanweisung
Installation‐ and Operating Instruction
Instructions d'installation et mode d'emploi
SDS 1/1‐13
Page 1: ...r Vitality Pro SALVIS Pressure Steamer Vitality Pro SALVIS Cuiseur vapeur Vitality Pro Installations und Gebrauchsanweisung Installation and Operating Instruction Instructions d installation et mode d...
Page 2: ...lungen w hrend des Garvorganges 19 3 7 2 Abfrage der Garzeit und der Gartemperatur im Garraum 20 3 7 3 Abfrage der Temperatur am Kerntemperatur F hler 20 3 7 4 Anzeigen der Uhrzeit und Programmnummer...
Page 3: ...39 2 Control panel and description of functions 41 3 Commissioning 42 3 1 Getting ready for use 42 3 2 Filling the cooking compartment and removing the cooked food 44 3 3 Setting the time and date 45...
Page 4: ...7 6 1 If there is a danger of freezing temperatures or before long periods of shutdown 57 7 Cleaning and care 58 7 1 Cleaning the stainless steel surfaces 58 7 2 Cleaning and care of the seal on the c...
Page 5: ...Cuisiner avec les programmes et fonctions 80 3 7 Possibilit s de modification et d interrogation pendant le fonctionnement 81 3 7 1 Modification des r glages en cours de cuisson 81 3 7 2 Interrogation...
Page 6: ...e de la chambre de cuisson 90 7 3 Nettoyage de la chambre de cuisson et de l gouttoir 90 8 R glage et r g n ration de l adoucisseur d eau 91 8 1 R glage de l adoucisseur d eau 91 8 2 R g n ration de l...
Page 7: ...dass die Gar Kerntemperaturen und die Garzeiten genau eingestellt werden k nnen Dadurch erhalten Sie optimale Garergebnisse Die Gerichte k nnen temperaturgenau mit oder ohne Druck gegart werden Bei b...
Page 8: ...se zur Reinigung D F r Sch den durch nicht bestimmungsgem en Gebrauch haftet allein der Benutzer D Wenn Sie Betriebsst rungen nicht anhand Seite 31 Kapitel 9 St rungen und Abhilfe besei tigen k nnen d...
Page 9: ...en Bauteile entleert werden benachrichtigen Sie den autorisierten Kundendienst D Das Ger t nicht mit Wasserleitungsschlauch Hochdruckreiniger Dampf Hochdruckreiniger oder Dampfreiniger abspritzen bzw...
Page 10: ...Programmspeicher Taste Dezimalpunkt Anzeigen von Zusatz informationen Eingabe Datum Eingabe der Kochzeiten mit Dezimalzahl z B 1 5 Minuten Anzeigefeld Uhrzeit Datum Uhrzeit f r Startzeit Vorwahl Bedi...
Page 11: ...el 3 3 Einschalten Ger t einschalten Taste Ein Aus dr cken D W hrend des Aufheizens die Kontrolllampe und die Anzeige blinkt D Der Ersch pfungszustand des Wasserenth rters wird im Anzeigefeld f r Gart...
Page 12: ...el 3 5 Schlie en der Garraumt r D Garraumt r nicht zuschlagen Quetschgefahr W hrend dem Schlie en der Garraumt r nicht zwischen Gar raumt r und Garraum fassen W hrend dem Verriegeln der T r nicht in d...
Page 13: ...erkante der Gastronorm Beh lter auff llen Entnehmen der Speisen nach einem Garvorgang D Nach Beendigung des Garvorganges ert nt ein Summer und die Kontrolllampe f r Garende blinkt Taste Summer dr cken...
Page 14: ...zeige blinkt oder die Kontrolllampen in den Tasten blinken Uhrzeit Taste Tageszeit dr cken D Die Kontrolllampe in der Taste blinkt D In der Anzeige erscheint D Stunde und Minuten mit den Zifferntasten...
Page 15: ...n der Garraumt r starten Bei wiederholtem Start ohne ffnen und Schlie en der Garraumt r blinkt die Anzeige f r Garzeit Anzeige vor der Eingabe D Um Garvorg nge ohne Programme durchf hren zu k nnen m s...
Page 16: ...D Die Kontrolllampe in der Taste blinkt D Im Anzeigefeld erscheint Kerntemperatur die im Innern des Gargutes erreicht werden soll mit den Zifferntasten ein geben z B und D Einstellbarer Temperaturber...
Page 17: ...is 99 C anwen den D Vorteile der Funktion Kerntemperatur immer gleiches und optimales Garergebnis Senkung des Gewichtsverlustes ein bergaren wird vermieden Einsetzen des Kerntemperatur F hlers Achtung...
Page 18: ...rogrammnummer mit den Zifferntasten eingeben z B Wenn Sie sich die Daten zum Programm sofort anzeigen lassen m chten Taste Eingabebe st tigung dr cken D Die Daten zu diesem Programm werden in den Anze...
Page 19: ...Gartemperatur oder Kerntemperatur Taste Gartemperatur oder Kerntemperatur dr cken D Die Kontrolllampe in der Taste blinkt D Im Anzeigefeld erscheint Gartemperatur oder Kerntemperatur mit den Ziffernta...
Page 20: ...am Kerntemperatur F hler Anzeige z B w hrend des Garvorganges Anzeige w hrend dem Dr cken der Taste Dezimalpunkt Eingestellte Gartemperatur Eingestellte Kern temperatur Temperatur im Garraum Temperatu...
Page 21: ...Taste Summer best tigt werden Erst dann startet die n chste Garphase Diese Einstellung wird z B ben tigt wenn Sie die Speise zwischen den Garvorg ngen umr hren m chten Um ein Programm neu anzulegen m...
Page 22: ...e Eingabebest tigung best tigen D Im Anzeigefeld erscheint Zweite Garphase Wenn Sie eine zweite Garphase einspeichern wollen Taste Garphase zweimal dr cken D Im Anzeigefeld erscheint Die Gartemperatur...
Page 23: ...n der Werte f r die Garphasen Taste Garphase so oft dr cken bis die gew nschte Garphase und die zugeh rigen Ein stellungen angezeigt werden D Vor dem Start des Garprogrammes mit der Taste Garphase wie...
Page 24: ...best tigung best tigen D Das Programm ist gespeichert und kann nun verwendet werden 4 3 L schen von Programmen Sie k nnen die eigenen und werkseitig gespeicherten Programme l schen Taste Programm dr c...
Page 25: ...instellen Einstellen der Startzeit Vorwahl Taste Startzeit Vorwahl dr cken D Die Kontrolllampe in der Taste blinkt D Die zuletzt eingegebene Startzeit wird angezeigt Taste Uhrzeit dr cken D Die Kontro...
Page 26: ...eit Vorwahl Um die Funktion Startzeit Vorwahl wieder zu aktivieren Taste Startzeit Vorwahl und Start Stopp nacheinander dr cken 6 Betriebsschluss Ger t mit der Taste Ein Aus ausschalten D Die Anzeigen...
Page 27: ...nst die Schutzschicht angegriffen wird Edelstahlfl chen nach Gebrauch klarsp len und trockenreiben D Das Ger t und den Garraum nicht mit S uren reinigen oder S ured mpfen aussetzen das sonst die Oberf...
Page 28: ...cht mehr gen gend abdichtet diese ber Nacht in Speise l ein legen D Ist die Dichtung verschliessen muss die Dichtung erneuert werden 7 3 Reinigen des Garraumes und der Tropfschale Ger t ausschalten un...
Page 29: ...h noch au erhalb den Kochzeiten Es sind keine Garvor g nge mehr m glich Der Regeneriervorgang muss sofort nach Beendi gung des Garvorganges durchgef hrt werden Der Garraum ist mit Kalk belegt Keine Ga...
Page 30: ...d Salz eingef llt oder hat sich das Salz nicht gen gend aufgel st ert nt ein Summer und die Anzeige erscheint wieder in diesem Fall etwas warten bis sich das Salz aufgel st hat und das Bef llen des Wa...
Page 31: ...Energieop timierungs Anlage schaltet die Heizung nicht zu Energieoptimierungs Anlage kontrollieren Wasser im Gar raum l uft nicht ab Der Ablauf ist verstopft Ablaufsieb reinigen Die W nde des Garraume...
Page 32: ...auf zu langsam eventuell zu starker Druckabfall durch andere Verbraucher Wasserhahn ffnen Eventuell das Ger t an eine separate Wasserversorgung anschlie en Wasserdruck erh hen Ger t aus und einschalte...
Page 33: ...zinhalt Garraum 2 x GN 1 1 100 1 x GN 1 1 200 Gesamtanschlusswert 16 kW Spannung Absicherung 400 V 3N 50 Hz 25 A 230 V 3 50 Hz 40 A Ger teger usch kleiner als 70 dB A W rmemenge latent 0 16 kW sensibe...
Page 34: ...besch digt wird Schutzfolie abziehen Schutzfolien am Ger t abziehen Kleber ckst nde mit Reinigungs oder Waschbenzin ent fernen Aufstellung D Mindestabst nde seitlich links und rechts 50 mm hinten 20...
Page 35: ...n sonst separaten Wasserzulauf oder Druckerh hungs pumpe installieren Max 350 kPa 3 5 bar statisch ber 350 kPa 3 5 bar muss ein Druckminderer vor dem Ger t eingebaut werden D Das Ger t enth lt einen e...
Page 36: ...Ger t nicht direkt an den Abfluss anschlie en Der Anschluss muss nach den nachfolgend aufgef hrten M glichkeiten ausgef hrt werden Ablauf mit offener Trennstrecke D Ablaufrohr offen in Trichter D Tri...
Page 37: ...das Potentialausgleichsystem einbeziehen Die Wirksamkeit muss nach VDE 0190 gepr ft sein D Stellen Sie sicher dass das Schutzleitersystem der elektrischen Hausinstallation vorschrifts m ig installiert...
Page 38: ...hat the cooking and core temperatures and the cooking times can be precisely adjusted This yields the best coo king results The dishes may be prepared to precisely the correct temperature with or with...
Page 39: ...is solely responsible for damage caused by use contrary to the intended use D If you cannot rectify malfunctions using the information on page 62 section 9 Malfunctions and their remedy switch off the...
Page 40: ...if the components carrying water need to be drained D Do not spray off or clean the appliance with water hoses high pressure cleaners high pressure steam cleaners or general steam cleaners D Do not s...
Page 41: ...l point key displays supplementary information Date input Input of cooking times using decimals e g 1 5 minutes Display field Time date Preselected start time Operator error Error number Time setting...
Page 42: ...ce on press the on off key D The indicator light and the display flash while the appliance is heating up D The degree of exhaustion of the water softener is indicated as a percentage in the cooking te...
Page 43: ...mpartment door D Do not slam the cooking compartment door Crush hazard Do not grip between the cooking compartment door and the cooking compartment when closing the cooking com partment door Do not re...
Page 44: ...to higher than 10 mm below the rim Removing the dishes after a cooking process D Once the cooking process is completed a buzzer sounds and the end of cooking indicator light flashes Press the buzzer...
Page 45: ...the display flashing while the appliance is heating up the indicator lights in the keys flashing Time Press the time of day key D The indicator light in the key flashes D The display shows D Enter the...
Page 46: ...ened and closed If you try to start again without opening and closing the cooking compartment door the cooking time display will flash Display before input D The indicator lights in the keys must be f...
Page 47: ...ey flashes D The display field shows Enter the core temperature to be reached inside the food being cooked using the numeric keys e g and D Temperature range variable from 20 to 99 C Confirming the se...
Page 48: ...the core temperature function always the same optimum result of cooking reduction in weight loss overcooking is avoided Using the core temperature sensor Caution the core temperature sen sor is hot T...
Page 49: ...e numeric keys e g If you wish to have the data relating to the programme displayed immediately press the entry confirmation key D The data for this programme will be displayed in the display fields S...
Page 50: ...temperature or core temperature Press the cooking temperature or core temperature key D The indicator light in the key flashes D The display field shows Enter the cooking temperature or core temperat...
Page 51: ...3 Querying the temperature at the core temperature sensor Display e g during the cooking process Display while pressing the decimal point key Cooking temperature set Core temperature set Temperature i...
Page 52: ...confirmed by pressing the buzzer key Only then will the next cooking phase start This setting is needed for instance if you wish to stir the food between the cooking processes Before you can create a...
Page 53: ...e entry confirmation key D The display field shows Second cooking phase If you wish to store a second cooking phase press the cooking phase key twice D The display field shows Enter the cooking temper...
Page 54: ...ses Press the cooking phase key until the desired cooking phase and its associated settings are displayed D Before starting the cooking programme use the cooking phase key to return to the first cooki...
Page 55: ...ing the entry confirmation key D The programme is stored and can now be used 4 3 Deleting programmes You are able to delete your own programmes and those stored in the factory Press the programme key...
Page 56: ...on Press the start time preselection key D The indicator light in the key flashes D The start time last entered will be displayed Press the time key D The indicator lights in the time key and the star...
Page 57: ...start time preselection function press the start time preselection key and the Start Stop key in sequence 6 Finishing work Switch the appliance off with the on off key D The displays go out The time i...
Page 58: ...rotective layer will be corroded Rinse stainless steel surfaces clean and rub them dry after use D Do not clean the appliance and the cooking compartment with acids or expose to acid vapours as the su...
Page 59: ...oak in cooking oil overnight D The seal must be replaced if is worn 7 3 Cleaning the cooking compartment and the drip tray Turn off appliance and let it cool down Place the core temperature sensor and...
Page 60: ...sible but outside cooking hours No further cooking processes are possi ble The regeneration process must be run immediately on completion of the cooking process The cooking com partment is scaled up D...
Page 61: ...e conds If insufficient salt has been added or if the salt has not dissolved sufficiently a buzzer sounds and the display shows again in this case wait a while until the salt has dissolved and repeat...
Page 62: ...ating Check the energy optimising unit Water is not draining out of the cooking com partment The outlet is blocked Clean the outlet screen The cooking compartment walls are scaled up The softener is e...
Page 63: ...ime out tap not open water supply too slow possibly excessive pressure drop due to other consumers Open the water tap Connect the appliance to a separate water supply if necessary Increase water press...
Page 64: ...mpartment capacity 2 x GN 1 1 100 1 x GN 1 1 200 Total connected load 16 kW Voltage fusing 400 V 3N 50 Hz 25 A 230 V 3 50 Hz 40 A Appliance noise level less than 70 dB A Heat quantity latent 0 16 kW s...
Page 65: ...protective film Remove protective film from the appliance Remove residual adhesive with white spirit Installation D Minimum distances 50 mm to the left and right 20 mm to the rear D Do not set the app...
Page 66: ...be cause of additional consumers otherwise install a separate water inlet or booster pump Maximum 350 kPa 3 5 bar static over 350 kPa 3 5 bar a pressure reducer must be installed upstream of the appli...
Page 67: ...t connect the appliance directly to the drain The connection must be made using the options shown below Outlet with open separator D Drain pipe open into hopper D Hopper not placed beneath the applian...
Page 68: ...must be checked in accordance with VDE 0190 D Make sure that the earth conductor system for the in house electrical installation is installed according to regulations 12 Maintenance D Have the applian...
Page 69: ...nsi des r sultats de cuisson optimaux Les plats peuvent tre cuisin s avec une temp rature exacte avec ou sans pression En cas de surpression la cuisson s effectue avec des temp ratures au dessus de 10...
Page 70: ...r est seul responsable des dommages r sultants d une utilisation non conforme de l appareil D Si vous ne parvenez pas rem dier aux dysfonctionnements l aide des instructions figu rant la page 93 du ch...
Page 71: ...i les l ments conduisant l eau doivent tre vi d s informez en le service apr s vente agr D Ne pas arroser ou nettoyer l appareil au jet d eau avec un nettoyeur haute pression un nettoyeur haute pressi...
Page 72: ...de programme Touche point d cimal Affichage d informations suppl mentaires Saisie de la date Saisie des temps de cuisson avec chiffre d cimal p ex 1 5 minutes Champ d affichage Heure date Heure pour...
Page 73: ...itre 3 3 Enclenchement Allumer l appareil Appuyer sur la touche Marche Arr t D Durant le r chauffement le t moin de contr le et l affichage clignotent D L tat d puisement de l adoucisseur d eau est in...
Page 74: ...pas frapper la porte de la chambre de cuisson Risques d crasement Durant la fermeture de la porte de la chambre de cuisson ne pas saisir entre la porte et la chambre de cuisson Ne pas mettre les doigt...
Page 75: ...bord sup rieur du r cipient gastronorme Enlever les plats apr s une cuisson D En fin de cuisson un vibreur retentit et le t moin de contr le pour la fin de cuisson clignote Appuyer sur la touche vibre...
Page 76: ...e dans les touches clignotent Heure Appuyer sur la touche heure du jour D Le t moin de contr le dans la touche clignote D L affichage indique D Saisir l heure et les minutes avec les touches chiffre p...
Page 77: ...activ e sans que la porte de la chambre de cuisson ait t ouverte et ferm e l indicateur du temps de cuisson clignote Affichage avant la saisie D Pour pouvoir effectuer une cuisson sans programme les...
Page 78: ...contr le dans la touche clignote D Le champ d affichage indique Saisir la temp rature coeur devant tre atteinte l int rieur de l aliment avec les touches chiffre p ex et D Plage de temp rature r glab...
Page 79: ...a fonction temp rature coeur toujours le m me r sultat optimal de cuisson r duction de la perte de masse une surcuisson est vit e Utilisation du d tecteur de temp rature coeur Attention le d tecteur d...
Page 80: ...touches chiffre p ex Si les donn es relatives au programme doivent s afficher tout de suite appuyer sur la touche confirmation de saisie D Les donn es relatives ce programme sont affich es dans le ch...
Page 81: ...ature coeur Appuyer sur la touche temp rature de cuisson ou temp rature coeur D Le t moin de contr le dans la touche clignote D Le champ d affichage indique Saisir la temp rature de cuisson ou la temp...
Page 82: ...r le d tecteur de temp rature coeur Affichage p ex en cours de cuisson Affichage pendant que la touche Point d cimal est appuy e Temp rature de cuisson r gl e Temp rature coeur r gl e Temp rature dans...
Page 83: ...t sur la touche vibreur Ce n est qu alors que la prochaine phase de cuisson d marre Ce r glage est n cessaire p ex lorsque vous souhaitez remuer le repas entre les cuissons Pour cr er un nouveau progr...
Page 84: ...de saisie D Le champ d affichage indique Deuxi me phase de cuisson Si vous voulez sauvegarder une deuxi me phase de cuisson appuyer deux fois sur la tou che phase de cuisson D Le champ d affichage in...
Page 85: ...les phases de cuisson Appuyer sur la touche phase de cuisson jusqu ce que la phase de cuisson souhait e et les r glages correspondants soient affich s D Avant le d but du programme passer de nouveau l...
Page 86: ...tion de saisie D Le programme est sauvegard et peut tre maintenant utilis 4 3 Suppression de programmes Vous pouvez supprimer les programmes que vous avez sauvegard s et ceux qui l ont t en usine Appu...
Page 87: ...a touche pr s lection de l heure de d marrage D Le t moin de contr le dans la touche clignote D La derni re heure de d marrage saisie s affiche Appuyer sur la touche heure D Le t moin de contr le de l...
Page 88: ...de l heure de d marrage Afin de r activer la fonction pr s lection de l heure de d marrage appuyer sur les tou ches pr s lection heure de d marrage et D marrage Arr t l une apr s l au tre 6 Fin de l u...
Page 89: ...le re v tement protecteur risque d tre attaqu Apr s l utilisation rincer les plans en inox l eau claire puis les s cher D Ne pas nettoyer l appareil et la chambre de cuisson avec des acides ou les ex...
Page 90: ...samment le plonger toute une nuit dans de l huile alimentaire D Si le joint est us il doit tre remplac 7 3 Nettoyage de la chambre de cuisson et de l gouttoir Eteindre l appareil et le laisser refroid...
Page 91: ...sson Il n est plus possible d effectuer une cuisson Le processus de r g n ration doit tre effectu imm diatement apr s la fin de la cuisson La chambre de cuisson a des d p ts de calcaire Ne plus effect...
Page 92: ...t de l eau dur e environ 40 secondes S il n y a pas assez de sel ou si le sel ne s est pas dissout suffisamment le vibreur re tentit et l indication r appara t dans ce cas attendre un moment jus qu ce...
Page 93: ...e Contr ler le syst me d optimisation d nergie L eau dans la chambre de cuisson ne s coule pas L vacuation d eau est bouch e Nettoyer le filtre de vidange Les parois de la chambre de cuisson ont des d...
Page 94: ...u Robinet non ouvert arriv e d eau trop lente ventuellement baisse de pression trop importante caus e par d autres utilisateurs Ouvrir le robinet d eau Eventuellement raccorder l appareil une conduite...
Page 95: ...sson 2 x GN 1 1 100 1 x GN 1 1 200 Valeur g n rale de raccorde ment 16 kW Tension Protection par fusi bles 400 V 3N 50 Hz 25 A 230 V 3 50 Hz 40 A Emission de bruits inf rieure 70 dB A Quantit de chale...
Page 96: ...films de protection de l appareil Eliminer les d p ts de colle au moyen d essence C ou d essence de lavage Mise en place D Distances minimales sur les c t s gauche et droite 50 mm l arri re 20 mm D Ne...
Page 97: ...isateurs suppl mentaires autrement in staller une arriv e d eau ou motopompe auxiliaire s par e Max 350 kPa 3 5 bars statique plus de 350 kPa 3 5 bars un r ducteur de pression doit tre mont devant l a...
Page 98: ...l directement l coulement Le raccordement doit tre effectu d apr s les possibilit s sp cifi es par la suite Evacuation des eaux avec distance de sectionnement ouverte D Tube d coulement ouvert dans l...
Page 99: ...tre contr l e conform ment la VDE 0190 D Assurez vous que le syst me de conducteur de protection de l installation lectrique de la maison soit install r glementairement 12 Maintenance D Soumettre cet...
Page 100: ...974196 7 08 3 09 SALVIS AG Nordstrasse 15 CH 4665 Oftringen Tel 41 0 62 788 18 18 Fax 41 0 62 788 18 98 Internet www salvis ch E Mail info salvis ch...