


24
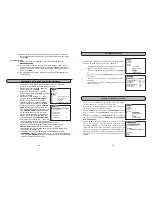
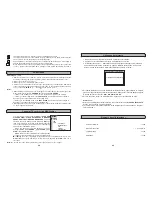
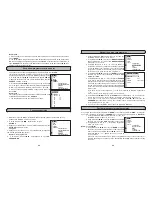
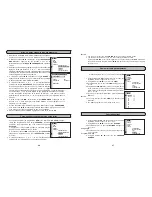
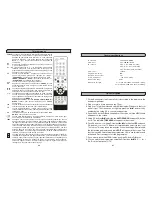
EDIT
PROGRAM 06
NAME
−−−−−
HIDE OFF
CHANGE
DELETE
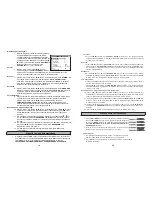
Individual setting of programes
MENU
SOUND
PICTURE
VIEW
CLOCK
AUTOSEARCH
MANUAL SEARCH
EDIT
OPTIONS
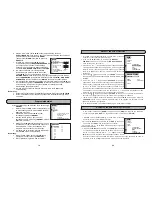
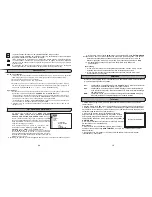
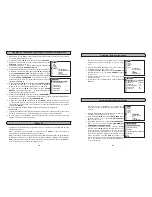
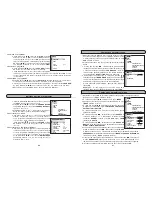
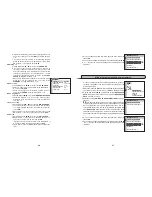
PROGRAM TUNE
PROGRAM TUNE
PROGRAM 06
VOLUME +1
BRIGHTNESS
−
2
ASPECT RATIO 4:3
SYSTEM AUTO
STANDARD AUTO
FINE TUNING 575,19 MHz
AFC ON
STORE
The mask of programes.
5. Using RC buttons
∧
∧
∧
∧
∧
,
∨
∨
∨
∨
∨
select the line HIDE. Using RC
button
<
or
>
turn on (ON) or turn off (OFF) the mask of
concrete programme. If you choose ON, your television will
skip selected programme, switching the programmes using
RC buttons
∧
∧
∧
∧
∧
,
∨
∨
∨
∨
∨
. You will be able turn on this programme
only using RC buttons 0, 1, ..., 9 or from the table VIEW.
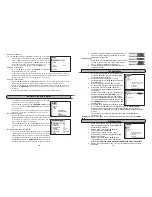
The shift of programes.
6. Using RC buttons
∧
∧
∧
∧
∧
,
∨
∨
∨
∨
∨
select the line CHANGE and using
RC button
<
or
>
activate the function of change.
7. Using RC buttons
<
or
>
, select the position of programme
into which you want to transfer the turned on programme. Push the RC button OK. You will
see the strip and the new number of programme in the screen. It shows that the programme
is transferred.
The deletion of programes.
8.Using RC buttons
∧
∧
∧
∧
∧
,
∨
∨
∨
∨
∨
select the line DELETE and push RC button
<
or
>
. The turned on
programme will be deleted and television will switch to the next programme.
9. If you want to perform this procedure with other programmes, then select the line PROGRAM
by using RC buttons
∧
∧
∧
∧
∧
,
∨
∨
∨
∨
∨
and repeat procedure, like it is written in the 3-8 items.
10.If you want to leave the MENU tables, push the RC button OK twice.
1. Push the RC button OK and keep it about 2 seconds, until
the MENU table will appear on the screen.
2.Using RC buttons
∧
∧
∧
∧
∧
,
∨
∨
∨
∨
∨
select the line PROGRAM TUNE
and push RC button
<
or
>
. The table PROGRAM TUNE will
appear on the screen.
3.Using RC buttons
<
,
>
, 0, 1, ..., 9 select the programme, for
which you want to perform the individual settings.
The correction of sound.
4. Sometimes the sound level of various programmes is
different. This function lets you to correct the sound for
every programme individually, and you wouldn’t need to
correct volume when switching the programmes.
Using RC buttons
∧
∧
∧
∧
∧
,
∨
∨
∨
∨
∨
select the line VOLUME. Pushing
RC button
<
or
>
you can change the sound’s level from
-7 to +7.
The correction of the picture lightness.
5. Sometimes the picture brightness of various programmes
is different. This function lets you to correct the brightness
for every programme individually, and you wouldn’t need
to correct brightness, when switching the programmes.
Using RC buttons
∧
∧
∧
∧
∧
,
∨
∨
∨
∨
∨
select the line BRIGHTNESS.
Pushing RC button
<
or
>
you can change the level of
brightness from -7 till +7.
41
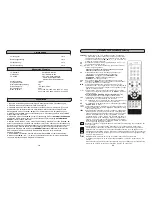
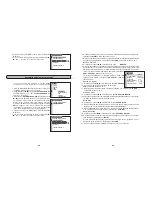
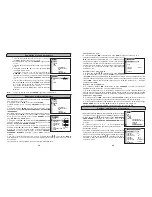
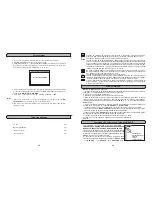
SON
VOLUME 20
AVL EN MARCHE
MEMORISER
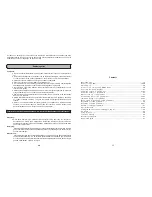
IMAGE
MODE PERSONNEL
LUMINOSITE 20
CONTRASTE 40
SATURATION 32
NETTETE 20
TEINTE 00
NUANCE NORMAL
REDUC. DU BRUIT ETEINT
MEMORISER
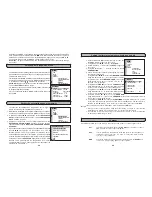
MENU
SON
IMAGE
APERCU
HORLOGE
RECHERCHE AUTO.
RECHERCHE MANUELLE
EXECUTER
OPTIONS
REGLAGE DE PROGR.
MENU
SON
IMAGE
APERCU
HORLOGE
RECHERCHE AUTO.
RECHERCHE MANUELLE
EXECUTER
OPTIONS
REGLAGE DE PROGR.
Réglage des paramètres son
1. Maintenez la touche
OK
de la télécommande enfoncée pendant
2 secondes environ jusqu’à ce que le MENU s’affiche à l’écran.
2. Appuyez sur les touches
<
ou
>
de la télécommande. Le menu
SON
s’affiche à l’écran.
3. À l’aide des touches
<
ou
>
vous pouvez régler le volume sonore
désiré.
4. À l’aide des touches
∧
∧∧
∧∧
,
∨
∨∨
∨∨
, sélectionnez le paramètre
AVL
(niveau sonore automatique). Si vous utilisez les touches
<
ou
>
, vous sélectionnerez le paramètre
EN MARCHE
; ainsi, si le
volume change pendant la diffusion, le son restera le même. Si
vous sélectionnez
NON UTILISE
,
AVL
sera désactivé.
5. Sauvegardez les paramètres. À l’aide des touches
∧
∧∧
∧∧
,
∨
∨∨
∨∨
,
sélectionnez la ligne
MEMORISER
. Appuyez sur les touches
<
ou
>
de la télécommande. Vous remarquerez une bande rouge.
Cette dernière signifie que tout a bien été sauvegardé.
Si vous souhaitez quitter le MENU, appuyez deux fois sur la
touche
OK
.
Remarque :
Si vous appuyez sur le bouton rouge de la
télécommande, vous accéderez directement au menu
SON
.
Réglage des paramètres image
1. Maintenez la touche
OK
de la télécommande enfoncée pendant 2 secondes environ
jusqu’à ce que le MENU s’affiche à l’écran.
2. À l’aide des touches
∧
∧∧
∧∧
,
∨
∨∨
∨∨
, sélectionnez la ligne
IMAGE
.
3. Appuyez sur les touches
<
ou
>
de la télécommande. Le menu
IMAGE
s’affiche à l’écran.
4. À l’aide des touches
∧
∧∧
∧∧
,
∨
∨∨
∨∨
, sélectionnez la ligne du paramètre
image que vous souhaitez régler :
LUMINOSITE, CONTRASTE,
SATURATION
ou
NETTETÉ.
5. À l’aide des touches
<
ou
>
, entrez la valeur voulue pour le
paramètre réglable.
6. À l’aide des touches
∧
∧∧
∧∧
,
∨
∨∨
∨∨
, sélectionnez la ligne
NUANCE
. À
l’aide des touches
<
ou
>
, sélectionnez la couleur d’image
souhaitée.
NORMAL
(neutre, gris),
CHAUD
(rose),
FROID
(bleuâtre),
ADAPTIF
.
7. À l’aide des touches
∧
∧∧
∧∧
,
∨
∨∨
∨∨
, sélectionnez la ligne
REDUC. DU
BRUIT
. À l’aide des touches
<
ou
>
, sélectionnez du paramètre:
ETEINT, FAIBLE, MEDIAN, FORT
.
8. Vous pouvez choisir un des quatre modes fixes de paramètres
image. À l’aide des touches
∧
∧∧
∧∧
,
∨
∨∨
∨∨
, sélectionnez la ligne
MODE
.
À l’aide des touches
<
ou
>
, sélectionnez les modes des paramètres d’image voulus.
PERSONNELL
(correspondant aux défauts du menu
IMAGE
),
STANDARD
,
DYNAMIQUE
(contraste accentué),
DOUX
(contraste diminué).
9. Il convient de sauvegarder les paramètres. À l’aide des touches
∧
∧∧
∧∧
,
∨
∨∨
∨∨
, sélectionnez
la ligne
MEMORISER
. Appuyez sur les touches
<
ou
>
de la télécommande. Vous
remarquerez une bande verte. Cette dernière signifie que tout a bien été sauvegardé.
10. Si vous souhaitez quitter le MENU, appuyez deux fois sur la touche
OK
.