

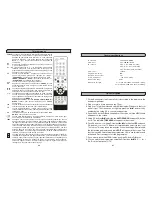

23
Manual tune up of programmes
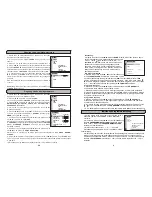
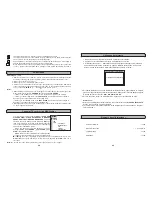
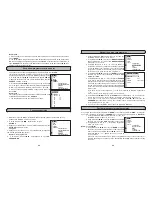
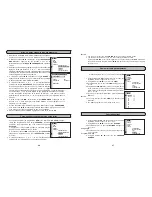
MENU
SOUND
PICTURE
VIEW
CLOCK
AUTOSEARCH
MANUAL SEARCH
EDIT
OPTIONS
PROGRAM TUNE
Customizing your stored programmes
MENU
SOUND
PICTURE
VIEW
CLOCK
AUTOSEARCH
MANUAL SEARCH
EDIT
OPTIONS
PROGRAM TUNE
1. Push the RC button OK and keep it about 2 seconds, until
the MENU table will appear in the screen.
2. Using RC buttons
∧
∧
∧
∧
∧
,
∨
∨
∨
∨
∨
select the line MANUAL SEARCH
and push RC button
<
or
>
. The table MANUAL SEARCH
will appear on the screen.
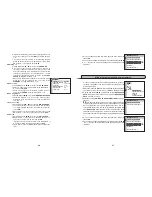
3. Using RC buttons
<
,
>
, 0, 1, ..., 9 select the number of
programme, into which you want to write tuned programme.
If selected number of programme is red, it shows, that the
programme is written in the selected position and will be
deleted when you will write the new programme.
4. Using RC buttons
∧
∧
∧
∧
∧
,
∨
∨
∨
∨
∨
select the line BAND and push RC
button
<
or
>
to select desirable band of channels: VHF-
L, VHF-H or UHF.
5. Using RC buttons
<
,
>
, 0, 1, ..., 9 to select the line SEARCH.
If you want to start the search, push the RC button
<
or
>
(it depends on the direction of search). When the programme
is founded, the farther tuning stops. If you want to find and
tune up other programme, it is necessary to push RC button
<
or
>
. It should be repeated until the desirable programme
will be found.
If you know the TV channel frequency, you can enter it directly by using RC buttons 0, 1,
..., 9.
It is necessary to write this programme in to the memory.
6. Using RC buttons
∧
∧
∧
∧
∧
,
∨
∨
∨
∨
∨
select the line STORE and push RC button
<
or
>
. You will see the
strip in the screen, which shows that the programme is written into the memory.
7. If you want to tune up more programmes, using RC buttons
∧
∧
∧
∧
∧
,
∨
∨
∨
∨
∨
select the line
PROGRAM and repeat this procedure, like is written in the 3-6 steps, until you will tune up
all programmes which you want.
8. If you want to leave the MENU tables, push the RC button OK twice.
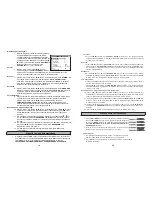
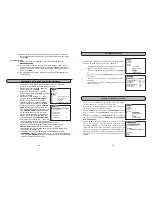
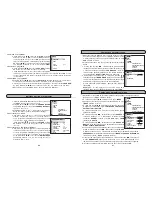
MANUAL SEARCH
PROGRAM 06
BAND UHF
SEARCH 479,25 MHz
STORE
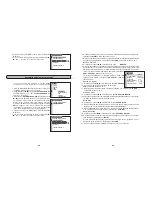
You can give the names for the programmes (NAME), to mask the programmes (HIDE), to change the
succession of tuned up programmes (CHANGE), also to delete unwanted programmes (DELETE).
1. Push the RC button OK and keep it about 2 seconds, until
the MENU table will appear on the screen
2. Using RC buttons
∧
∧
∧
∧
∧
,
∨
∨
∨
∨
∨
select the line EDIT and push RC
button
<
or
>
. The table EDIT will appear on the screen.
3. Using RC buttons
<
,
>
, 0, 1, ..., 9 select the programme,
which you want to edit.
Name’s conferment
4. Using RC buttons
∧
∧
∧
∧
∧
,
∨
∨
∨
∨
∨
select the line NAME. Using RC
button
<
or
>
select the symbol position of name, which you
want to install, and using RC buttons
∧
∧
∧
∧
∧
,
∨
∨
∨
∨
∨
select one of
symbols A-Z, 0-9, ., /, +, -, space. The name can have up
to five symbols.
When you have selected the name’s symbol, using RC button
>
go to the next position or
using RC button
<
go to the former position. Push the RC button OK, when you finish selecting
the name.
42
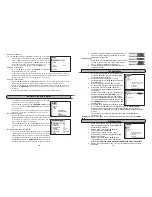
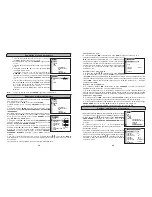
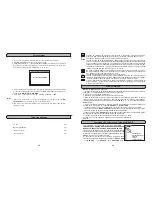
MENU
SON
IMAGE
APERCU
HORLOGE
RECHERCHE AUTO.
RECHERCHE MANUELLE
EXECUTER
OPTIONS
REGLAGE DE PROGR.
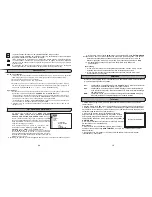
APERCU
01 TV3 11
02 TV4 12
03 13
04 14
05 15
06
07
08
09
10
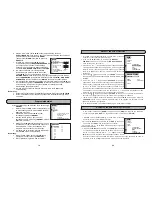
MENU
SON
IMAGE
APERCU
HORLOGE
RECHERCHE AUTO.
RECHERCHE MANUELLE
EXECUTER
OPTIONS
REGLAGE DE PROGR.
Remarques :
1. Si vous appuyez sur le bouton vert de la télécommande, vous accéderez directement au
menu
IMAGE
.
2. Les paramètres d’image fixe peuvent être sélectionnés directement à l’aide de la touche
PP
. Si vous appliquer le signal du système couleur
NTSC
à l’entrée vidéo de la télévision, la
ligne
NUANCE
sera active. Si vous sélectionnez cette ligne à l’aide des touches
∧
∧∧
∧∧
,
∨
∨∨
∨∨
, vous
pourrez régler la teinte de l’image.
Revue des programmes mis au point
Vous pouvez revoir tous les programmes mis au point dans le menu
VUE
.
1. Maintenez la touche
OK
de la télécommande enfoncée pendant
2 secondes environ jusqu’à ce que le MENU s’affiche à l’écran.
2. À l’aide des touches
∧
∧∧
∧∧
,
∨
∨∨
∨∨
, sélectionnez la ligne
APERCU
.
3. Appuyez sur les touches
<
ou
>
de la télécommande. Le menu
APERCU
s’affiche à l’écran.
4. À l’aide des touches
∧
∧∧
∧∧
,
∨
∨∨
∨∨
(en colonne), ou avec les touches
<
or
>
(en ligne), vous pouvez mettre n’importe quelle chaîne de
la liste. Le programme s’affichera après environ 1 seconde.
5. Si vous souhaitez quitter le MENU, appuyez deux fois sur la
touche
OK
.
Remarques :
1. Si vous appuyez sur le bouton jaune de la télécommande, vous
accéderez directement au menu
APERCU
.
2. Les programmes cachés sont indiqués en rouge.
Fonctions spéciales
1. Maintenez la touche
OK
de la télécommande enfoncée pendant 2 secondes environ
pendant que le MENU s’affiche à l’écran.
2. À l’aide des touches
∧
∧∧
∧∧
,
∨
∨∨
∨∨
, sélectionnez la ligne
OPTIONS
3. Appuyez sur les touches
<
ou
>
de la télécommande. Le menu
OPTIONS
s’affiche à l’écran.
Langues
4. Appuyez sur les touches
<
ou
>
et sélectionnez la langue de
commande graphique appropriée.
Numéro de programme
5. À l’aide des touches
∧
∧∧
∧∧
,
∨
∨∨
∨∨
, sélectionnez la ligne
NO.
PROGRAMME
.


