14
INSTALLATION—PNEUMATIC REVERSING EDGE SWITCH ADJUSTMENT
PNEUMATIC REVERSING EDGE SWITCH
ADJUSTMENT
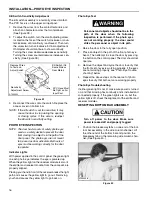
Do not stand under the door panel when
making check. If reversing edge switch is
not working properly, panel could strike
person performing check.
To check the reversing edge switch operation, run the
door through the down cycle. As the door is lowering,
tap the bottom of the reversing edge. If the reversing
edge switch is operating properly, the door should
immediately reverse and run to the full open position.
Push the control box push button to close the door after
the check is completed.
If the door does not reverse, check the air bleed and
sensitivity of the reversing edge switch. The switch is in
the bottom bar on the side opposite the door motor.
Reversing Edge Switch Air Bleed Check
1.
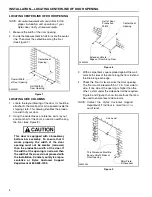
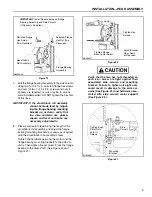
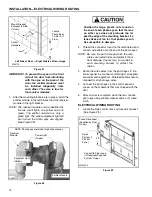
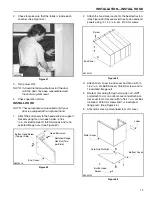
The reversing edge switch is located inside the bot-
tom bar assembly. To inspect and/or adjust the
switch, remove the access cover from the face of
the bottom bar assembly. (See Figure 32.)
Figure 32
2.
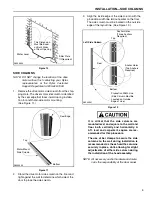
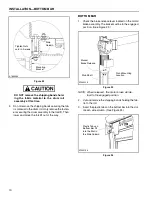
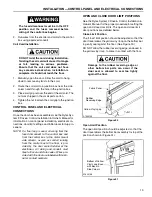
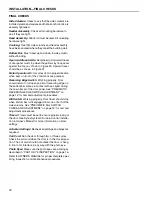
Make sure the clear PVC hose is in tight contact
with the air input post so that air leakage cannot
occur and that vibration will not cause the hose to
fall off. Make sure the hose is not kinked.
(See Figure 33.)
3.
The air bleed has been set at the factory and should
not require adjustment. To check the air bleed, turn
the air bleed adjustment screws located on the front
and back of the switch fully clockwise, but do not
overtighten. Then turn the screws back counter-
clockwise one full turn. (See Figure 33.)
Figure 33
Reversing Edge Switch Sensitivity Adjustment
1.
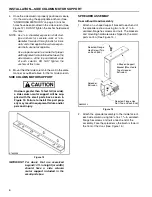
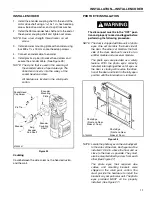
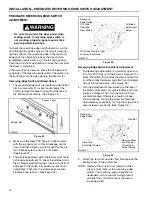
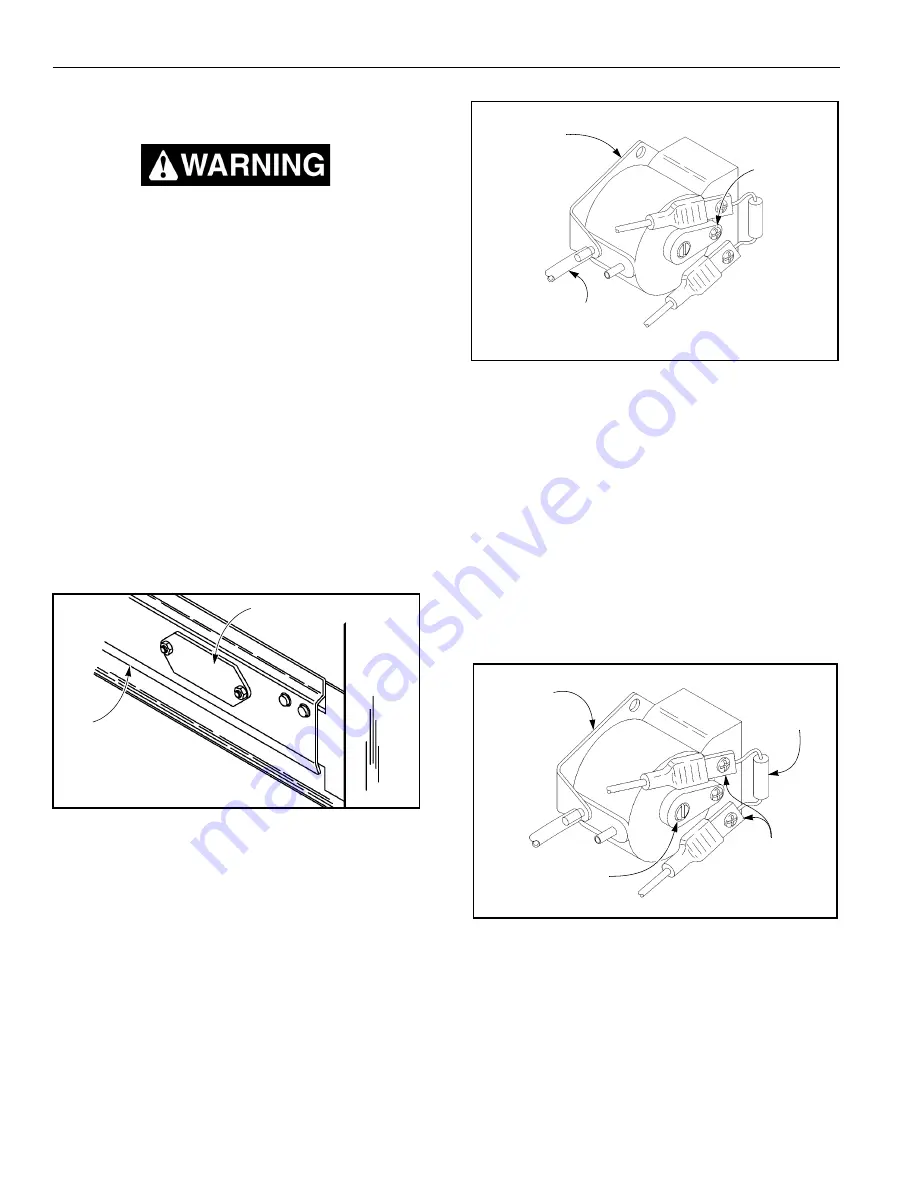
The reversing edge switch is a normally open con-
tact. The PVC hose is on the lower air input post. To
adjust the switch, first remove the wires and resistor
from the contact terminals and attach an ohmmeter
across the two terminals. (See Figure 34.)
2.
Turn the adjustment screw, located on the face of
the switch, clockwise or counterclockwise until con-
tinuity is achieved. Then turn the screw 3/4 turn
counterclockwise. Ohmmeter should no longer
show continuity. Turning the screw counterclock-
wise decreases sensitivity. Turning the screw clock-
wise increases sensitivity. (See Figure 34.)
Figure 34
3.
Attach the resistor and wires and then replace the
access cover on the bottom bar.
NOTE: Replace the resistor and mount to either
the coil cord wires or the reversing edge
switch. The reversing edge connection is
dependent on the resistor being present
on either the coil cord wires or the revers-
ing edge switch.
A7500201
Access Cover
Bottom Bar
Reversing
Edge Switch
(On Side
Opposite
Door Motor)
PVC Hose Must Be Tight
on Lower Input Hose
Air Bleed
Adjustment
Screw
A7500227
Reversing
Edge Switch
to Test and
Adjust Switch
Resistor
and Resistor
Remove Wires
Sensitivity
Adjustment Screw
A7500227
Summary of Contents for Pharma-Roll
Page 1: ...Pharma Roll Installation Manual Revision January 15 2009 0715009 Rytec Corporation 2007...
Page 2: ......
Page 23: ...NOTES 19...
Page 24: ......

