1-7
LEF2-300
1
R
EPLACEMENT
Print Head Replacement
•
Always use the UV protection sheet during this adjustment, or ink will harden and clog inside the ink line.
1.
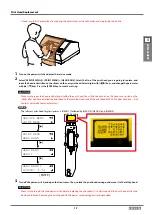
Turn on the power switch and enter the service mode.
2.
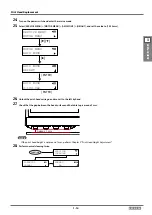
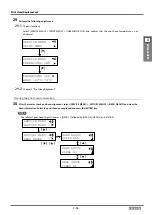
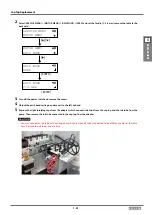
Select [SERVICE MENU] > [PRINT MENU] > [HEAD RANK]. Select the No. of the print head you are going to replace, and
input the head rank written on the sticker on the new print head. Select digits with [
][
] keys, and change the parameter
with [
] [
] keys. Press the [ENTER] key to save the setting.
CAUTION
Make sure to input the head rank before installing the print head. You will not be able to see the head rank written on the
sticker after you have installed the print head to the machine. Head rank of the print head of LEF2-300 does not have…, but
contains only alphanumeric characters.
NOTE
The leftmost print head for gloss/primer is [HEAD 1], followed by [HEAD 2], [HEAD 3] and [HEAD 4].
HEAD RANK
HEAD 1
PRINT MENU
HEAD RANK
HEAD RANK 1
1234567 (1/5)
[ ]
[ ]
[ ENTER ]
SERVICE MENU
PRINT MENU
[ ]
HEAD RANK
3.
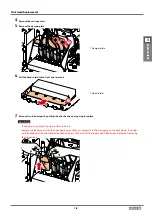
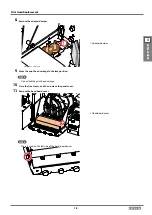
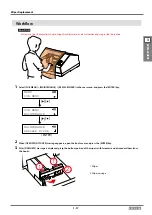
Turn off the power switch, and open the front cover. Then, unlock the print-head carriage, and move it to the left by hand.
CAUTION
Make sure to turn off the main power switch before replacing the print head. If it is not turned off, the print head or the main
board could break. Replacing the print head with the power cord unplugged is recommended.


