■
Storing the Unit’s Settings
You can transmit the information for the unit’s settings from the
MIDI Out connector. This function is called a “Bulk Dump.” This
sends the unit’s data to a sequencer or some other MIDI device
in real-time for storage on the other device. You can also use this
function to return settings stored on another device to the unit.
●●●●●●●●●●●●●●●●●●●●●●●●●●●●●●●●●●●●●●●●●●●●●●●●●●●●●●
How to Do a Bulk Dump
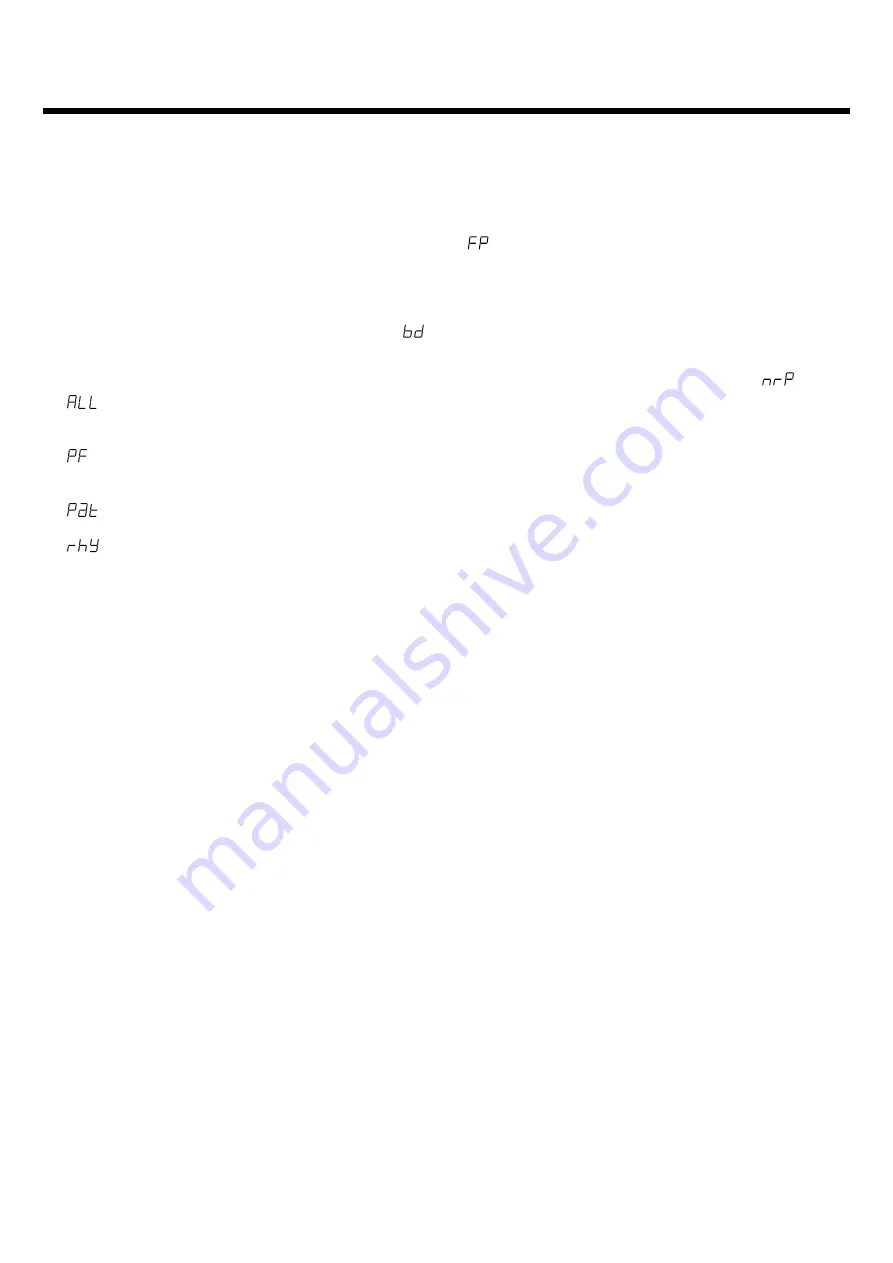
Hold down the select button and press the F2 button. “
”
appears on the display. Then use the Value buttons to select the
information that you want to send.
Sends all of the data as well as the Parameter settings
for Master and MIDI Rx that can be adjusted from the
front panel.
Sends Performance settings and the Parameter set-
tings for Part Param 1 and Part Param 2 that can be
adjusted from the front panel.
Sends the information for Patches assigned to Parts 1
to 7.
Sends the settings for the Rhythm Set assigned to Part
8.
* The display and operation shown above explain the usage
when in the Performance mode. In the Patch mode, the selec-
tions “PF” and “rhy” are not available. Also, selecting “Pat”
causes the information for only one Patch to be sent.
After starting recording on the sequencer, press the unit’s Enter
button. The Bulk Dump is executed when you press this button.
If you want to cancel the Bulk Dump, press the Exit button.
●●●●●●●●●●●●●●●●●●●●●●●●●●●●●●●●●●●●●●●●●●●●●●●●●●●●●●
■
Saving Settings.................................................
To save the unit’s setting data, connect its MIDI Out connector to
the MIDI In connector on a sequencer (or some other MIDI
device), and then set the unit’s Device ID number (p. 5). When
you’ve done this, start recording on the sequencer and execute a
Bulk Dump. After the Bulk Dump has finished, stop recording
on the sequencer.
■
Returning Saved Settings to the Unit .................
To load settings data back into the unit, connect the MIDI Out
connector on the sequencer to the unit’s MIDI In connector.
Make sure that the unit’s Device ID number (p. 5) is set to the
same number that was used when the settings were save. Also
check to make sure that the System Exclusive Message Receive
Switch (p. 5) is set to “on.”
After you have checked these, send the settings data stored on
the sequencer to the unit.
If you record Bulk Dump data at the start of a batch of music
data, you can set up the unit simply by sending the song data to
the unit.
Returning Settings to Their
■
Factory Defaults (Factory Preset)
This returns all of the unit’s settings to the data in effect when
the unit was shipped from the factory.
Hold down the Select button and press F3. When the message
“
” flashes on the display, confirm that you want to go ahead
by pressing the Enter button. Press the Exit button instead if you
change your mind.
■
NRPN Receive Switch
If you hold down the Select button and press F4, “
” flashes
on the display. After this disappears, you can use the Value but-
ton to select “on” or “oFF.” When set to “on,” you can use an
NRPN (non-registered parameter number) to edit the unit’s
Patches and Rhythm Sets. This is automatically set to “on” when
a GS Reset or GM System On message is received.
When at “oFF,” a Patch or Rhythm Set cannot be edited even
when an NRPN is received. The setting is always at “oFF” when
the power is switched on.
* No GS Reset or GM System On messages are received when
the SysEx parameter is set to “oFF” or “PAr.”
■
How to Listen to the Demo Songs
Holding down the Select button as you switch on the power
makes it possible to listen to the demo songs. Use the Value but-
tons to choose a song number. The Demo song is played back
when you press the Enter button. Pressing the Exit button stops
playback.
Press the Exit button once more, you can play this unit it was.
For more information on the Demo songs, see the owner’s manu-
al for the particular model that you’re using.
6
Quick Start


