62
��
2.7 Routes
The
multi
M
AUS
PRO
does not only offer the possibility to switch individual turnouts but can also combine
several turnouts into one route and switch together by pressing only one key. A route is a distance covered
by a train crossing several turnouts. For example, this can be used to move a freight train from a feeder track
across sever turnouts switched with a single command and onto the main track without interruption.
Use the
multi
MAUS
PRO
to configure 64 routes each with a maximum of 16 turnouts. However, it is not pos-
sible to embed a route into another route, i. e. one route cannot be combined with another route.
Train operation is not suspended or canceled while in route mode! This is also why the display depicts
the drive symbols. The last active locomotive is also possible with the drive controller and an emergency
stop can also be triggered.
The turnout switching action and whether the train has already passed across the route usually does
not trigger a confirmation.
2.7.1 Creating a New Route
Input
Display message
Comment
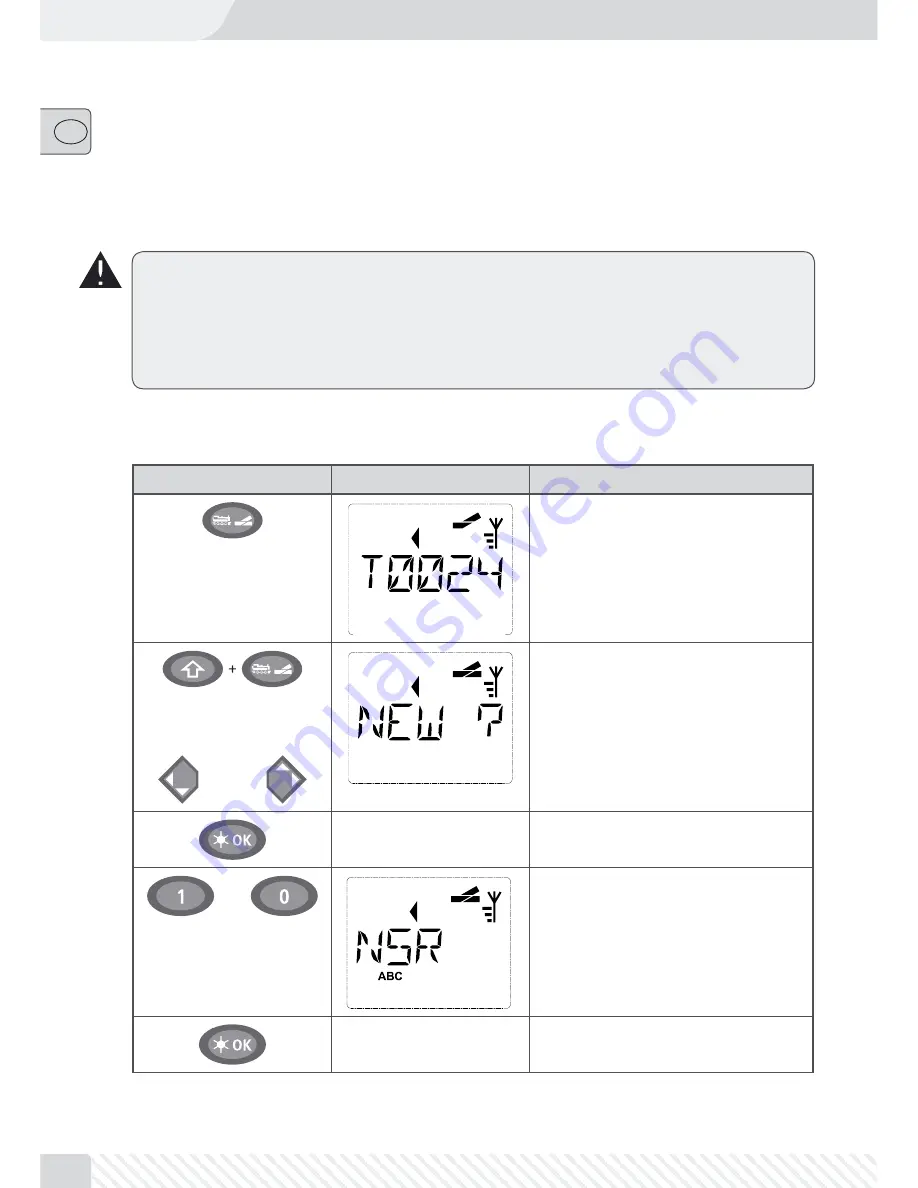
Press the “Loco/Turnout” key. The last se-
lected turnout is displayed, in this case
turnout 24.
/
Press “Shift” and “Loco/Turnout” at the
same time to open route mode.
The image depicted to the left is shown if
there are no routes created yet.
If there are already some created routes,
use the arrow keys to find the available
storage slot marked with “NEW?”.
Confirm by pressing “OK”.
…
Now enter the name of the route, in this
case “NSR” for “north–south route”. Five
characters can be entered.
Entry is the same as creating a locomotive
in the library (see page 54).
Confirm by pressing “OK”.


