55 of 136
11.
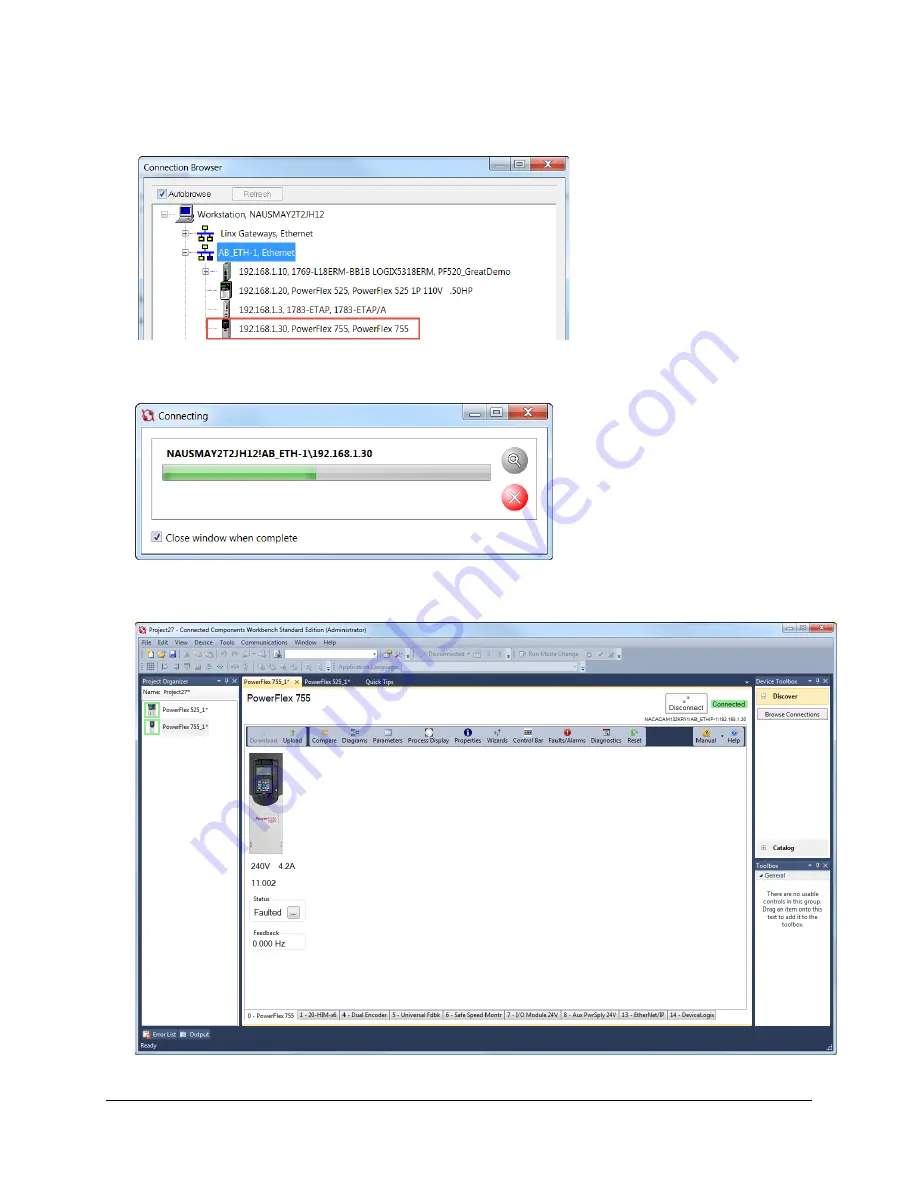
The lab’s preconfigured RSLinx driver will appear. Click on the [+] to expand the topic AB_ETH-1,
Ethernet. Click to highlight the “192.168.1.30, PowerFlex 755, PowerFlex 755” device.
12.
Press the “OK” button to initiate the connection process. For a quick moment, you might see a connection
status window.
Otherwise, once the connection process is complete, you will see the following main screen with a green highlighted
“Connected” for the PowerFlex 755 drive within the Connected Components Workbench software.
Summary of Contents for PowerFlex 525
Page 8: ...8 of 136 About the PowerFlex 525 Demo Box ...
Page 9: ...9 of 136 About the PowerFlex 755 DHQ Demo Box ...
Page 12: ...12 of 136 Control and Navigation Keys ...
Page 34: ...34 of 136 Relay Outputs changes required Opto Outputs Analog Outputs ...
Page 126: ...126 of 136 Default Machine States Default Machine Commands ...
Page 129: ...129 of 136 DMAT Device Status Rungs ...
Page 130: ...130 of 136 DMAT Application Status Rungs ...
Page 132: ...132 of 136 ...


