36 of 136
12.
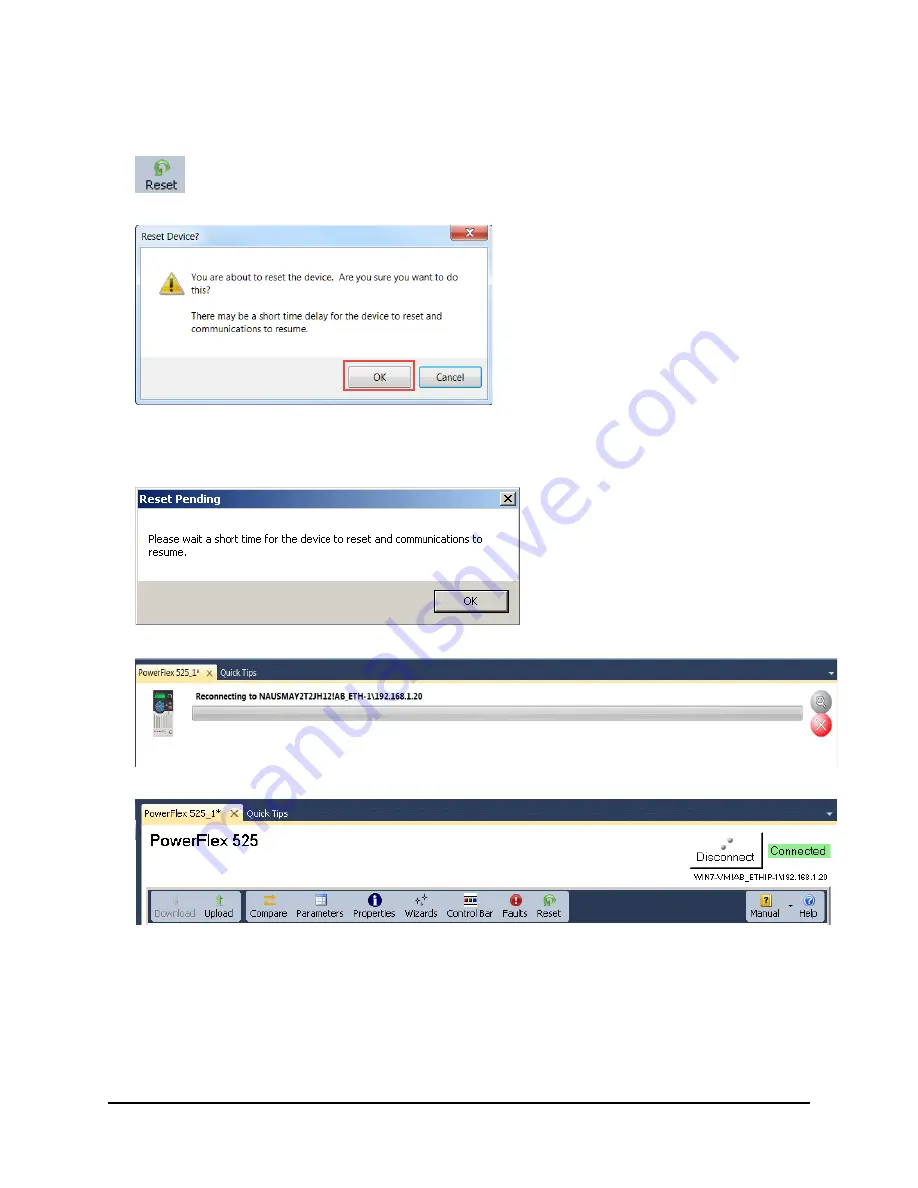
The main PowerFlex 525 drive window will be present. Click the “Reset” button for all of the new parameter settings
to take effect. Some settings require a drive reset to be implemented.
A window will appear confirming that you would like to reset the device.
Click the “OK” button. You will hear the PowerFlex 525 drive cycle power and the HIM Keypad display will turn off and
on before scrolling the drive information.
13.
The reset happens quickly. You may see the following screen appear If it does, click the “OK” button.
While the computer is reconnecting to the drive, your screen may show the following graphic for a moment.
After the connection has been established with the drive again, the window will return to its normal state.
14.
Disconnect connection to the drive. You may be prompted to upload parameters from the drive or to save the project
when exiting the Connected Components Workbench software. Select the “No” button for each.
15.
The configuration of the PowerFlex 525 is complete. At this point, we will be using the startup settings to run the motor.
16.
Keeping in mind that you now control the drive from two sources: the push buttons and potentiometer of the drive, and
the selector switches; attempt to run the drive.
Summary of Contents for PowerFlex 525
Page 8: ...8 of 136 About the PowerFlex 525 Demo Box ...
Page 9: ...9 of 136 About the PowerFlex 755 DHQ Demo Box ...
Page 12: ...12 of 136 Control and Navigation Keys ...
Page 34: ...34 of 136 Relay Outputs changes required Opto Outputs Analog Outputs ...
Page 126: ...126 of 136 Default Machine States Default Machine Commands ...
Page 129: ...129 of 136 DMAT Device Status Rungs ...
Page 130: ...130 of 136 DMAT Application Status Rungs ...
Page 132: ...132 of 136 ...


