79 • Using the Single Module Data Viewer Program
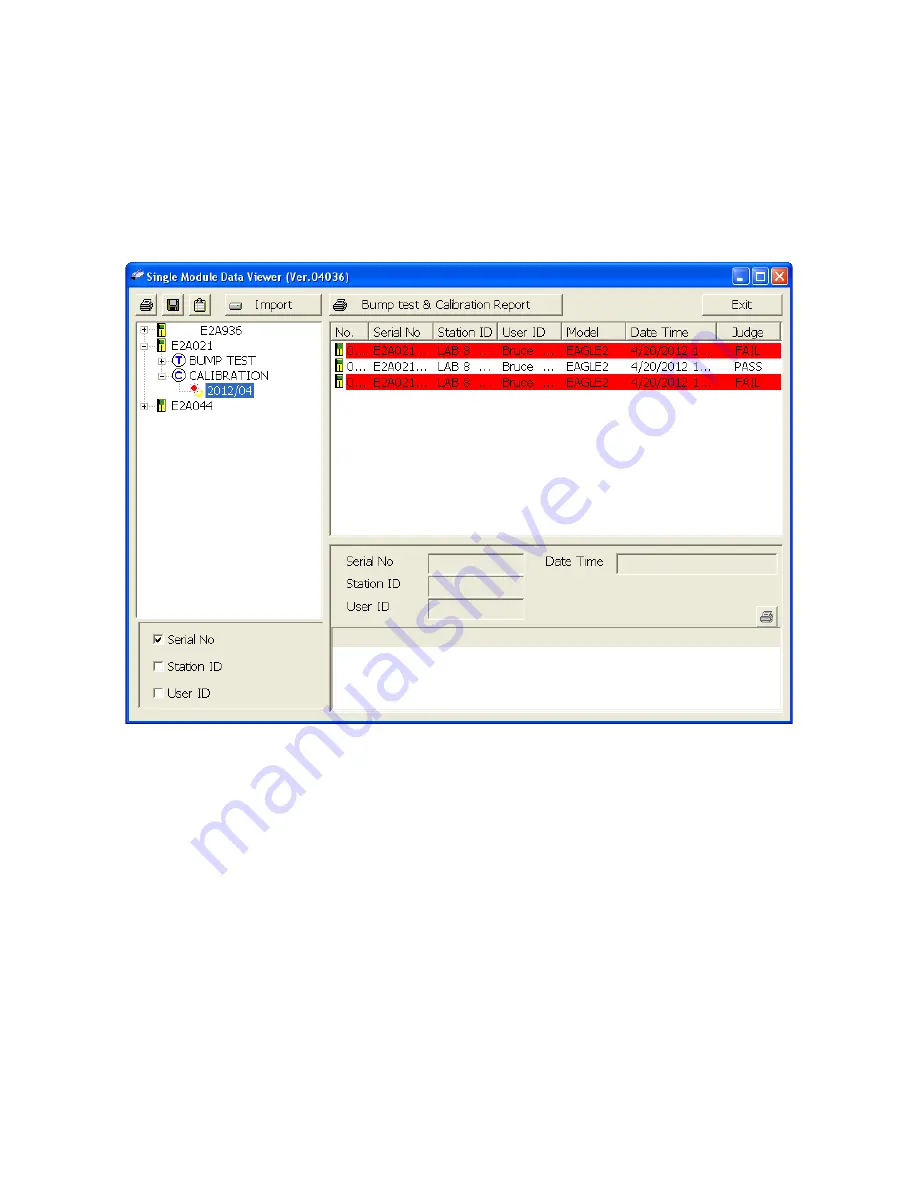
If you are viewing data in ID view format, expand the folders in the left side of
the window until the bump test or calibration folder you wish to view is visible.
Expand the folder by clicking the (+) symbol next to it. Folders organized by
year/month will be listed below the calibration or bump test folder. Click the
folder whose contents you want to view and the calibration or bump test files in
it will be shown in the upper right side of the data view window. The example
below is organized by serial number.
4. Files that record a failed calibration or bump test on all channels are
highlighted in red. Files that record a calibration or bump test where not all
channels passed are highlighted in orange.
5. To view the file contents, click on the file in the upper right part of the data view
window that you wish to view. The contents in the file will appear in the lower
right part of the window. The contents include the instrument’s serial number,
station ID, user ID, bump test or calibration time, test gas, and gas readings
during the operation.
6. To print the files as they appear in the upper right part of the data view window,
click the print button in the upper left corner of the window. A dialog box will
appear confirming if you want to print. Click
OK
.
7. To print only the pass or fail result of all files in the upper right window, click the
Bump test & Calibration Report
button above the files. A dialog box will
Figure 22: Calibration/Bump Test Files in ID View Format


