background image

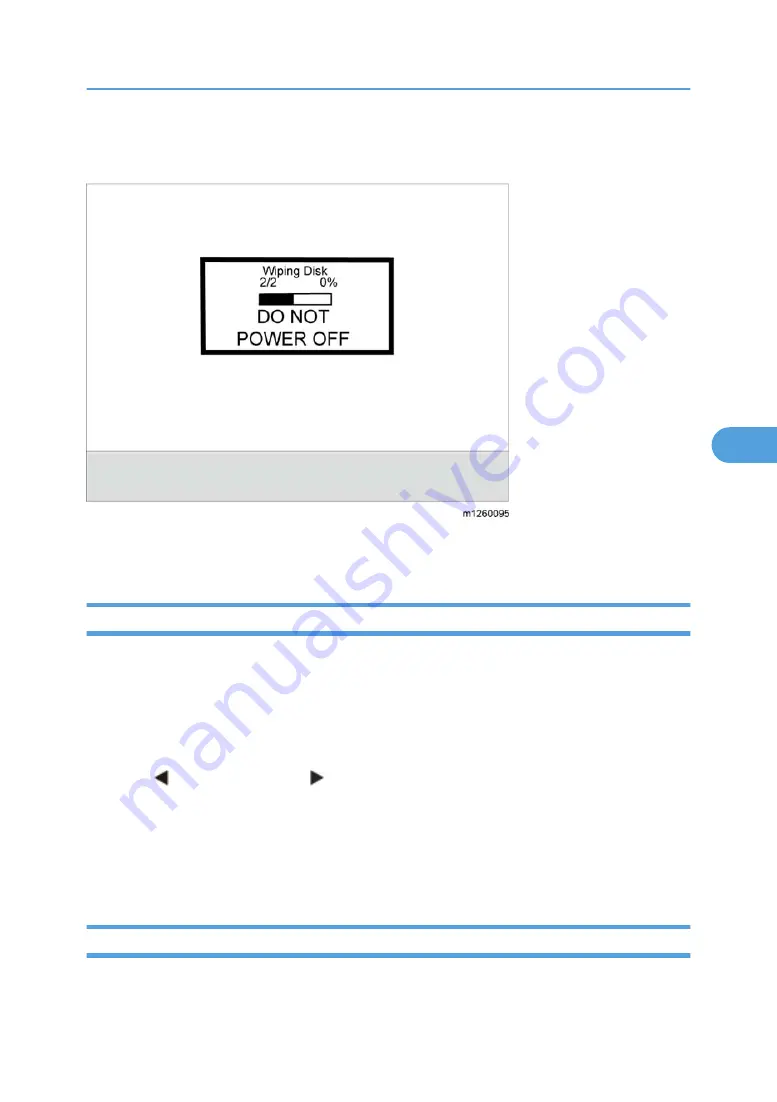
When the first stage of the process completes, the machine displays the following graphic and then
begins the second stage of the process:

The entire process is complete when the progress bar appears completely shaded and the percentage
indicator shows "100%". The panel returns to the screen that shows the values for the Wipe Disk setting.

Font Sharpening

This setting allows you to set a text point size below which the high-frequency screens are used when
printing font data. For example, at the default 24, all text in font sizes 24 and less will use the high
frequency screens. The values for this setting range from 0 to 150.
To change this setting:

1. Touch "Font Sharpening" from the Configuration Menu.
2. Touch   to increase the value or   to decrease the value.
3. Touch "Back" to cancel and return to the Configuration Menu.
4. Touch "Submit" to save the change.

This setting affects the PostScript, PCL, PDF, and XL emulators.
This function is not supported when the device generates output at 600 dpi resolution.

Require Standby

This setting determines if the Standby Mode is "On" or "Off". The default is "On".

Configuration Menu (CONFIG MENU)

157

5

Summary of Contents for LI-MF1 M126

Page 1: ...Model LI MF1 Machine Codes M126 M127 M128 Field Service Manual 26 August 2011 ...

Page 2: ......

Page 3: ...Safety Notices The following laser notice labels may be attached to this machine 1 ...

Page 4: ...2 ...

Page 5: ...3 ...

Page 6: ...4 ...

Page 7: ...5 ...

Page 8: ...6 ...

Page 9: ...7 ...

Page 10: ...8 ...

Page 11: ... of Microsoft Corporation in the United States and or other countries PostScript is a registered trademark of Adobe Systems Incorporated PCL is a registered trademark of Hewlett Packard Company Ethernet is a registered trademark of Xerox Corporation PowerPC is a registered trademark of International Business Machines Corporation Other product names used herein are for identification purposes only ...

Page 12: ...Motor BOR Black Only Retract CCD Charge Couple Device CCFL Cold Cathode Fluorescent Lamp CCW Counter clockwise CDB Command Descriptor Blocks CMYK Cyan yellow magenta black CPU Central processing unit CRC Cyclic redundancy check CRU Customer Replaceable Unit CSU Customer Setup CW Clockwise DBCS Double byte character set dc Direct Current DIMM Dual Inline Memory Module DLE Downloadable emulator DRAM...

Page 13: ...EPROM Erasable programmable read only memory ESD Electrostatic Discharge FB Flatbed FD Facedown FRU Field replaceable unit FU Face up GB Gigabyte GFI Ground Fault Interrupter GHz Gigahertz HBP Host Based Printing HCF High capacity feeder HCIT High capacity Input Tray HCOF High Capacity Output Finisher HCPF High capacity feeder HTML Hypertext markup language HV High Voltage HVPS High voltage power ...

Page 14: ...lay LCM Liquid Crystal Module LD Laser Diode LED Light emitting diode LEF Long edge feed LSU Laser Scanning Unit LV Low Voltage LVPS Low voltage power supply MB Megabyte MDC Motor Driver Control MFD Multifunction Device MFP Multifunction Printer MH Message handling MIF Motor interface mm millimeter MMR Modified modified read MPF Multipurpose feeder MR Modem ready MROM Masked Read Only Memory 12 ...

Page 15: ...rtable Document Format PICS Problem isolation charts PIN Personal identification number PIXEL Picture element PJL Printer Job Language POR Power on reset POST Power on self test PPDS Personal Printer Data Stream ppm Pages per minute PQET Print Quality Enhancement Technology PRC Peoples Republic of China PSC Parallel Synchronous Communications PSD Position Sensing Device PSO Participating Standards...

Page 16: ...t edge feed SIMM Single Inline Memory Module SOL Solenoid SOS Start of scan SRAM Static random access memory TAR Toner Add Roll TPS Toner Patch Sensing TTM Tandem Tray Module TVOC Total Volatile Organic Compound UAT Universally Adjustable Tray UPR Used Parts Return USB Universal Serial Bus V Volts V ac Volts alternating current V dc Volts direct current VOIP Voice over internet protocol VOM Volt O...

Page 17: ...XPS XML Paper Specification 15 ...

Page 18: ... 2 Installation Installation 35 3 Preventive Maintenance Safety Inspection Guide 37 Lubrication Specifications 38 4 Replacement and Adjustment Handling ESD Sensitive Parts 39 Removal Procedures 40 ACM Pick Tire Roller Removal 40 Card Reader Removal 42 Upper and Lower Card Reader Cover Removal 43 Card Reader Cable Removal 43 Controller Board Removal 44 Controller Board Shield 48 Controller Board Ca...

Page 19: ...utch with Cable Removal 81 Media Manual Input Sensor 83 Multipurpose Feeder Removal 86 Multipurpose Feeder MPF Feed Clutch Removal 88 Nameplate Cover Removal 90 Operator Panel Keypad Removal 90 Operator Panel Display Removal 91 Display Bezel 92 UICC Cable Removal 93 USB Cable Mount Bracket Removal 94 Operator Panel Support Removal 95 Display Rotation Support Removal 95 Left Rear Frame Assembly Rem...

Page 20: ...kstand Removal 121 Output Bin LED and Lens Removal 122 ADF Cable Removal 123 Left Scanner Cover Removal 124 Right Scanner Cover Removal 125 Option Board Installation and Removal 127 Lifting the Scanner to the Up Position 127 Installing an Internal Solutions Port ISP 128 Printer Hard Disk Removal 132 Printer Hard Disk Installation on an ISP 134 Printer Hard Disk Installation Directly on the Control...

Page 21: ...Edge Erase 150 Scanner Manual Registration 150 Disable Scanner 151 Paper Prompts 152 Envelope Prompts 152 Action For Prompts 152 Jobs on Disk 153 Disk Encryption 153 Wipe Disk 156 Font Sharpening 157 Require Standby 157 LES Applications 158 Key Repeat Initial Delay 158 Key Repeat Rate 159 Wiper Message 159 Clear Custom Status 159 USB Speed 159 USB PnP 159 Exit Configuration Menu Exit Config Menu 1...

Page 22: ...it Diagnostics 183 Printhead Assembly Electronic Adjustment 184 Printhead Assembly Mechanical Adjustment 186 SE Menu 188 General 188 Code Revision Info 188 History 188 MAC 188 NVRAM 188 NPAP 189 TCP IP 189 6 Troubleshooting Start 191 Symptom Tables 191 Service Errors 8xx xx 9xx xx s 191 User Status and Attendance Messages 191 Power On Self Test POST Sequence 192 Symptom Tables 193 POST Symptom Tab...

Page 23: ...ine Service Check 240 Fuser Service Check 240 LVPS HVPS Service Check 242 Main Motor Service Check 242 Networking Service Check 243 Operator Panel Service Check 245 Paper Feed Service Checks 247 Option Card Service Check 251 USB Port Service Check 251 Print Quality Service Checks 252 Printhead Service Check 263 Transfer Roll Service Check 264 Tray 2 Service Check 264 840 xx Service Check 265 Black...

Page 24: ...n Service Check 274 Fax Reception Service Check 276 Escalating a Fax Issue to Second Level Support 279 Paper Jams 281 Avoiding Jams 281 Understanding Jam Numbers and Locations 282 Jam Messages and Their Locations 282 7 Energy Saving Energy Save 297 Energy Saver Modes 297 Paper Save 298 Effectiveness of Duplex Combine Function 298 INDEX 301 22 ...

Page 25: ...1 Product Information General Information See Appendices for the following information Maintenance Approach Print Engine Specifications Digital Imaging Specifications Fax Specifications Tools 23 1 ...

Page 26: ... View No Item name 1 Front door release button 2 E Task display Operator panel 3 ADF unit 4 Output bin cave 5 Output bin extension 6 Standard input tray 7 MFP input tray 8 Front cover access 1 Product Information 24 1 ...

Page 27: ...Rear View No Item name 1 Scanner locks 2 Kensington lock 3 Ethernet port 4 Host USB port 5 Fax 6 Fax 7 Rear door 8 Power switch 9 Power 10 Rear USB 11 ISP Options cover Locations 25 1 ...

Page 28: ... Manual feed sensor C Upper end feed rolls D Input sensor E Transfer roll F Fuser G Fuser exit rolls H Fuser exit sensor I Exit rolls J Exit sensor narrow media sensor K Duplex unit L Duplex sensor 1 Product Information 26 1 ...

Page 29: ...M Auto compensator Overview 27 1 ...

Page 30: ...Main Boards Controller Board 1 Product Information 28 1 ...

Page 31: ...d or the engine board The comments column lists which board the connection appears on These values were measured with all connections made plugged or with only one connector at a time unplugged to expose the pins Always disconnect and connect with the printer power off Otherwise the values below may not match Main Boards 29 1 ...

Page 32: ... 10 12 14 Ground J7 1 4 7 5V Cave light Controller board 1 Ground J99 4 3 3V Controller cooling fan Controller board 3 Ground J4 1 Ground Cartridge Engine Board The front access door must be closed 1 1 7 V dc 2 3 3 V dc J34 1 3 5 6 3 3 V dc Operator panel UICC Controller Board 10 16 17 18 5 0 V dc 2 9 15 Ground J6 1 0 V dc 5 V dc Printhead Controller Board 2 3 5 V dc 4 5 6 7 Ground 1 Product Infor...

Page 33: ... V dc LSU Controller Board 9 2 9 V dc J36 1 24 V dc 0 V dc Cooling fan Engine Board 2 24 V dc J10 1 24 V dc 24 V dc Duplex solenoid Engine Board 2 24 V dc 0 V dc LSU Controller Board J35 1 5 V dc Narrow media sensor Engine Board 2 5 V dc 5 V dc 3 Ground J12 1 5 V dc Thermistor Engine Board 2 Ground J13 1 0 6 V dc Toner level sensor Engine Board 2 Ground 3 0 V dc Main Boards 31 1 ...

Page 34: ...5 V dc 5 Ground 7 8 9 24 V dc J19 USB port Controller Board J23 1 1 1 V dc 5 V dc Manual feed sensor Engine Board 2 5 V dc 3 Ground J24 1 24 V dc MPF clutch Engine Board 2 24 V dc 0 V dc J25 1 24 V dc Manual feed solenoid Engine Board 2 24 V dc 0 V dc J34 1 24 V dc Media feed clutch Engine Board 2 24 V dc 0 V dc J27 1 4 1 1 V dc 5 V dc Input and duplex sensor Engine Board 2 5 V dc 3 Ground 1 Produ...

Page 35: ...density sensor Engine Board 3 1 V dc 0 V dc 4 Ground 5 5 V dc 0V dc Media feed clutch Engine Board J502 1 3 5 7 11 13 15 5V dc LVPS Engine Board 4 5 V dc 6 24 V dc 17 19 24 V dc Other 0 V dc J503 11 13 15 5V dc HVPS Engine Board 17 19 24V dc 10 12 14 1 6 18 Ground J37 11 13 15 5V dc PS LVPS HVPS Controller Board 17 19 24V dc 10 12 14 1 6 18 Ground Main Boards 33 1 ...

Page 36: ...ntroller Board 6 7 5V 1 5 13 15 1 8 21 24 27 3 0 31 36 GND J28 1 V12_A FB Motor Controller Board 2 V12_A 3 V12_B 4 V12_B J17 14 5V ADF Controller Board 11 12 24V 3 5 8 10 13 GND J13 1 5V Home Sensor Controller Board 2 GND 3 HOME J12 1 GND Paper Legnth FB Controller Board 2 P_LENGTH 3 5V 1 Product Information 34 1 ...

Page 37: ...2 Installation Installation Refer to the User s Guide 35 2 ...

Page 38: ...2 Installation 36 2 ...

Page 39: ... conditions exist then find out how serious the hazard could be and if you can continue before you correct the hazard Check the following items Damaged missing or altered parts especially in the area of the On Off switch and the power supply Damaged missing or altered covers especially in the area of the top cover and the power supply cover 37 3 ...

Page 40: ...n lubricate only when parts are replaced or as needed not on a scheduled basis Use of lubricants other than those specified can cause premature failure Some unauthorized lubricants may chemically attack parts Lubricate gears that were lubricated in the original part 3 Preventive Maintenance 38 3 ...

Page 41: ...sitive part by its edge connector shroud cover do not touch its pins If a pluggable module is being removed then use the correct tool Do not place the ESD sensitive part on the MFP cover or on a metal table if the ESD sensitive part needs to be put down for any reason then first put it into its special bag Machine covers and metal tables are electrical grounds They increase the risk of damage beca...

Page 42: ...ter We recommend disconnecting all external cables from the printer to prevent damage during service Unless otherwise stated reinstall the parts in reverse order of removal When reinstalling a part held with several screws start all screws before final tightening ACM Pick Tire Roller Removal 1 Place the printer on its side Be careful to not mar the finish of the printer 4 Replacement and Adjustmen...

Page 43: ...ve the ACM pick tires If the door is opened too far then it can become disengaged and interfere with the paper tray The tray may go in but will not come out and will render the printer non serviceable 3 After the ACM pick tires have been pulled out close the duplex door 4 ACM pick tire roller A Removal Procedures 41 4 ...

Page 44: ...lace with the new tires Do not attempt to remove the hubs Card Reader Removal 1 Scanner front cover p 65 Scanner Front Cover Removal 2 Operator panel keypad assembly p 90 Operator Panel Keypad Removal 3 Release the tabs on the rear of the operator panel display and tilt it upright 4 Remove the two screws A securing the card reader housing to the tub assembly 5 Disconnect the card reader cable from...

Page 45: ...r Card Reader Cover Removal 1 Scanner front cover p 65 Scanner Front Cover Removal 2 Card reader p 42 Card Reader Removal 3 Remove the four screws A fastening the upper and lower card reader covers Card Reader Cable Removal 1 Scanner front cover p 65 Scanner Front Cover Removal l 2 Operator panel keypad assembly p 90 Operator Panel Keypad Removal l 3 Release the tabs on the rear of the operator pa...

Page 46: ...to the tub assembly 6 Disconnect the cable from the card reader card Controller Board Removal This product contains a lithium battery THERE IS A RISK OF EXPLOSION IF THE BATTERY IS REPLACED BY AN INCORRECT TYPE Discard used batteries according to the battery manufacturer s instructions and local regulations 4 Replacement and Adjustment 44 4 ...

Page 47: ...r board at the same time Each card contains the printer settings When either of these cards is new it obtains its settings from the other card Critical factory settings are lost when both cards are new and are replaced at the same time 1 Remove the screw A from the USB port 2 Lift the scanner assembly to the raised position p 127 Lifting the Scanner to the Up Position 3 Remove any option cards fro...

Page 48: ...le can be used to hold the ADF in place This is desired since less pressure is placed on the frame assemblies 6 Carefully tilt the ADF down as shown Hold the flatbed assembly while lowering the ADF 1 Controller board shield p 48 Controller Board Shield 2 Disconnect all the cables from the controller board 3 Tilt the operator panel display to the up position 4 Route the UICC cable the front USB cab...

Page 49: ...C securing the controller board to the controller board cage 6 Lift the controller board out When installing the controller board place the USB port screw first and then place the controller board screws Removal Procedures 47 4 ...

Page 50: ...Controller Board Shield 1 Remove the two screws A securing the controller shield bracket to the controller board cage 4 Replacement and Adjustment 48 4 ...

Page 51: ...2 Remove the three screws B securing the top of the controller shield Removal Procedures 49 4 ...

Page 52: ...ge 1 Controller board p 44 Controller Board Removal 2 Remove the five screws A which secure the controller board cage to the tub assembly 3 Tilt the front of the cage up and remove it from the machine Controller Board Fan 1 Operator panel display p 91 Operator Panel Display Removal 4 Replacement and Adjustment 50 4 ...

Page 53: ... cage Engine Board Removal This product contains a lithium battery THERE IS A RISK OF EXPLOSION IF THE BATTERY IS REPLACED BY AN INCORRECT TYPE Discard used batteries according to the battery manufacturer s instructions and local regulations 1 Right side cover p 104 Right Side Cover Removal 2 Disconnect all the cables from the engine board Removal Procedures 51 4 ...

Page 54: ... the cable from connector J11 on the controller board 3 Remove the screw A holding the sensor 4 Cover open sensor Door Mount Removal 1 Open the front cover 2 Lower front cover p 69 Lower Front Cover Removal 3 Left side cover p 66 Left Side Cover Removal 4 Right side cover p 104 Right Side Cover Removal 5 Cable take it out through the opening 4 Replacement and Adjustment 52 4 ...

Page 55: ...6 Remove the three screws A from the right side of the printer 7 Disconnect the fuser link B Removal Procedures 53 4 ...

Page 56: ...8 Remove the three screws C from the left side of the printer 9 Door mounts Duplex Removal 1 Right side cover p 104 Right Side Cover Removal 2 LVPS HVPS p 70 4 Replacement and Adjustment 54 4 ...

Page 57: ...e duplex slightly push to the left and tilt to clear the right side of the printer 6 Take out the duplex Duplex Main Motor Gear Drive Interface Removal 1 LVPS HVPS p 70 LVPS HVPS Removal 2 Duplex p 54 Duplex Removal 3 Main motor gear drive p 72 Main Motor Gear Drive Removal Removal Procedures 55 4 ...

Page 58: ...4 Remove the e clip A from the gear 5 Remove the gear B and gear shaft C 4 Replacement and Adjustment 56 4 ...

Page 59: ...6 Remove the screw D from the gear E 7 Remove the plastic bushing F Removal Procedures 57 4 ...

Page 60: ...8 Use a screwdriver to pop the retainer clip G loose from the gear 9 Remove the gear H 4 Replacement and Adjustment 58 4 ...

Page 61: ... screws B holding the fan to the right side frame 3 Take out the fan Front Access Door Removal 1 Front door access cover p 68 Front Door Access Cover Removal 2 Left side cover p 66 Left Side Cover Removal 3 Upper front guide assembly p 108 Upper Front Guide Assembly Removal 4 Close the front access door Removal Procedures 59 4 ...

Page 62: ...5 While closing the MPF cover pull up on the MPF by the steel shaft until the MPF lifts from its hinges 6 Disconnect the MPF from the lower front cover 4 Replacement and Adjustment 60 4 ...

Page 63: ...7 Disconnect the fuser link A from the front access door 8 Disconnect the front access door from its hinges Installation note a Install a new front access door at its hinges Removal Procedures 61 4 ...

Page 64: ... door Keep the spring in place e Finish tightening the screws F and reinstall the remaining parts Fuser Removal 1 Rear exit guide p 103 Rear Exit Guide Assembly with Sensor and Reversing Solenoid Removal 2 Remove the two screws A 3 Partially pull the fuser forward for better access 4 Replacement and Adjustment 62 4 ...

Page 65: ...4 Push in on the cable connector cover B and remove it 5 Disconnect the AC cable C 6 Disconnect the thermistor cable D Removal Procedures 63 4 ...

Page 66: ...t sensor cable E from the engine board 8 Take out the fuser Be careful to not damage the gears during the fuser installation Be sure to reinstall the AC cable during the fuser installation 4 Replacement and Adjustment 64 4 ...

Page 67: ...Scanner Front Cover Removal 1 Use a flatblade screwdriver to pry the scanner front cover away from the side cover Be careful to avoid marring the finish Removal Procedures 65 4 ...

Page 68: ...oor closed when removing the left side cover Make sure that the fuser cables are out of the way when removing the left side cover 1 Scanner front cover p 65 Scanner Front Cover Removal 2 Move the scanner assembly to the up position p 127 Lifting the Scanner to the Up Position 4 Replacement and Adjustment 66 4 ...

Page 69: ...secures the left cover to the tub assembly 4 Remove the metal screw B that secures the left cover to the front of the print engine frame 5 Move the machine to the edge of the table 6 Open the front cover slightly Removal Procedures 67 4 ...

Page 70: ...e You will need to pry the MPF cover door forward slightly to provide clearance to the left cover when you pull the cover away from the machine Front Door Access Cover Removal 1 Bumper p 90 Nameplate Cover Removal 2 Remove the two screws A securing the front door access cover to the front door assembly 4 Replacement and Adjustment 68 4 ...

Page 71: ...e lower front cover 3 Flex the lower front cover and disconnect it first from its right hinge and then from its left hinge An alternative to step 3 is to remove the front access door and remove the three screws from the right door mount p 59 Front Access Door Removal and p 52 Door Mount Removal Removal Procedures 69 4 ...

Page 72: ...r to the hinge C LVPS HVPS Removal 1 Rear cover p 102 Rear Door and Lower Rear Cover Removal 2 Left side cover p 66 Left Side Cover Removal 3 Place the printer on its top with the rear facing you Be careful to not mar the finish of the printer 4 Remove the two screws A from the right rear foot assembly 4 Replacement and Adjustment 70 4 ...

Page 73: ...5 Disconnect the fuser power cable B 6 Remove the four screws C from the LVPS HVPS shield Removal Procedures 71 4 ...

Page 74: ...ables D Squeeze the clip to remove the cables from their connectors E 8 Disconnect the transfer roll cable F 9 Lift out the LVPS HVPS Main Motor Gear Drive Removal 1 The left side cover p 66 Left Side Cover Removal 4 Replacement and Adjustment 72 4 ...

Page 75: ...t the fuser link A from the front access door 3 Place the printer on its right side Be careful to not mar the finish of the printer 4 Remove the four screws B from the main motor gear drive Removal Procedures 73 4 ...

Page 76: ...ain motor gear drive Manual Feed Clutch Removal 1 Left side cover p 66 Left Side Cover Removal 2 Open the front access door and disconnect the fuser link A 3 Place the printer on its right side Be careful to not mar the finish of the printer 4 Replacement and Adjustment 74 4 ...

Page 77: ...our screws B from the main motor gear drive 5 Rotate the main motor gear drive enough to access the manual feed solenoid 6 Use a screwdriver to remove the e clip C from the manual feed clutch Removal Procedures 75 4 ...

Page 78: ...moval 1 Left side cover p 66 Left Side Cover Removal 2 Duplex p 54 Duplex Removal 3 Open the front access door and place the printer on its right side Be careful to not mar the finish of the printer 4 Remove the two screws A 4 Replacement and Adjustment 76 4 ...

Page 79: ...left door mount C away from the side frame and unroute the cable D with a spring hook 7 Reinstall the left door mount and place the printer on its top Be careful to not mar the finish of the printer 8 Disconnect the cable D from J25 on the engine board Removal Procedures 77 4 ...

Page 80: ... connect the new solenoid cable to J25 on the engine board Media ACM ASM Feeder Removal 1 Left side cover p 66 Left Side Cover Removal 2 LVPS HVPS p 70 LVPS HVPS Removal 3 Duplex p 54 Duplex Removal 4 Main motor gear drive p 72 Main Motor Gear Drive Removal 5 Remove the media feed clutch p 81 Media Feed Clutch with Cable Removal 4 Replacement and Adjustment 78 4 ...

Page 81: ...6 Use a screwdriver to pop the shaft retainer tab A loose from the ACM feed shaft 7 Use a small pair of pliers to remove the shaft retainer tab Removal Procedures 79 4 ...

Page 82: ...8 Use a screwdriver to pop the inner shaft lock B loose 9 Remove the inner shaft lock C 4 Replacement and Adjustment 80 4 ...

Page 83: ...1 Remove the auto compensator shaft 12 Disconnect the spring E from the cylinder 13 Take out the media ACM ASM feeder Media Feed Clutch with Cable Removal 1 Main motor gear drive p 72 Main Motor Gear Drive Removal 2 Duplex p 54 Duplex Removal Removal Procedures 81 4 ...

Page 84: ...3 Disconnect the media feed clutch cable A from J34 on the engine board 4 Unroute the cable from the bottom of the printer 4 Replacement and Adjustment 82 4 ...

Page 85: ...the media feed clutch with cable C Media Manual Input Sensor 1 Right side cover p 104 Right Side Cover Removal 2 Scanner assembly 3 Place the machine on its side Be careful to not mar the finish of the printer Removal Procedures 83 4 ...

Page 86: ...le from its retainers and pull it through the opening toward the sensor mount Re installation note Prop open the duplex door and insert the hook end of the spring hook through the frame opening C from the controller board side Extend the hook until the sensor connector can be hooked 4 Replacement and Adjustment 84 4 ...

Page 87: ...d pull it through the opening Place the sensor into position and reconnect the cable on the controller board Using the spring hook be sure to reroute the cable through the three retainers F between the sensor and side frame Removal Procedures 85 4 ...

Page 88: ...oper position The cover must be closed in the down position and the ends of the shaft must be in the holders If it is not then the paper tray will become lodged and the printer will need to be replaced Multipurpose Feeder Removal 1 Open the front access door 2 Remove the four screws A from the upper front guide 3 Upper front guide 4 Replacement and Adjustment 86 4 ...

Page 89: ...4 Remove the two screws B 5 Close the front access door and pull up on the MPF by the steel shaft until the MPF lifts from its hinges Removal Procedures 87 4 ...

Page 90: ...ower front cover 7 Open the front access door and remove the lower paper guide Multipurpose Feeder MPF Feed Clutch Removal 1 Left side cover p 66 Left Side Cover Removal 2 Duplex p 54 Duplex Removal 4 Replacement and Adjustment 88 4 ...

Page 91: ... A from J24 on the engine board 4 Place the printer on its right side Be careful to not damage any cables or mar the finish of the printer 5 Remove the three screws B from the left side of the printer Removal Procedures 89 4 ...

Page 92: ... 7 Lift and remove the multipurpose feeder MPF feed clutch Nameplate Cover Removal 1 Open the front access door 2 Remove the three screws A 3 Take off the nameplate Operator Panel Keypad Removal 1 Lift the scanner assembly to the up position 4 Replacement and Adjustment 90 4 ...

Page 93: ...n cables C from the operator panel PCB assembly 5 Disconnect the ground D on the operator panel PCB assembly 6 Tilt the operator panel keypad up and remove it from the machine Operator Panel Display Removal 1 Operator panel keypad 2 Press the tab on the left side of the operator panel display and raise the operator panel display to the up position Removal Procedures 91 4 ...

Page 94: ...y rotation supports 4 Disengage the operator panel display from the right display support and remove it from the machine Remove the operator panel display bezel from the old display p 92 Display Bezel It will be used on the new operator panel display Display Bezel 1 Operator panel display p 91 Operator Panel Display Removal 4 Replacement and Adjustment 92 4 ...

Page 95: ... the display UICC Cable Removal 1 Lift the scanner assembly to the up position 2 Disconnect the UICC cable from the controller board 3 Feed the cable through the hole in the front of the controller card cage 4 Release the two tabs A securing the keypad to the keypad to the tub assembly Removal Procedures 93 4 ...

Page 96: ...rator panel PCB assembly USB Cable Mount Bracket Removal 1 Operator panel keypad 2 Open the USB cable clamp and remove the USB cable 3 Remove the screw A securing the USB cable mount bracket to the tub assembly 4 Replacement and Adjustment 94 4 ...

Page 97: ...e operator panel support to the tub assembly The same steps are performed for both supports Display Rotation Support Removal 1 Operator panel display p 91 Operator Panel Display Removal 2 Remove the three screws A securing the display rotation support to the tub assembly Removal Procedures 95 4 ...

Page 98: ... The same steps are performed for both supports Left Rear Frame Assembly Removal 1 Flatbed assembly p 111 Flatbed Removal 4 Replacement and Adjustment 96 4 ...

Page 99: ...ee screws A from the left rear frame assembly 3 Carefully lift the left rear frame assembly off the print engine frame Right Rear Frame Assembly Removal 1 Flatbed assembly p 111 Flatbed Removal Removal Procedures 97 4 ...

Page 100: ...oval 2 Disconnect the remaining cables from the controller board 3 Thread the cables through the tub assembly and top cover 4 Controller board cage p 50 Controller Board Cage 5 Operator panel keyboard p 90 Operator Panel Keypad Removal 6 Operator panel display p 91 Operator Panel Display Removal 7 Left rear frame assembly p 96 Left Rear Frame Assembly Removal 4 Replacement and Adjustment 98 4 ...

Page 101: ...ft flatbed support 13 Left flatbed support 14 Remove the top and side screws securing the right flatbed support 15 Right flatbed support 16 Lift the tub assembly off the machine After removing the tub assembly remove the output bin LED and LED cover p 122 Output Bin LED and Lens Removal These will be used on the new tub assembly Paper Input and Duplex Sensor Assembly Removal 1 Right side cover p 1...

Page 102: ...put and duplex sensor assembly Printhead Removal 1 Top cover p 107 Top Cover Assembly Removal 2 Right side cover p 104 Right Side Cover Removal 3 Disconnect the two cables A and unroute them back through the frame toward the printhead 4 Replacement and Adjustment 100 4 ...

Page 103: ...nthead on the metal frame Align the new printhead relative to the location of the old printhead p 186 Printhead Assembly Mechanical Adjustment 5 Take out the printhead Mid rear Cover Removal 1 Remove the two metal screws A 2 Pull the upper rear cover back Removal Procedures 101 4 ...

Page 104: ...d remove the cover Rear Door and Lower Rear Cover Removal 1 Mid rear cover p 101 Mid rear Cover Removal 2 Open the rear door 3 Pull the rear door up at an angle and disconnect the door from the notch A 4 Replacement and Adjustment 102 4 ...

Page 105: ...sembly with Sensor and Reversing Solenoid Removal 1 Top cover p 107 Top Cover Assembly Removal 2 Disconnect the narrow media sensor cable from J35 on the engine board 3 Remove the reversing solenoid cable from J10 on the engine board 4 Remove the six screws B from the rear exit guide assembly Removal Procedures 103 4 ...

Page 106: ...cable D through the opening 7 Rear exit guide assembly Be careful to not damage the gears during the rear exit guide assembly removal and reinstallation Right Side Cover Removal Leave the front cover closed when removing the right side cover assembly 4 Replacement and Adjustment 104 4 ...

Page 107: ...n p 127 Lifting the Scanner to the Up Position 3 Remove the plastic screw A securing the cover to the tub assembly 4 Remove the screw B from the bottom right side of the printer 5 Open the MPF cover 6 Depress the tab C and pull the front of the MPF cover away from the printer slightly Removal Procedures 105 4 ...

Page 108: ...y to the left and pull out You will need to pry the MPF cover forward slightly to provide clearance for the cover when you pull the front of the side cover away from the machine Toner Level Sensor Removal 1 Open the front access door 2 Right side cover p 104 Right Side Cover Removal 4 Replacement and Adjustment 106 4 ...

Page 109: ... properly or the printer will not function Top Cover Assembly Removal 1 Scanner assembly p 113 Scanner Assembly Removal 2 Lift off the top cover Be sure to lift the top cover assembly from the front to remove it During reinstallation be sure the exit guide and the paper bin align correctly A mismatch can cause paper jams Transfer Roll Removal A flashlight may be required to remove the transfer rol...

Page 110: ...er roll out Do not try removing the spring on the left it is not removable but can be dislodged The spring included with the FRU is to be used only if the old right side spring is damaged or lost Both springs must be positioned on posts that cannot be seen If the old springs are moved then feel the base of the springs to assure that they are on the posts The top of the springs must be captured in ...

Page 111: ...ont guide 3 Upper front guide Wear Strip Tray 1 and 250 Sheet Tray 2 Removal 1 Hold the tray with the bottom up 2 Use a spring hook to disconnect the strip from the top of the tray 3 Remove the strip from inside the tray Removal Procedures 109 4 ...

Page 112: ...efully insert the strip from the top of the tray and push it down through the opening until it snaps into place Turn the tray over to view the bottom of the strip Using the spring hook check to make sure that the end of the strip is fastened tightly Be sure that the drafted edge of the strip is installed toward the bottom of the tray 4 Replacement and Adjustment 110 4 ...

Page 113: ...ADF unit 2 Disconnect the ADF cable B and two sensor connections C on the relay card above the ADF relay cable 3 Lift the ADF unit up and depress the tabs located on the bottom of the ADF hinges to release the ADF from the flatbed Flatbed Removal 1 Left side cover p 66 Left Side Cover Removal Imaging Component Removals 111 4 ...

Page 114: ...bed unit to the up position 7 Controller board shield p 48 Controller Board Shield 8 Disconnect connector J28 connector J13 connector J30 and sensor cables from connector J12 on the controller board 9 Using a flatbed screwdriver depress the lower tab on the kickstand and lift the kickstand out of the left rear frame assembly 10 Remove the e clip A from the flatbed hinge rod 4 Replacement and Adjus...

Page 115: ...e the controller shield D This will be used on the new flatbed Scanner Assembly Removal 1 Left scanner cover p 124 Left Scanner Cover Removal 2 Right scanner cover p 125 Right Scanner Cover Removal 3 Left side cover p 66 Left Side Cover Removal 4 Right side cover p 104 Right Side Cover Removal 5 Lift the flatbed and ADF assemblies to the up position 6 Controller board shield p 48 Controller Board ...

Page 116: ...board 9 Disconnect the stairway cables from J500 and J501 on the engine board 10 Disconnect the LSU laser diode cable from the controller board 11 Thread the LSU diode cable the cover interlock cable the stairway cables and the controller board power supply cable through the side of the printer away from the scanner assembly 4 Replacement and Adjustment 114 4 ...

Page 117: ...12 Disconnect the LSU HSYNC extension cable at the connector in the middle of the cable Imaging Component Removals 115 4 ...

Page 118: ...13 Remove the three screws A from the left rear frame assembly 4 Replacement and Adjustment 116 4 ...

Page 119: ...14 Remove the three screws B from the right rear frame assembly Imaging Component Removals 117 4 ...

Page 120: ...he left flatbed stop to the top of the print engine frame 16 Remove the screw D securing the right flatbed stop to the top of the print engine frame 17 Lower the flatbed and ADF to the down position 4 Replacement and Adjustment 118 4 ...

Page 121: ...o the print engine frame 19 Remove the side screw F securing the right flatbed stop to the print engine frame 20 Lift the scanner assembly from the machine ADF Separator Pad 1 ADF separator roll p 121 ADF Separator Roll Assembly Imaging Component Removals 119 4 ...

Page 122: ...2 Pinch the two tabs on each side of the pad inward 3 Tilt the pad up and lift it out of the ADF assembly 4 Replacement and Adjustment 120 4 ...

Page 123: ...mbly 1 Lift the locking lever A 2 Slightly lift the separator roll assembly and pull it out of the mount B on the opposite side Kickstand Removal 1 Lift the flatbed assembly to the up position Imaging Component Removals 121 4 ...

Page 124: ...lace 3 Remove the e clip A securing the kickstand rod to the flatbed 4 Slide the rod out and remove the kickstand from the flatbed Output Bin LED and Lens Removal 1 Disconnect the output LED cable from the controller board 2 Controller board cage p 50 Controller Board Cage 4 Replacement and Adjustment 122 4 ...

Page 125: ... Pull down on the lens and LED and remove it from the tub ADF Cable Removal 1 Left scanner cover p 124 Left Scanner Cover Removal 2 Left cover p 66 Left Side Cover Removal 3 Controller board shield p 48 Controller Board Shield Imaging Component Removals 123 4 ...

Page 126: ... cable B and two sensor connections C on the relay card above the ADF relay cable 7 Disconnect the ADF cable from connector J17 on the controller board 8 Disconnect the ADF cable ground from the controller cage 9 Take out the ADF cable Left Scanner Cover Removal 1 Lift the ADF to the up position 4 Replacement and Adjustment 124 4 ...

Page 127: ...ring the left scanner cover to the flatbed unit 3 Lift and carefully pull the left scanner cover up and away from the rear of the flatbed Right Scanner Cover Removal 1 Lift the ADF to the up position Imaging Component Removals 125 4 ...

Page 128: ... Remove the two screws A securing the right scanner cover to the flatbed unit 3 Lift and carefully pull the right scanner cover up and away from the rear of the flatbed 4 Replacement and Adjustment 126 4 ...

Page 129: ...Option Board Installation and Removal Lifting the Scanner to the Up Position 1 Turn the two rear frame assembly locks counter clockwise to the unlock position Option Board Installation and Removal 127 4 ...

Page 130: ...ickstand will lock into place Installing an Internal Solutions Port ISP 1 Access the controller board p 127 Lifting the Scanner to the Up Position 2 Unpack the ISP and mounting tee Avoid touching components on the card 4 Replacement and Adjustment 128 4 ...

Page 131: ...lled then the printer hard disk must first be removed p 132 Printer Hard Disk Removal 4 Take off the metal cover from the ISP opening in the rear of the controller board cage 5 Align the posts of the mounting tee and press down to secure it to the controller board Option Board Installation and Removal 129 4 ...

Page 132: ...Install the ISP onto the plastic tee Make sure the ISP card is properly aligned with the rear of the controller board cage 7 Press down on the ISP to seat it in the tee 4 Replacement and Adjustment 130 4 ...

Page 133: ...rew Do not tighten the thumbscrew at this time 9 Attach the two screws that came with the ISP to secure the ISP to the controller board cage 10 Tighten the thumbscrew from step 8 Option Board Installation and Removal 131 4 ...

Page 134: ...he controller board If a printer hard disk was previously attached reinstall it at this time 12 Lower the scanner assembly and lock it Printer Hard Disk Removal 1 Unplug the printer hard disk interface cable from the system board 4 Replacement and Adjustment 132 4 ...

Page 135: ... out the printer hard disk by pulling it upwards from the standoffs 4 Remove the thumbscrews that attach the printer hard disk mounting bracket to the printer hard disk if the drive is going to be installed on top of an ISP Option Board Installation and Removal 133 4 ...

Page 136: ...roller board p 127 Lifting the Scanner to the Up Position 2 Unpack the printer hard disk 3 Locate the standoff location on the controller board 4 Use a flatblade screwdriver to remove the screws attaching the mounting bracket 4 Replacement and Adjustment 134 4 ...

Page 137: ... 6 Gently press down on the hard drive until it locks into place 7 Fasten the hard dive connector into the connector on the ISP card Printer Hard Disk Installation Directly on the Controller Board Perform steps 1 2 and 3 from above before doing the rest of the installation Option Board Installation and Removal 135 4 ...

Page 138: ... standoffs with the holes on the system board 2 Press the hard disk down until it locks into place 3 Attach the hard disk to the controller board cage using the screws that came with the hard disk 4 Replacement and Adjustment 136 4 ...

Page 139: ...sk interface cable to the connector on the controller board Fax Card Installation 1 Access the controller board 2 Unpack the fax card 3 Fax card cover on the controller board cage Option Board Installation and Removal 137 4 ...

Page 140: ...4 Insert the fax card into the controller board cage 5 Tighten the two screws to secure it to the controller board cage 4 Replacement and Adjustment 138 4 ...

Page 141: ...6 Insert the fax card interface cable into the system board connector 7 Lower and lock the scanner assembly Option Board Installation and Removal 139 4 ...

Page 142: ...4 Replacement and Adjustment 140 4 ...

Page 143: ...Generally the options made available in this menu group are used to configure a machine for operation Diagnostics Mode The Diagnostics Mode group contains the settings and operations used while manufacturing and servicing the machine To run the diagnostic tests described in this chapter the machine must be in Diagnostic Mode If you have installed a controller board engine board or operator panel a...

Page 144: ...n System Maintenance Panel Menus See Panel Menus in System Maintenance PPDS Emulation See PPDS Emulation in System Maintenance Download Emuls See Download Emuls in System Maintenance Factory Defaults See Factory Defaults in System Maintenance Energy Conserve See Jobs on Disk in System Maintenance Min Copy Memory See Min Copy Memory in System Maintenance Num Pad Job Assist See Num Pad Job Assist in...

Page 145: ... See Font Sharpening in System Maintenance Require Standby See Require Standby in System Maintenance LES Applications See LES Applications in System Maintenance Key Repeat Initial Delay See Key Repeat Initial Delay in System Maintenance Key Repeat Rate See Key Repeat Rate in System Maintenance Wiper Message See Wiper Message in System Maintenance Clear Custom Status See Clear Custom Status in Syst...

Page 146: ...r to schedule the appropriate maintenance on the device To view the Maintenance Counter Value touch Maintenance Counter Value from the Configuration Menu The panel displays the current value of the maintenance counter as illustrated below Touch Back to return to the Configuration Menu After installing the required maintenance kit reset this count to zero Reset Maintenance Counter After scheduled m...

Page 147: ...he touch screen 2 Touch or to scroll through the setting s possible values 3 Touch Back to cancel and return to the Configuration Menu 4 Touch Submit to save the change Print Quality Pages This setting is a limited version of the Print Quality Pages setting that appears in the Diagnostics menu This setting reports the values of a broad range of machine settings and tests the machine s ability to g...

Page 148: ...r presses Menu they receive a message that the panel menus are locked When set to Off this setting restricts all menu access even to menus or items set for PIN access However when set to On all PIN restrictions are restored To change the value of this setting 1 Touch Panel Menus from the Configuration Menu setting s current value appears on the touch screen 2 Touch or to scroll through the setting...

Page 149: ... values 3 Touch Back to cancel and return to the Configuration Menu 4 Touch Submit to save the change Download Emuls This setting enables you to disable a Downloadable emulator DLE that is installed on the machine The setting for this menu setting is disabled The DLE is re enabled automatically after two PORs To change the value of this setting 1 Touch Download Emuls from the Configuration Menu se...

Page 150: ...values appear on the Power Saver menu If Off is selected in the Energy Conserve menu then Disabled appears in the Power Saver menu and Power Saver can be turned off If On is set in the Energy Conserve menu the Power Saver feature cannot be disabled To change this setting 1 Touch Energy Conserve from the Configuration Menu setting s current value appears on the touch screen 2 Touch or to scroll thr...

Page 151: ...x Storage from the Configuration Menu If an advanced password has been established you must enter this password in order to change the setting If no advanced password exists you can establish one by using the keyboard that appears on the LCD 2 Touch Submit to save the change 3 Touch Back to cancel and return to the Configuration Menu Formatting Fax Flash DO NOT POWER OFF appears on the LCD while t...

Page 152: ...1 Touch FB Edge Erase from the Configuration Menu setting s current value appears on the touch screen 2 Touch to increase the value or to decrease the value 3 Touch Submit to save the change 4 Touch Back to cancel and return to the Configuration Menu Scanner Manual Registration This item is used to manually register the flatbed and ADF on the machine s scanner unit Registration should be performed...

Page 153: ...ded To manually register the flatbed perform the following steps 1 In the Configuration Menu touch the Scanner Manual Registration menu item 2 Touch the Print Quick Test Page menu item 3 To view and adjust the flatbed registration place the quick test page into the flatbed 4 Touch the Copy Quick Test Page item 5 After the quick test page copies touch Flatbed 6 Use the or to increase or decrease th...

Page 154: ...bmit Envelope Prompts This setting controls the tray the user is directed to refill when a specific envelope size is out The selections are Auto default MP Feeder and Manual Env To change the value of this setting 1 Touch Env Prompts from the Configuration Menu setting s current value appears on the touch screen 2 Touch or to scroll through the setting s possible values 3 To exit this screen witho...

Page 155: ...is setting 1 Touch Disk Encryption from the Configuration Menu If an advanced password has been established you must enter this password in order to change the setting If no advanced password exists you can establish one by using the keyboard that appears on the LCD 2 Touch Submit to save the change 3 Touch Back to cancel and return to the Configuration Menu If you remove an encrypted disk from a ...

Page 156: ...ndicators during the two stage process 1 2 indicates that the process is currently in the first stage 0 indicates the progress of the current stage of the process The progress bar indicates the overall completion of the entire process by filling in throughout each separate stage 5 System Maintenance 154 5 ...

Page 157: ...aphics depending on the process selected and then begins the second stage of the process The entire process is complete when the progress bar appears completely shaded and the percentage indicator shows 100 After completion the panel returns to Disk Encryption Configuration Menu CONFIG MENU 155 5 ...

Page 158: ...Touch Wipe disk now Contents will be lost Continue appears on the LCD 3 Touch Back to cancel and return to the Configuration Menu If you touch No the device cancels the Wipe Disk process and returns to the Configuration Menu If you touch Yes the following screen appears The panel provides the following progress indicators during the execution of this process 1 1 2 indicates that the process is cur...

Page 159: ...ng font data For example at the default 24 all text in font sizes 24 and less will use the high frequency screens The values for this setting range from 0 to 150 To change this setting 1 Touch Font Sharpening from the Configuration Menu 2 Touch to increase the value or to decrease the value 3 Touch Back to cancel and return to the Configuration Menu 4 Touch Submit to save the change This setting a...

Page 160: ...S Applications from the Configuration Menu If an advanced password has been established you must enter this password in order to change the setting If no advanced password exists you can establish one by using the keyboard that appears on the LCD 2 Touch Back to cancel and return to the Configuration Menu 3 Touch Submit to save the change Key Repeat Initial Delay When a key is touched repeatedly t...

Page 161: ... The values are On default and Off 3 Touch Submit to save the change Touch Back to cancel and return to the Configuration Menu Clear Custom Status No values exist for this operation Pressing initiates this operation Touch to select Clear Custom Status from the Configuration Menu Executing this operation erases any strings that have been defined by the user for the default or alternate custom messa...

Page 162: ...onfiguration Menu 2 Touch or to change the value The values are 1 default and 2 3 Touch Submit to save the change Touch Back to cancel and return to the Configuration Menu Exit Configuration Menu Exit Config Menu Press to exit the Configuration menu The machine performs a POR and restarts in normal mode 5 System Maintenance 160 5 ...

Page 163: ...n Tests in System Maintenance Base Sensor Test See Base Sensor Test in System Maintenance Device Tests See DEVICE TESTS in System Maintenance Printer setup See PRINTER SETUP in System Maintenance EP Setup See EP SETUP in System Maintenance Reports See Reports in System Maintenance Event Log See EVENT LOG in System Maintenance Scanner Tests See Scanner Tests in System Maintenance Exit Diagnostics S...

Page 164: ...auses approximately0 55 mm shift in the bottom margin A positive change compresses the image so it appears to move down the page and a negative change moves the image up Left Margin 25 to 25 A positive change moves the image right and a negative change moves the image left No compression occurs Right Margin 10 to 10 A positive change moves the image right and a negative change moves the image left...

Page 165: ...anged values The device prints a Quick Test page from the appropriate paper tray While the Quick Test page prints Printing Alignment Page appears on the LCD Quick test page The Quick Test contains the following information Device information Printer margin settings Scanner margin settings Alignment diamonds at the top bottom and each side Horizontal lines for skew adjustment General machine inform...

Page 166: ...e Diagnostics menu 2 Select the media source to test Tray 1 Tray 2 if installed MP Feeder Envelope Feeder MP Feeder 3 Select Single or Continuous If Single is selected a single page is printed If Continuous is selected printing continues until Stop is pressed to cancel the test If a source is selected that contains envelopes an envelope test pattern is printed If Continuous is selected the test pa...

Page 167: ...temperature warm up time transfer print contrast charge roll settings and gap adjust Contents of the EVENT LOG from DIAGNOSTICS Configuration information including machine serial number controller code level engine code level operator panel code level font versions and cartridge information Default values for the QUALITY MENU settings used to print the pages Hardware Tests Select the following Har...

Page 168: ...ory test has passed and finished successfully Initially 000000 displays with the maximum pass count being 999 999 F represents the number of times the memory test has failed and finished with errors Initially 0000 displays with the maximum fail count being 99 999 Initially only four digits appear but additional digits appear as needed Each time a test is completed the number of pass and failures i...

Page 169: ...wing type of message appears 3 To stop this test before completion turn the machine off USB HS test mode 1 Select USB HS Test Mode from HARDWARE TESTS 2 Press until the appears next to the Port to be tested and then press 3 Select the desired Test and then press Port Test Appears on the display Port 0 Test J Test K Test SEO NAK Test Packet Test Force Enabled USB High Speed Certification Testing Po...

Page 170: ... A4 To run the Quick Test duplex 1 Touch to select Quick Test from DUPLEX TESTS 2 Touch to select Single or Continuous The single Duplex Quick test cannot be canceled The machine attempts to print the Quick Test Page from the default paper source If the default paper source only supports envelopes then the page is printed from Tray 1 Check the Quick Test Page for the correct offset between the pla...

Page 171: ...test is used to determine whether or not the duplex sensors and switches are working correctly The test allows you to actuate the duplex input sensor located in the back part of the duplex unit and the duplex exit sensor located in the return paper path 1 Select Sensor Test from DUPLEX TESTS The message Sensor Test Testing displays 2 Manually actuate each of the duplex sensors When the sensor swit...

Page 172: ...ys The message Duplex Feed 1 Clear Paper displays when the paper reaches paper stop position 1 and the power indicator turns on solid 2 Remove the media from the duplex unit and clear the message on the operator panel by pressing Stop Duplex feed 2 This test feeds a blank sheet of paper to the duplex paper stop position 2 This test can be run using any of the supported paper sizes To run the Duple...

Page 173: ...her Single or Continuous Single feeds one sheet of media from the selected source Continuous media continues feeding from the selected source until Stop is pressed Sensor test input tray This test is used to determine if the input tray sensors are working correctly To run the Input Tray Sensor Test 1 Touch to select the Sensor Test from INPUT TRAY TESTS 2 Touch to select the input source from the ...

Page 174: ... by the machine To run the Feed Tests for the output bins 1 Touch to select Feed Tests from the OUTPUT BIN TESTS 2 Touch to select the output bin you want the paper to exit into 3 Touch to select either Single or Continuous Single feeds one sheet of media from the selected source Continuous media continues feeding from the selected source until Stop is pressed Touch Back to return to OUTPUT BIN TE...

Page 175: ... read four test patterns to the bytes in the block If the block is good the saved data is written back to the disk To run the Quick Disk Test 1 Touch to select Quick Disk Test from DEVICE TESTS The power indicator blinks while the test is in progress and quick Disk Test Testing displays Quick Disk Test Test Passed message displays if the test passes and the power indicator turns on solid Quick Dis...

Page 176: ...ks during the test The test can NOT be canceled 3 Once the test is complete the power indicator turns on solid and either the message Disk Test Clean Test Passed or Disk Test Clean Failed appears If the message indicates failure the disk is unusable PRINTER SETUP The triangles pointing up or down indicate whether there are additional menus Touch the up or down arrows to display these additional me...

Page 177: ...rial number The serial number can only be viewed and cannot be changed Touch Back to return to the Diagnostics Menu Engine settings 1 through 4 Do not change these settings unless requested to do so by your next level of support Model name The model name can only be viewed and cannot be changed Configuration ID The two configuration IDs are used to communicate information about certain areas of th...

Page 178: ... over a digit from the right of the number toward the left When the numbers are correct touch Submit If you have a question touch the question mark icon To exit without changing the numbers touch Back Be sure to touch Submit or the number will not be changed Submitting Selection displays followed by the value for Configuration ID 1 If Invalid ID appears the entry is discarded and the previous Conf...

Page 179: ...estore EP Defaults 1 Touch to select EP Defaults from EP SETUP 2 Touch to select Restore to reset the values to the factory settings and touch to select Do Not Restore to exit without changing the settings Touch Back to exit without changing the settings Fuser temperature Fuser temp This adjustment can be used to help solve some customer problems with paper curl on low grade papers and problems wi...

Page 180: ...st The print contrast setting controls the developer voltage offset The print contrast can be adjusted to Low Medium or High The default setting is Medium Touch Back to return to the Diagnostics Menu Charge roll The charge roll can be adjusted to Low Medium or High The default setting is Medium Touch Back to return to the Diagnostics Menu Gap adjust The setting adjusts the minimum gap between shee...

Page 181: ...the log is full the oldest error is discarded Identical errors in consecutive positions in the log are entered so there may be repetitions All 2xx and 9xx error messages are stored in the event log To view the event log 1 Touch to select Display Log from EVENT LOG Up to three error codes display at a time Touch to display additional information if available 2 Touch Back to return to the EVENT LOG ...

Page 182: ...g information 1 Touch to select Clear Log from the Event Log menu 2 Touch to select Yes to clear the Event Log or touch to select NO to exit the Clear Log menu If YES is selected Deleting EVENT LOG displays on the screen Scanner Tests ASIC test A pattern appears and ASIC Test Passed displays If xxxxxx displays the test was unsuccessful Press Stop to return to the SCANNER TESTS menu Feed test To ru...

Page 183: ...vailable P Sensor ADF Paper Present A Sensor ADF cover closed interlock F Sensor FB scanner cover interlock 1 Sensor ADF sensor 1 2 Sensor ADF sensor 2 H Sensor FB Home position 1 Touch to select Sensor Test from the SCANNER TESTS menu 2 The display will show P F H A 1 2 in a vertical column It is not necessary to test all scanner sensors when Scanner Tests is selected 3 To test the paper present ...

Page 184: ... the actuator B to ensure it is functioning properly 5 To test scanner sensor 1 press on the tab C The 0 next to the 1 will change to 1 if the sensor is working properly 6 To test scanner sensor 2 press on the tab D The 0 next to the 2 will change to 1 if the sensor is working properly 5 System Maintenance 182 5 ...

Page 185: ...properly the 0 next to the A will change to 1 8 Press Stop to return to the SCANNER TESTS menu Exit Diagnostics Selecting EXIT DIAGNOSTICS exits the Diagnostics menu and Resetting the Printer displays The machine performs a POR and the machine returns to normal mode Diagnostics Menu 183 5 ...

Page 186: ...Registration menu Quick Test page sample only use actual sheet 3 Touch Quick test to print the Quick test page 4 In the Registration menu select the right margin setting 5 To determine the margin setting choose the value that is next to the darkest bar on the center graph of the margin page Add that value to the current right margin setting printed on the left hand side of the margin page The righ...

Page 187: ...e again and check that the darkest line in the center graph is equal to zero If it is equal to zero then check to see if the left top and bottom margins are visible If it is not equal to zero then repeat step 5 The alignment of the left margin positions the black plane to the right or left The alignment of the right margin does not alter the margins and should only be used to adjust the printhead ...

Page 188: ...hile the vertical lines remain parallel to the vertical edges There are no adjustments for skew Check the pick roll paper pick assembly for wear the paper path for obstructions the fuser for proper setting and the tray paper guides for fit to the media To adjust the printhead 1 Enter the Diagnostics Menu See Entering Diagnostics in System Maintenance 2 Select PRINT TESTS 3 Select Tray 1 4 Select S...

Page 189: ...he grid lines of the left flap align below the corresponding lines of the right side then adjust the printhead counterclockwise See the right side of the diagram below 8 After obtaining a properly adjusted image on the paper tighten all three screws The printhead must be aligned electronically See Printhead assembly electronic adjustment in System Maintenance Printhead Assembly Mechanical Adjustme...

Page 190: ...formation Optra Forms mode On or off Code Revision Info Network Code Level Displays network code level Network Compile Info Displays compile information Printer Code Level Displays printer code information Printer Compile Info Displays compile information History Print History Mark History History Mode MAC Set Card Speed LAA Keep Alive NVRAM Dump NVRAM Re init NVRAM 5 System Maintenance 188 5 ...

Page 191: ...NPAP Print Alerts TCP IP netstat r arp a Allow SNMP Set MTU Meditech Mode Raw LPR Mode Gather Debug Enable Debug SE Menu 189 5 ...

Page 192: ...5 System Maintenance 190 5 ...

Page 193: ...ice error code appears while you are working on the machine then go to Service error codes in the Troubleshooting and take the indicated action for that error Service error codes are indicated by a three digit error code followed by a period and additional numbers in the format XXX YY In most cases five digits are shown User Status and Attendance Messages User status messages provide the user with...

Page 194: ...yed in the lower left of the screen 3 Scanner calibration and testing initiates when the progress bar is two thirds finished 4 Not Ready will be displayed if the cover is open 5 Any cartridge errors such as Defective Cartridge are displayed in the message are at the bottom of the screen 6 Applicable maintenance messages are displayed 7 Applicable toner low messages are displayed 8 The red indicato...

Page 195: ...to feed media p 247 Paper Feed Service Checks Investigate any displayed codes before proceeding with these symptoms For example a missing toner cartridge will prevent POST from completing Printer Symptom Table Symptom Action Touchscreen displays upside down Replace the display keypad Fan noisy or fan not working p 239 Cooling Fan Service Check Fuser parts melted p 242 LVPS HVPS Service Check Toner...

Page 196: ...Heavy background in Troubleshooting Light print See Light print in Troubleshooting White or black lines or bands See White or black lines or bands in Troubleshooting Toner on back of page See Toner on back of page in Troubleshooting Media never picks See Media never picks in Troubleshooting Media feeds continuously See Media occasionally mispicks or picks multiple sheets at once in Troubleshooting...

Page 197: ...k or Blank Page Copy Service Check Black page No dial tone p 274 Modem Fax Card Service Check Machine dials a number but fails to make a connection with another fax machine The other fax machine may be turned off Ask the fax recipient to check their machine Incoming fax has blank spaces or poor quality 1 The sending fax machine may be faulty 2 The sending fax machine may have a dirty document glas...

Page 198: ...Symptom Action Fax reception fails p 276 Fax Reception Service Check 6 Troubleshooting 196 6 ...

Page 199: ...ted for the remainder of the current job The following actions can be taken Change the paper source to a custom type custom string source and size source type size Continue the print job Request more information Use the current source Reset the active Wait fir supplies Change src Custom String Change src size Change src type size Close Door Message clears when front door is closed Disk Corrupted R...

Page 200: ...ed once after the firmware has tried to restore all of the jobs on disk regardless of the number of held jobs that were not restored There are three versions of this IR depending upon cause IRHeldA occurs when any other condition occurs which stops the machine from restoring jobs from disk These might include disk failure user abort etc Held jobs may not be restored Insufficient Memory 37 This mes...

Page 201: ...h the correct type and size media Cancel the current job Load source type size The machine does not detect media meeting the size or type requested in the source indicated Load the input source with the correct type and size media Cancel the current job Load Manual custom type The machine does not detect media meeting the description custom type in the single sheet feeder manual feeder The followi...

Page 202: ...ed Change or load new media PJL OP Message PJL Seed Message PJL ST Message Try one or more of the following press Select to clear the message and continue printing Wait for the message to clear Remove Paper ADF This posts when there is paper detected in the ADF upon POR or when the cover is closed or any other situation that re initializes the scanner Message clears when paper is removed Remove Pa...

Page 203: ...rted Disk Remove the unsupported disk before continuing 34 Short Paper Press Select to clear the message and continue printing The machine does not automatically reprint the page that prompted the message Check tray length and width guides to ensure paper is properly fitted in the tray Make sure the print job is requesting the correct size of paper Adjust the Paper Size setting for the size paper ...

Page 204: ... and modify the link buffers again Note the reduction of available memory to the link buffers when Resource Save has been enabled and compare it to the memory available when Resource Save is disabled press Select to disable Resource Save and continue printing To enable Resource Save after you get this message Make sure the link buffers are set to Auto then exit the menus to activate the link buffe...

Page 205: ...unctions are available using the Busy Waiting Menu Cancel Job Reset Printer Menu Lockout does NOT prevent access to the Busy Waiting Menu 38 Memory Full This message is displayed when the machine is processing an incoming job and there is not enough memory available to continue processing the job The following actions can be taken Determine how to make more memory available to your print job by De...

Page 206: ...d is requested based on a PPDS mode Set Font Global command a Select Code Page command or a Comprehensive Font Selection command and the printer Best Fit setting is off If Best Fit is on the machine performs a best fit search to find a similar font and this error does not occur This error also displays when the machine receives invalid PPDS download font data The following actions can be taken whi...

Page 207: ...o reset the machine 54 Network x Software Error The machine disables all communications to the associated network interface No data may be received or sent from or to the associated interface The user can program new firmware in the network using the parallel port after this message clears Press Select to clear the message and continue printing The job may not print correctly Program new firmware ...

Page 208: ...ed The following actions can be taken Press Select to clear the message Any data received on the USB port is discarded Press Menus to access the Busy Waiting Menu The following functions may be available Turn the machine power off and then back on to reset the machine Reset Active Bin Check Supply Levels Make sure the USB Buffer menu item is not set to Disabled Press Menus to access the Administra...

Page 209: ... defective disk The Format Disk menu is not shown 62 Disk Full This error code displays when there is not enough free space on the disk to hold the resources that have been requested to be written to the disk This message displays for both resource and PostScript Disk operators when the disk is full 63 Unformatted Disk The optional disk is not formatted Format the disk If the error remains after f...

Page 210: ...pen service check in Troubleshooting Scan job too long The scan job exceeds the maximum number of pages Break the scan job into multiple small jobs Cancel the scan job Scan Paper cleared Paper is cleared from ADF Cancel job Restart job This can only be performed if job recovery is enabled and the job can be restarted A new job with the same parameters is started Cartridge Error Messages Error Desc...

Page 211: ...Printhead Service Check in Troubleshooting 200 04 The media at the input sensor before interrupt occurred not enough time elapsed since the printhead started to expect the printhead mirror motor lock Possible causes include bouncy sensor or exceptionally fast pick perhaps due to media pre staged in the source tray Carefully remove the tray and notice if the leading edge of the media is pointed upw...

Page 212: ... the front remove the upper front guide and inspect the flag on the manual input sensor If the flag is loose then replace it See Media Manual Input Sensor in Replacement and Adjustment 200 15 UNRECOVERABLE NO GAP JAM Engine detected no gap at the manual feeder sensor attempted to open the gap by stopping the feed rolls but no trailing edge was ever seen at the input sensor Remove the toner cartrid...

Page 213: ... gap by stopping the feed rolls but never saw the leading edge of the second page at the input sensor 200 23 Laser Servo never started due to potential conflict with the transfer servo Possible causes slow or missing transport motor positional feedback or the media is transferred too quickly to the input sensor Verify that the media is approved Inspect the wear strips in the tray and replace if th...

Page 214: ...Verify that the media is approved Inspect the wear strips in the tray and replace if they are worn 200 29 Printhead drive control out of range due to an external event beyond what the control is designed to handle Probable causes ESD or noise on hsync signal Check the cable routing for the printhead p 263 Printhead Service Check 200 30 Narrow media sensor covered during warm up Check that the narr...

Page 215: ... 36 Lost hsyncs during auto alignment 200 37 Timeout on data collection during auto alignment 200 38 Interpage servo gap is smaller than expected for printhead offset target evaluation 200 42 Rogue sheet is at the manual feed sensor while flushing the paper path prior to declaring MPF source empty Retry alignment 200 43 The media is at the input sensor before interruption occurs Possible causes in...

Page 216: ...tructions between the input sensor and the fuser if the media continues to stop at the entrance or in the fuser then replace the fuser p 62 Fuser Removal 201 26 Page at fuser nip before fuser started ramping toward desired temperature Indicates code may be receiving more interrupts than intended 201 27 Page at fuser nip before fuser reached acceptable operating temperature Page arrived at fuser ea...

Page 217: ...nsor when feeding out the media detected during warm up 202 26 Trailing edge never cleared exit sensor when feeding out media that was detected during warm up Open the rear door and inspect the flag on the exit sensor The flag is located behind the fuser exit rollers about mid machine If the flag does not rotate freely or has no spring action then replace the fuser p 62 Fuser Removal 202 32 Long m...

Page 218: ...or Assembly Removal Check the belt and drive of the duplex unit Replace it if necessary 231 01 Duplex sensor never made by leading edge reversing into the duplex 231 02 Bouncy duplex sensor never made 233 00 Duplex jam while picking from the device 233 01 Page in duplex never picked 233 02 Feed error picking from the duplex 233 03 Paper never reached the input sensor but was detected at the manual...

Page 219: ...Second pick attempted failed from Tray 1 no pages printed since calling a 241 10 or a prior 241 19 242 00 Paper jam near tray 2 Remove Tray 2 and inspect for obstruction in the paper path Check the pick tires for wear or paper dust Replace if necessary Check the wear strips and replace if necessary 242 01 Took too long to ramp up dc feed motor Check the connection with Tray 2 Lift the machine and ...

Page 220: ...ce while the other sheets were committed to the paper path 251 19 Media never reached the input sensor from the manual feeder 251 20 The media in the MPF has been pushed in too far Remove the media realign the stock and re insert Do not let the top sheets to go beyond the wear strips 251 21 The media in the MPF has been pushed in too far 290 02 Scanner ADF Feed Jam The scanner ADF has failed to fe...

Page 221: ... all originals from the scanner A jam is detected at the ADF exit sensor 294 06 ADF Backfeed Jam A jam is detected at the ADF exit sensor 295 01 Scanner Disable Page at CCD ADF page gap is too small Not enough to re initialize the image processing unit Remove paper from the ADF 295 02 Scanner Disable Page at CCD The ADF page gap is too small not enough room to accelerate after pausing Remove paper...

Page 222: ...Failure ADF mechanical failure p 270 ADF Paper Jam Service Check 843 02 Scanner Failure General mechanical failure 843 03 Scanner Failure Pick Roller engage failure 843 04 Scanner Failure Pick roller disengage failure 844 yy Scanner Failure Lamp failure p 267 CCD Service Check 844 Front scan module output level error p 267 CCD Service Check 844 01 Rear scan module output level error 844 02 Front s...

Page 223: ...n that channel or channels p 267 CCD Service Check 845 02 Cable SCC Failure Front scan module connector or cable failure p 267 CCD Service Check 845 03 Cable SCC Failure Rear scan module connector or cable failure p 267 CCD Service Check 845 yy CCD Failure The CCD is defective p 267 CCD Service Check 846 Front calibration strip unusable p 267 CCD Service Check 846 01 Rear calibration strip unusabl...

Page 224: ...ax Storage The devices flash partition is invalid or unavailable p 149 Format Fax Storage If the issue is not fixed replace the controller board p 44 Controller Board Removal 848 01 Modem Config ID Mismatch A device has a modem installed but its Configuration ID indicates that a modem shouldn t be present 849 HD Config ID Mismatch A device doesn t have a hard drive installed even though its Config...

Page 225: ... 00 DC pick motor error 914 01 Lost encoder feedback Transfer service errors 917 xx Transfer service error Replace the transfer roll p 264 Transfer Roll Service Check Fuser service errors 920 00 Under temperature during steady state control Replace the fuser p 240 Fuser Service Check 921 00 Under temperature during standby control 922 00 Fuser failed to ramp to target temperature 923 00 Fuser is o...

Page 226: ...first hsync Replace the printhead See Printhead Service Check in Troubleshooting 932 xx Lost hsyncs 933 xx Mirror motor locked No hsync received 935 xx Motor unable to reach operating speed Transport motor service errors 936 xx Transport motor initial lock failure Replace the main motor gear drive See Main Motor Service Check in Troubleshooting 937 00 Main transport motor lost lock Replace the mai...

Page 227: ... failure with mirror Replace the engine board See Engine Board Service Check in Troubleshooting 954 xx NVRAM chip failure with system part Replace the controller board See Controller Board Service Check in Troubleshooting 955 xx The code ROM or NAND flash failed the Cyclic Redundancy Check or the NAND experienced an uncorrectible multi bit failure 956 00 RIP card failure processor failure 956 01 P...

Page 228: ...e controller board See Controller Board Service Check in Troubleshooting 959 24 EEPROM retention error 959 25 Insufficient device space during HW prog 959 26 Incremental counter reset exceeds maximum value 959 27 Increment count failed due to max value limit 959 28 Invalid SP memory configuration Memory and emulation errors 960 xx RAM memory error RAM soldered on the controller board is bad Replac...

Page 229: ...ll the next level of support 981 xx Engine protocol violation detected by the specified device 982 xx Communications error detected by the specified device 983 xx Invalid command received by the specified device 984 xx Invalid command parameter received by the specified device Call the next level of support 990 xx An equipment check condition has occurred in the specified device but the device is ...

Page 230: ...ing image data Check line quality Adjust Transmit Level Select a lower Max Speed value under Fax Receive settings 5XX Received unknown response from remote fax device No action needed Issue is with the other device 6XX Error occurred when receiving a frame Check line quality Adjust Receive Threshold 7XX Error occurred when sending a frame Check line quality Adjust Transmit Level Select a lower Max...

Page 231: ... with a remote fax device Adjust Transmit Level Receive Threshold values 809 T2 Timeout occurred due to loss of command response synchronization Adjust Transmit Level Receive Threshold values 80A T5 Timeout occurred when transmitting image data to remote fax device Check line quality Adjust Transmit Level Select a lower Max Speed value under Fax Send settings 80B Too many errors when transmitting ...

Page 232: ...814 Tried too many times at selected speed using V34 modulation scheme Adjust Transmit Level Adjust to a lower modulation scheme 815 Fax transmission was interrupted due to power failure Troubleshoot the machine if error persists See Modem Fax Card Service Check in Troubleshooting 818 Fax transmission failed due to insufficient memory to store scanned image Adjust Memory Use setting to allocate mo...

Page 233: ... in V29 V27 terminal modulation schemes Select a lower Max Speed under Fax Send settings Adjust the Transmit Level Check line quality 885 Failure to transmit training successfully in V17terminal modulation scheme Select a lower Max Speed under Fax Send settings Adjust the Transmit Level Check line quality 886 Failure to transmit training successfully in V29 terminal modulation scheme Select a lowe...

Page 234: ...d if successive attempts fail 904 Hardware error detected See Modem Fax Card Service Check in Troubleshooting 905 A timeout occurred after dialing the number and waiting for a response Check with remote end if successive attempts fail 906 Fax cancelled by user No action needed 907 Modem detected a digital line connection Verify the machine is connected to an analog line See Fax Transmission Servic...

Page 235: ...request for unsupported compression type from remote fax device No action needed A04 Received request for unsupported image length from remote fax device No action needed F00 Unknown error occurred No action needed Messages and Error Codes 233 6 ...

Page 236: ... Controller Board Service Check Controller board service check FRU Action Controller board assembly POST Power On Self Test The machine should complete POST in approximately 45 seconds If the machine fails to display lights or activate the drive motor fuser or fan then check the following order 1 Power to the LVPS HVPS 2 Power from the LVPS HVPS to the engine board p 236 Engine Board Service Check...

Page 237: ...nductors of the cable If the cable is good then turn the machine off and check the connectors on the controller board If the cable isn t good replace the controller board cable 7 Verify that pins 10 12 14 16 and 18 on both the cable and the engine board connector are grounded 8 If grounds are not correct on the cable but the cable passes continuity otherwise then check the controller board 9 If th...

Page 238: ...ne fails to display lights or activate the drive motor fuser or fan then check the following order 1 Power to the LVPS HVPS 2 Power from the LVPS HVPS to the engine board 3 Cables are plugged in correctly especially for the operator panel The machine will not power up without a functioning operator panel 4 The operator panel p 245 Operator Panel Service Check 6 Troubleshooting 236 6 ...

Page 239: ...h the cable and the card connector are grounded 7 If grounds are not correct on the cable but the cable passes continuity otherwise then check the LVPS HVPS 8 If the grounds are not correct on the engine board then replace the engine board Check with one probe on the connector pin and the other on the card s ground plane found at each screw head Engine board assembly Engine board voltage outputs T...

Page 240: ...rrect then replace the LVPS HVPS p 240 Dead Machine Service Check Card Reader Service Check The card reader cover will need to be removed and the op panel keyboard assembly will need to be removed to verify the cable connections p 43 Card Reader Cable Removal FRU Action Card reader cable Card FRU Controller Board Verify that the card reader USB cable is properly connected to the card reader card M...

Page 241: ... the cover open switch lever FRU Action Cover interlock switch Disconnect the cover interlock cable from the controller board at J11 With the machine turned off 1 Verify continuity between cable pin 1 and pin 2 with the door closed and discontinuity with the door open 2 Verify continuity between cable pin 1 and pin 3 with the door open and discontinuity with the door closed 3 Verify discontinuity ...

Page 242: ...the board Do these verifications and then unplug the AC cord from the power supply CN201 6 17 19 Pins 24Vdc CN201 10 12 14 16 18 Ground CN201 1 3 5 11 13 15 Pins 5Vdc If voltages are not correct then replace the LVPS HVPS If voltages are correct then check the engine board p 236 Engine Board Service Check If the engine board checks out ok perform the controller board service check Fuser Service Ch...

Page 243: ...ductor for continuity Replace cable if necessary If the cable tests good then replace the fuser Reconnect the cables turn the machine on and at 12 check for approximately 5Vdc on pin1 and ground on pin 2 If line voltage is incorrect on pin1 then see Engine Board Service Check in Troubleshooting for more information Fuser Disconnect the thermistor cable from J12 on the engine board Measure the resi...

Page 244: ...settings When either of these boards is new it obtains the settings from the other board Settings are lost when both are new and replaced at the same time Turn off the machine and unplug the main motor cable at J17 on the engine board Turn on the machine and check for the following voltages at J17 1 4 6 Pins Approx 5Vdc 7 9 Pins 18Vdc 24Vdc Verify ground at pin 5 for both the card and cable If the...

Page 245: ...t the ethernet cable is properly connected on both ends Is the cable properly connected Go to step 3 If the network is wireless got to step 3 Go to step 2 2 Connect the ethernet cable Did this fix the problem Problem resolved Go to step 3 3 Check the machine s online status under Printers and Faxes on the host computer Delete all print jobs in the print queue Is the machine online and in a Ready s...

Page 246: ...he problem Problem resolved Go to step 12 12 Is the device physically connected ethernet cable to the network Go to step 13 Go to step15 13 Try using a different ethernet cable Did this remedy the situation Problem resolved Go to step 14 14 Have the network administrator check the network drop for activity Is the drop functioning properly Replace the controller board p 44 Controller Board Removal ...

Page 247: ... Service Check Was there another faulty ISP option Replace the faulty ISP option p 128 Installing an Internal Solutions Port ISP Go to step 21 21 Replace the ISP wireless card p 128 Installing an Internal Solutions Port ISP Did this fix the problem Problem resolved Replace the controller board p 44 Controller Board Removal Operator Panel Service Check Inspect the operator panel cable for damage Ma...

Page 248: ... Pins 2 9 and 15 GND If any are incorrect then see Controller Board Service Check in Troubleshooting If these are approximately correct and the operator panel is not functioning 1 Turn the machine off 2 Remove the left and right covers 3 Tilt the operator panel keyboard and verify the UICC cable is properly connected to the keyboard at connector J10 4 If the cable is properly connected at both end...

Page 249: ...rly connected to the engine board at connectors J500 and J501 and on the controller board at connectors J26 and J27 If they are properly connected verify continuity on both cables If this fails replace the cables Make sure the input sensors are working properly Check for a broken or stuck flag on the input sensors Clear anything that keeps the flags from rotating freely Make sure the cables are se...

Page 250: ...occasionally mispicks or picks multiple sheets at once FRU Action Tray 1 Tray 2 option Check tray for media catch points If the sheet being fed stops momentarily then the ACM applies additional vertical force causing additional sheets to feed Do not mix media types in one tray Paper pick tires Tray 1 or tray 2 Check the tires in the ACM assembly for signs of wear or damage Replace the tires as nec...

Page 251: ...resistance across cable pins 1 and 2 The resistance should be approximately 70ohms If it is not then replace the solenoid If the resistance is approximately 70ohms then check the controller board Pin 1 at J25 on the engine board should be 24 V dc Replace engine board as necessary Media skews FRU Action Paper feed pick tires tray 1 Paper feed pick tires tray 2 Tray 1 Tray 2 option Check tires for d...

Page 252: ...rl Print the menu sheet found under Utilities Look at the media settings Some such as card stock or rough texture may require a higher fuser temperature which leads to more of these problems except stacking in plain paper Change settings using the printer driver Use the local printer setup utility included on the CD to change the NVRAM settings Try a different ream of paper Moist media has a highe...

Page 253: ...ion card replace the controller board p 44 Controller Board Removal If there are no errors found testing the cards individually install the cards on at a time Restart the machine after each card is installed Cables If the cards do not trigger an error check the option card connection cables for continuity USB Port Service Check 1 Perform a print test to make sure the machine prints correctly Verif...

Page 254: ...fter 10 seconds d Touch Print Quality Pages to print out the quality pages Four pages print to help evaluate print quality The first page has various fonts and a graphic the second page is gray with graphics the third page is black and the last page is blank 2 Use the test pages to isolate problems such as light or toner streaks See POST Symptom Table in Troubleshooting for solutions to these prob...

Page 255: ...4 mm above and to the right of the transfer roll gear If there is not continuity then call the next level of service Try a different toner cartridge and PC kit If those fail then replace the LVPS HVPS controller board or the printhead in that order Also see Print quality problems in Troubleshooting Black page Incorrect laser exposure or incorrect charging of the photoconductor causes an all black ...

Page 256: ... development or poorly charged toner particles cause excessive background This is more noticeable as the toner cartridge nears end of life FRU Action Toner cartridge not a FRU PC Kit not a FRU Check the toner darkness setting in the driver Try a lower setting Make sure the toner cartridge and PC Kit are correctly installed and the high voltage contacts are clean If the toner cartridge and PC Kit a...

Page 257: ...sity horizontally across page FRU Action PC Kit not a FRU The charge roll may have an unbalanced force against the PC photoconductor drum Try a new PC Kit Transfer roll Do not touch the transfer roll except at its ends Place a sheet of paper over the roll to prevent damage from finger oils or hand lotion Check the springs in the left and right transfer roll bearings The bearing assemblies should s...

Page 258: ... Make sure the toner cartridge and PC Kit are installed correctly and that the toner cartridge is not low on toner If the problem continues then install a new toner cartridge Recheck condition before replacing PC Kit if necessary Transfer roll LVPS HVPS card Check the transfer roll for signs of toner buildup and contamination Inspect the HVPS contact transfer roll for contamination Verify the high...

Page 259: ...inds or damage Toner on back of page FRU Action Photoconductor kit not a FRU Print a menu page from the Menu Settings Page in Reports Menu Inspect the overall paper path for signs of spilled toner Gently clean the contaminated areas with a soft cloth Fuser Inspect the fuser for signs of contamination Replace the fuser as necessary Transfer roll A transfer roll contaminated with toner can cause ton...

Page 260: ...dge or PC Kit may be defective Replace the PC Kit first and recheck Blurred characters Blurred images including characters are usually caused by a defective printhead Vertical white lines See Vertical streaks below Vertical white lines may be caused by the laser beam which may be partially blocked With the machine off clear the path or clean the lens The toner cartridge or fuser may be defective T...

Page 261: ...ectly set Check those settings The PC cleaner sump may be full Replace the PC kit Toner smears or rubs off the page Toner is not being fused to the paper Replace the fuser Change the media texture setting in the driver If special media is being used such as card stock or labels then be sure to select the correct media type Try a different kind of paper Paper designed for copiers gives the best qua...

Page 262: ...ots appear on the page Select a different media type or form type setting from the printer driver Try a different type of paper Media designed for copiers gives the best quality Replace the toner cartridge Pages are blank The print cartridge may be out of toner or defective Replace the cartridge There may be a software error Re initialize the machine by turning it off and back on With the machine ...

Page 263: ...If a 3 5K or more page toner cartridge is being used and the Toner Low alarm is set to on then the machine stops printing until the toner cartridge is replaced The Error light alone is on Make sure the front machine cover is closed The Toner Low light is blinking and the Error light is on Make sure the toner cartridge is installed correctly Install a new toner cartridge The media skews or buckles ...

Page 264: ... Replace as necessary Check the paper path in the tray for burrs or debris that may hinder media movement Make sure the media does not exceed the stack height indicator Load Paper displays even though there is media loaded in the optional Tray 2 The input sensor does not sense media after picking Make sure the tray is pushed all the way in Press Check the feed tires See two preceding actions The m...

Page 265: ...ry Printhead Service Check FRU Action Printhead New printhead must be aligned p 184 Printhead Assembly Electronic Adjustment Turn the machine off Disconnect the printhead cables from J9 and J6 on the controller board Turn the machine on with the front door closed On the controller board verify 5Vdc on pins 2 and 3 at J6 and 5Vdc on pins 1 and 10 at J9 Verify grounds on pins 4 5 6 and 7 at J6 and o...

Page 266: ... drum Replace the transfer roll assembly if the springs or bearings show signs of damage or fatigue Inspect the transfer roll for signs of wear damage or contamination Replace as necessary Tray 2 Service Check FRU Action Tray 2 Turn the machine off Separate the machine from Tray 2 Turn the machine on and check the voltages on connector J28 on the engine board Pins 1 4 3 3 V Pin 2 24 V Pin 6 Ground...

Page 267: ...ck the ADF cable connections on the ADF relay card and connector J17 on the controller board Also inspect the cable connections on J28 J12 13 and J30 on the controller board Are the connections properly connected Go to step 5 Go to step 4 4 Properly connect the connections on the ADF relay card and controller board POR the machine into configuration mode Go to the disable scanner menu item See Dis...

Page 268: ...Enable ADF FB Enabled and press Submit to save the change POR the machine to operating mode Run a copy from the ADF Did the 840 xx error recur Go to step 8 Stop Problem solved 8 Inspect J17 J12 13 and J30 on the controller board Are the connections properly connected Go to step 10 Go to step 9 9 Properly connect all the connections Did the 840 xx error recur Go to step 10 Stop Problem solved 10 Re...

Page 269: ...o to step 5 Go to step 4 4 Did the sheet feed into the ADF Go to step 6 Go to step 5 5 Is the CCD ribbon cable properly connected to J30 on the controller board Go to step 6 Properly connect the ribbon cable to J30 6 Check for 14VDC on Pin 3 and 4 on connector J30 Pin 4 is 5VDC Are the voltages present Replace the flatbed unit See Flatbed removal in Replacement and Adjustment Replace the controlle...

Page 270: ... cable 2 Check pin 1 in J28 for voltage The voltage is only present when a flatbed copy job is running The voltage should measure 24V AC Is voltage present Replace the flatbed unit p 111 Flatbed Removal Replace the controller board p 44 Controller Board Removal Flatbed Home Position Service Check Step Questions actions Yes No 1 POR the machine Does the CCD move and return to the home position Prob...

Page 271: ...lace the controller board p 44 Controller Board Removal ADF Cover Open Service Check Step Questions actions Yes No 1 Is the ADF cover properly closed Go to step 3 Go to step 2 2 Close the ADF cover Does the problem go away Issue resolved Go to step 3 3 Perform the ADF cover open sensor test See Scanner Tests in System Maintenance Does the sensor work properly Go to step 4 Go to step 8 4 On the bot...

Page 272: ...voltages present Replace the ADF p 111 ADF Unit Removal Replace the controller board p 44 Controller Board Removal ADF Streak Service Check Step Questions actions Yes No 1 Do streaks appear on the middle of scans when using the ADF Clean the ADF glass on the flatbed using a lint free cloth No issue to fix ADF Paper Jam Service Check This service check should be used if the paper feeds and jams in ...

Page 273: ... the paper present sensor actuator Is the paper damaged Bad media Go to step 7 7 Is there dirt in the sensors or is the paper present actuator stuck Clean the sensors or remove debris from the actuators Go to step 8 8 Are the sensor actuators on the ADF mechanism cover damaged Replace the ADF Go to step 9 9 Is the ADF connector properly connected to J17 on the system board Go to step 10 Properly c...

Page 274: ...the ADF See ADF Paper Jam Service Check in Troubleshooting 4 Is paper failing to feed into the ADF Go to step 5 There is no issue 5 Is the leading edge of the paper wrinkled or torn Use different media Go to step 6 6 Perform the ADF paper present sensor test See Scanner Tests in System Maintenance Is the sensor working properly Go to step 7 Properly connect all the connections in the ADF relay car...

Page 275: ...place the ADF unit See ADF Unit Removal in Replacement and Adjustment 3 Check all the connections on the ADF relay card Are they properly connected Go to step 4 Properly connect all the connections 4 Check the ADF cable to ensure it is properly connected to CN 15 on the ADF relay card and main controller board at J17 Is the ADF cable properly connected Go to step 5 Properly connect the ADF cable t...

Page 276: ...ystem board at J8 and the modem card Go to step 7 Go to step 6 6 Properly connect the modem card cable to the modem card and system board Did this fix the problem Problem resolved Go to step 7 7 Check the modem card cable for continuity Is there continuity Go to step 8 Replace the modem card cable 8 Check the voltages from connector J8 on the controller board Check Pin 12 and 13 for 3 3VDC Pin 10 ...

Page 277: ... 5 Is the phone line being used by the machine an analog line Go to step 8 Go to step 6 6 Is the line being used a VOIP line Go to step 7 Go to step 8 7 Have the system administrator verify that the VOIP server is configured to receive faxes Is the server properly configured Go to step 8 Stop here The issue is VOIP related The VOIP provider needs to change the server configuration 8 Is the machine...

Page 278: ...djusting the transmitted signal strength by decreasing increasing the Transmit Level setting in steps of 1db For example if default value is 11 db changing it to 12db will decrease the signal strength by 1db and changing it to 10db will increase the signal strength by 1db Recommended adjustment range is 5 db in 1db steps from the default value Did this fix the problem Stop Problem resolved Go to y...

Page 279: ...x Receive setting is on Is the setting set to on Go to step 9 Go to step 8 8 Set Enable Fax Receive to On Did this fix the problem Problem resolved Go to step 9 9 Is Distinctive Ring enabled Go to step 11 Go to step 10 10 Turn on Distinctive ring Did this fix the problem Problem resolved Go to step 11 11 Is the phone line analog Go to step 13 Go to step 12 12 Is the VOIP server configured to suppo...

Page 280: ...to step 18 Go to step 19 18 Remove the remote number from the banned fax list Did this fix the problem Problem resolved Go to step 19 19 Adjust the Receive Threshold setting in the SE menu press 411 to enter the SE menu enter Modem settings and select Receive Threshold Test by adjusting the received signal level by decreasing increasing the Receive Threshold setting in steps of 2db For example if ...

Page 281: ...ne settings information and debug information that will help second level support determine the cause of a failure To generate the fax error file perform the following steps 1 In a Web browser type http machine ip address se 2 The machine s SE menu page will display Click the Dump Job History link The following displays 3 Write down the type of connection the type of error and the job in which the...

Page 282: ...ll the requested information is entered into the Fax Checklist Web page press the Submit button on the bottom of the page A dialogue asking you to save the file will appear The file generated by the machine is not automatically transmitted to second level support It is placed on the computer desktop 2 Enter a name for the file and indicate where you want to save the file 3 Press OK The file appear...

Page 283: ... Do not mix print media sizes weights or types in the same print media source Push all trays in firmly after loading them Make sure the media stack is below the maximum media fill indicators on the 250 sheet tray before pushing the tray into the machine Make sure paper guides are positioned before loading the paper or specialty media Do not remove trays while a job is printing Before loading trans...

Page 284: ... Area No Description 1 Opened front door 2 Paper output bin 3 Front door 4 Multi purpose feeder 5 Tray 1 6 Tray 2 7 Rear door 8 Automatic document feeder ADF Jam Messages and Their Locations 200 and 201 paper jams Hot surface The inside of the machine may be hot To reduce the risk of injury from a hot component allow the surface to cool before touching it 6 Troubleshooting 282 6 ...

Page 285: ...1 Pull the tray completely out 2 Remove the paper jam 3 If the paper is not visible open the front door and remove the photoconductor kit and toner cartridge Paper Jams 283 6 ...

Page 286: ...4 Remove the jam 5 If the paper is still not visible open the rear door 6 Troubleshooting 284 6 ...

Page 287: ... toner cartridge 9 Close the front door 10 Touch Continue 202 paper jam Touch Status Supplies to identify the location of the jam If the paper is exiting the machine into the exit bin pull the paper out and touch Continue If the paper is still in the paper path Paper Jams 285 6 ...

Page 288: ... the rear door 4 Touch Continue 231 paper jam Hot surface The inside of the machine may be hot To reduce the risk of injury from a hot component allow the surface to cool before touching it 1 Open the front door 2 Open the rear door 6 Troubleshooting 286 6 ...

Page 289: ...3 Remove the jam 4 Close the rear door 5 Close the front door 6 Touch Continue Paper Jams 287 6 ...

Page 290: ...chine 2 Locate the duplex release lever and pull it down to release the paper 3 Insert the tray 4 Touch Continue If this does not clear the jam perform the steps found in 231 paper jam See 231 paper jam in Troubleshooting 6 Troubleshooting 288 6 ...

Page 291: ...ollowing jam removal procedures 231 paper jam See 231 paper jam in Troubleshooting 233 paper jam See 233 paper jam in Troubleshooting 235 paper jam 1 Gently pull the jammed media from the fuser 2 Touch Continue 240 249 paper jams 1 Touch Supply Status to identify the jam location 2 Remove the standard tray Paper Jams 289 6 ...

Page 292: ...ue 5 If the jam message remains remove the optional tray 6 Remove any jammed paper 7 Reinsert the option tray and touch Continue 250 paper jam 1 Touch Supplies Status to find the jam location 2 Remove the media from the multipurpose feeder 6 Troubleshooting 290 6 ...

Page 293: ... media into the multi purpose feeder 6 Adjust the guides if needed 7 Touch Continue 251 paper jam If the media is visible from the front of the machine gently pull the media out of the multipurpose feeder If the media is not visible perform the following steps to clear the jam Paper Jams 291 6 ...

Page 294: ... the flap at the front of the machine and remove any jams 3 Reinsert the photoconductor kit and toner cartridge 4 Close the front door 5 Touch Continue 290 294 paper jams Clearing jams under the ADF cover 1 Remove all original documents from the ADF input tray 6 Troubleshooting 292 6 ...

Page 295: ...2 Open the ADF cover 3 Unlock the ADF separator roll 4 Remove the ADF separator roll Paper Jams 293 6 ...

Page 296: ...5 Remove the jammed media 6 Reinstall the ADF separator roll 7 Lock the ADF separator roll 8 Close the ADF top cover Clearing ADF jams under the flatbed cover 6 Troubleshooting 294 6 ...

Page 297: ...ove the jammed media from the ADF 2 Touch Continue Clearing jams in the duplex ADF 1 Remove the ADF input tray 2 Pull out the jammed media by pulling on the bottom sheet 3 Reinstall the ADF input tray 4 Touch Continue Paper Jams 295 6 ...

Page 298: ...6 Troubleshooting 296 6 ...

Page 299: ...inactivity The Power Saver Mode is automatically engaged after this product is not used for a specified period of time called the Power Saver Timeout Factory default Power Saver Timeout for this product in minutes 30 minutes By using the configuration menus the Power Saver Timeout can be modified between 1 minute and 240 minutes Setting the Power Saver Timeout to a low value reduces energy consump...

Page 300: ...mount of paper used This means that less energy overall is used for paper production which improves the environment 1 Duplex Reduce paper volume in half 2 Combine mode Reduce paper volume in half 3 Duplex Combine Using both features together can further reduce paper volume by 3 4 7 Energy Saving 298 7 ...

Page 301: ...total counter goes up by 2 For a duplex job of a three page original the total counter goes up by 3 The duplex counter counts pages that have images on both sides For one duplex page the duplex counter goes up by 1 For a duplex job of a three page original the duplex counter will only increase by 1 even though two sheets are used Paper Save 299 7 ...

Page 302: ...7 Energy Saving 300 7 ...

Page 303: ...Model LI MF1 Machine Codes M126 M127 M128 Appendices 12 October 2011 ...

Page 304: ......

Page 305: ...nd Compatibility 5 Media Trays and Supply Capacity 6 Types of Print Media 7 Media Guidelines 9 Digital Imaging Specifications 12 General specifications 12 Scan and Copy Specific Specifications 13 Fax Specifications 15 Phone Network Connectivity 15 Fax Resolutions 15 Miscellaneous FAX Specifications 16 Tools 17 2 Appendix Preventive Maintenance Tables Maintenance Kits 19 1 ...

Page 306: ...2 ...

Page 307: ...ield replaceable unit FRU or part Use the error code charts symptom index and service checks to determine the symptom and repair the failure See Troubleshooting for more information See Replacement and Adjustment to help identify parts After completing the repair perform tests as needed to verify the repair 3 1 ...

Page 308: ...200 X 1200 dpi3 1 1200 Image quality is defined as 6010 dpi with 2 bit IET Image Technology default mode for all models 2 2400 Image quality is defined as 600 dpi with 4 bit IET 3 True 1200 dpi at 1 2 the rated speed Environment Specified operating environment Operating temperature range 16 to 32 degrees C 60 to 90 degrees F Humidity 8 to 80 Relative humidity Altitude 0 to 3048 meters 10 000 ft 1 ...

Page 309: ...CL 6 PostScript 3 PPDS migration tool PDF v1 6 XPS HTML including DBCS Direct image Compatibility Windows Macintosh Linux Windows Macintosh Linux Standard local connections USB Standard network connections Ethernet 10 100 Base Tx Wireless ethernet 802 11b g n Optional local connections Optional network connections external print server support All models are USB 2 0 Certified devices supporting Hi...

Page 310: ...excluding envelopes 850 excluding envelopes Manual integrated print duplex Integrated Integrated Envelope conditioning Available output trays Standard 150 sheet sensing bin Toner and photoconductor Starter toner cartridge 7 000 standard pages SWE 3 500 standard pages 7 000 standard pages SWE 3 500 standard pages High toner cartridge 14 000 standard pages 14 000 standard pages Extra high yield 18 0...

Page 311: ...etter legal executive oficio Mexico folio statement Plain paper recycled labels bond letterhead preprinted colored paper light paper heavy paper rough cotton custom type x 60 90 g m 16 24 lb 250 paper 150 A6 50 labels 2nd Drawer option 250 550 sheet drawer A4 A5 JIS B5 letter legal executive oficio Mexico folio statement Plain paper recycled labels bond letterhead preprinted colored paper light pa...

Page 312: ...plex A4 letter legal oficio Mexico folio Plain paper recycled bond letterhead preprinted colored paper light paper heavy paper custom type x 60 90 g m 16 24 lb Capacity for 20lb print media unless otherwise noted Use for occasional printing only 1 Japanese Industry Standard 2 If a source supports size sensing and is activated then neither the oficio value nor the folio value appears in that source...

Page 313: ...both print quality and the ability of the printer to feed the paper correctly Leave paper in its original wrapper until it is time to use it This limits the exposure of paper to moisture changes that can degrade its performance Condition paper before printing by storing it in its original wrapper in the same environment as the printer for 24 to 48 hours before printing Extend the time several days...

Page 314: ...Use only forms and letterhead printed using an offset lithographic or engraved printing process Avoid papers with rough or heavily textured surfaces Use papers printed with heat resistant inks designed for use in xerographic copiers The ink must be able to withstand temperatures up to 200 C 392 F without melting or releasing hazardous emissions Use inks that are not affected by the resin in toner ...

Page 315: ... using these types of paper consult your paper supplier Suitable sheet to sheet coefficient of friction 0 4 0 6 Sufficient bending resistance in the direction of feed Recycled paper paper of lower weight 60 g m2 16 lb bond and or lower caliper 3 8 mils 0 1 mm and paper that is cut grain short for portrait or short edge fed printers may have lower bending resistance than is required for reliable pa...

Page 316: ... optical resolution 600 x 600 dpi Mono 600 x 300 dpi Color with final resolution of 300 x 300 dpi CDD 1200 dpi and 600 dpi Selectable through electronics Color depth 48 bit RGB output 16 bit channel Mono ADF optical resolution Max 600 x 600 dpi Color ADF resolution Max 600 x 300 dpi final resolution of 300 x 300 dpi Flatbed document specifications Flatbed scan area Max 8 5 x 14 216mm x 355 6mm Doc...

Page 317: ...c pressure Storage environments unpacked Temperature 0 to 40 C Humidity 5 to 80 relative humidity Tilt This device should operate within the stated parameters when it is level within 10mm from front to back and 10mm side to side Scan and Copy Specific Specifications Scan Resolutions Optical 600 dpi Local Twain only Enhanced 1200 X 1200 dpi 2400 X 2400 dpi 4800 X 4800 dpi 9600 X 9600 dpi 19200 X 19...

Page 318: ...EG TIFF 1 bit CCITT G4 8 24 bit Packbits LZW JPG 8 24 bit JPG Supported scan destinations Temporary profile from a user s PC FTP Scan to PC via network TWAIN Scan to PC using Web applet Scan to E Mail Scan to USB Windows network folder requires installing embedded scan to folder application Multiple copies 999 copies maximum Reduce Enlarge 25 to 400 Copy only 1 Appendix Specifications 14 1 ...

Page 319: ...7 ITU T 4 and T 6 MH MR MMR JPEG Modem speed V 34 2 400 33 600 BPS V 17 7 200 14 400 BPS V 27 2 400 4 800 BPS V 29 7 200 9 600 BPS Compression MH MR MMR JPEG Error correction ITU T 30 Line interface selection Modular Plug Out Band Signal Level Dual RJ 11C Guaranteed North American and Europe PTT standard Input Level Range Ring Detection 16dBm 59dBm Complies with all regulatory requirements Fax Res...

Page 320: ...b Fax logs 11 5mb Fax Storage 900 pgs X466e 80GB Hard disk space 4096 fax jobs Color fax Yes Fax from PC Yes Supported using PostScript driver for both local and network attach modes Caller ID Yes Junk FAX blocking Yes based on caller ID and remote station ID Tone Pulse Tone Default Pulse Yes Fax forward Yes Broadcasting Yes 46 destinations External phone interface Yes Manual mode Yes Fax shortcut...

Page 321: ...Tools The removal and adjustment procedures require the following tools and equipment Spring hook Needle nose pliers Volt ohmmeter 1 and 2 Phillips screwdriver Slotted screwdriver Tools 17 1 ...

Page 322: ...1 Appendix Specifications 18 1 ...

Page 323: ...eventive Maintenance Tables Maintenance Kits Maintenance kits include Fuser Tray 1 ACM feed tires Transfer roll Maintenance kits Description Low voltage 110 V maintenance kit High voltage 220 V maintenance kit 19 2 ...

Page 324: ...MEMO 20 EN ...

Reviews: