13
│
Sentinel Kinetic Advance S, SX - www.regulus.eu
Floor Mounting the Unit
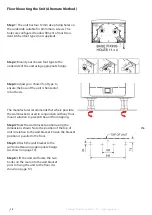
Step 1:
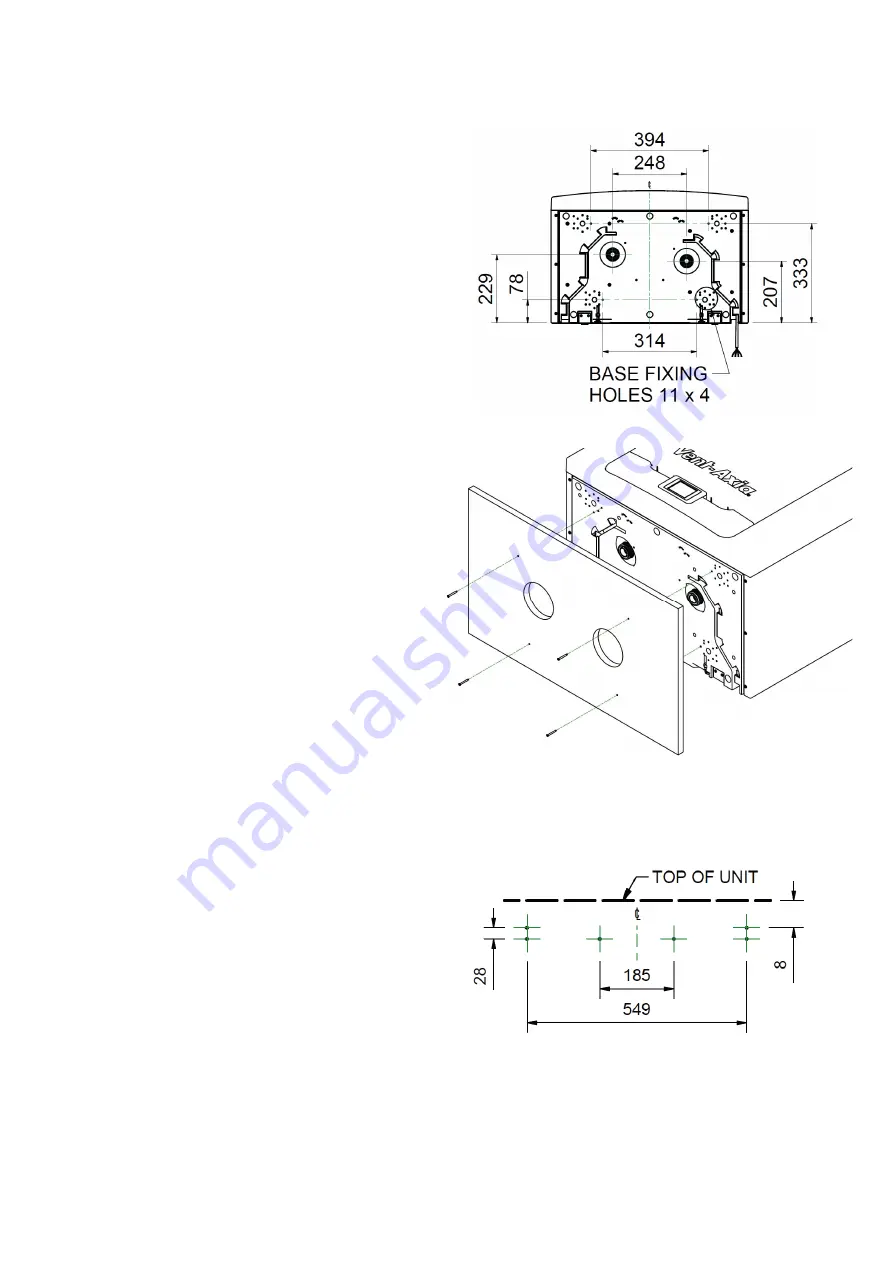
The unit has four 12mm deep fixing holes
on the underside suitable for 6mm diam. screws.
Pre drill a board using the dimensions shown, and
cut 2 x 105mm minimum diameter holes for the
condensate drain access.
The manufacturer recommends that where
possible, the wall bracket is used in conjunction
with any floor mount solution to prevent the unit
from tipping.
Step 2:
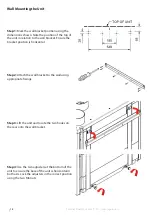
Mark the wall bracket position using the
dimensions shown. Note the position of the top of
the unit in relation to the wall bracket. Ensure the
bracket position is parallel to the floor.
Step 3:
Attach the wall bracket to the wall or
batten using appropriate fixings. (As shown on
page 12)
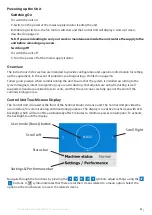
Step 4:
Lift the unit and locate the two hooks on
the rear onto the wall bracket prior to fixing the
unit to the floor. (As shown on page 12)
7


