


65
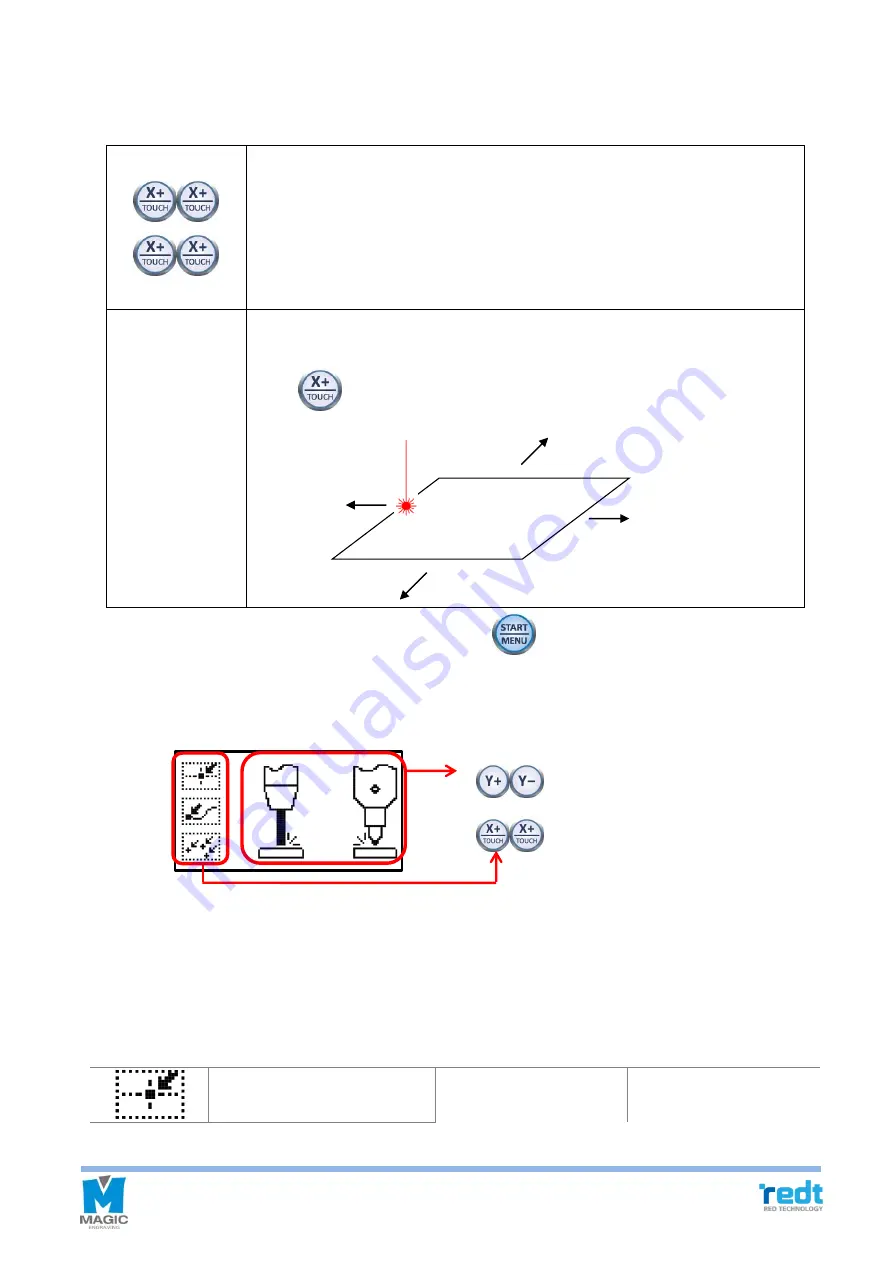
11. Once the tool is moved to the center of the material and stopped, the engraving area can be verified and
adjusted by using the direction key button. At this time, check the laser pointer while moving it for easier
measurement and adjustment.
Whenever the direction key is pressed, move the laser pointer to the left, top, right
and bottom of the engraving area to show the area to be engraved. Check whether
the area to be engraved is outside of the materials surface. If so, adjust the location
by using the direction key.
The laser pointer moves the area to be engraved to the left, top, right or bottom
according to current location. If the current location of the laser pointer is left, then,
press
key to move the area to the left.
12. After the location of engraving is decided, press and hold
button until it beeps (more than 3 seconds)
to start the engraving.
13. User can select measurement mode within two seconds before measurement begins, after transferring tool
path (engraving data) from MagicArt to the machine.
Measure the origin of
engraving area.
Measurement
Method
Select.
Work area
: 측정 모드 선택
: 프로브/터치 선택
Summary of Contents for R&D MAGIC-70
Page 13: ...12 R Communication port Connects USB cable to the computer ...
Page 22: ...21 If the thickness of ring is not even mix different sized chuck fingers to hold it ...
Page 27: ...26 ...
Page 31: ...30 ...
Page 36: ...35 Left top Origin point Left bottom Origin point Center Origin point ...
Page 101: ...100 ...
Page 113: ...112 3 Drag the work area by the mouse and decide picture size to load the picture ...
Page 117: ...116 3 Click File Import button from the Magic Art menu to import a file ...
Page 119: ...118 ...
Page 123: ...122 ...


