Audio Amplifier
Back
of
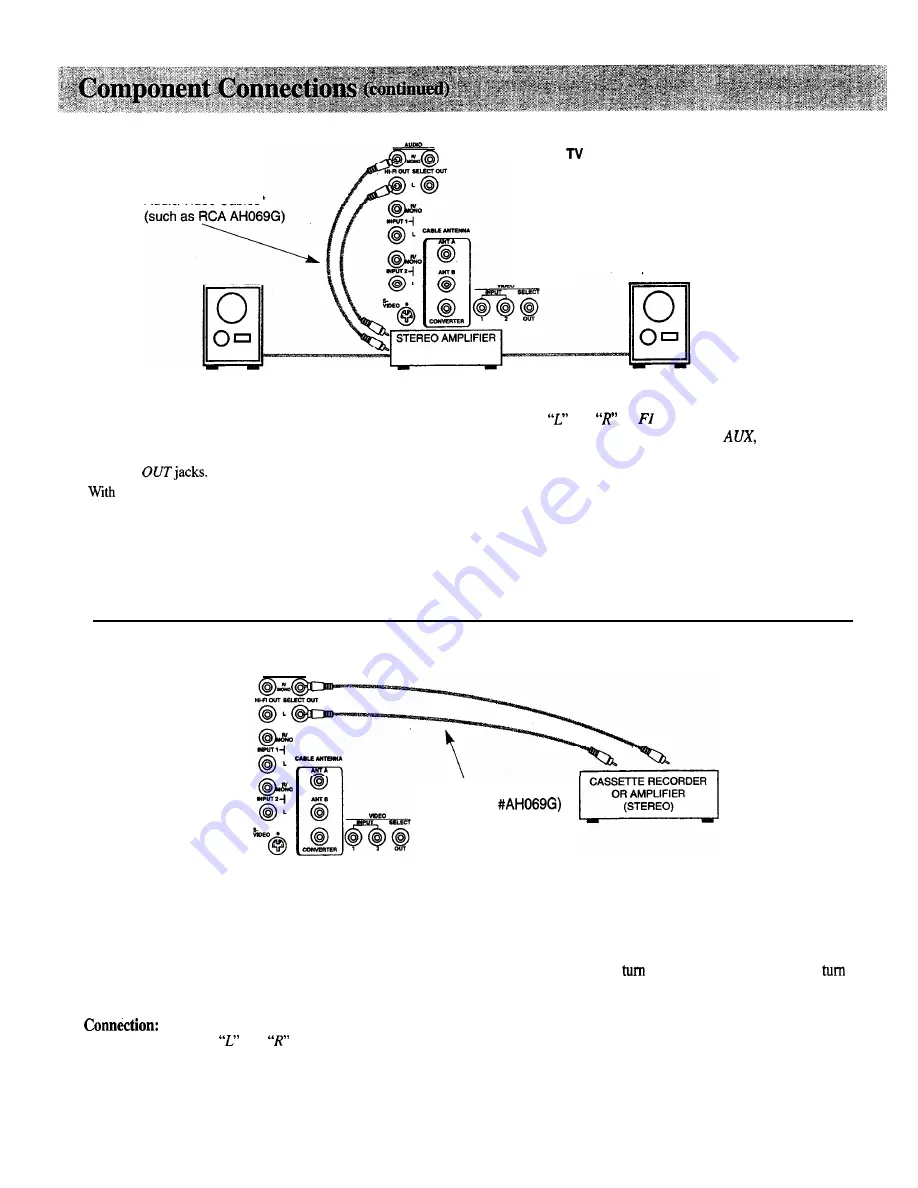
AudioNideo Cables’
If your stereo amplifier is not part of a “system” that has its
own remote, connect it to the TV as shown here. If the stereo
amplifier is part of a system that has its own remote, you may
choose to connect it to the TV as shown below using the
SELECT
the connection shown here, you’ll be able
to
change and
mute volume with the TV’s remote control. You’ll also be able
to remotely control bass and treble functions.
Connection:
Connect the
and
HI
OUT jacks to the corresponding
input jacks on the stereo amplifier (such as
TUNER,
or
CD).
Do not use the
PHONO
inputs. If your amplifier is not stereo
(mono), connect it to the TV’s
WMONO
jack. Consult the
amplifier’s owner’s manual for the manufacturer’s recommended
h o o k u p .
Operation:
If desired, turn off TV’s internal speakers as described on page 16.
Adjust the amplifier for normal listening. Then control sound with
the VOLUME
and
MUTE
buttons on the TV’s remote.
Audio Cassette Recorder or Amplifier
Back of TV
AudioNideo Cables*
(such as RCA
If your stereo amplifier is part of a “system” that has its own
remote control, connect it to the
S E L E C T
OUT jacks as shown
here. The “fixed level” audio signal present at these jacks is also
ideal for connecting an audio cassette recorder to record audio
from the TV This constant audio signal is not affected by
pressing
the VOLUME
buttons on the TV’s front panel or the
TV’s remote control.
Connect
SELECT OUT
and
to the corresponding input
jacks on the stereo amplifier or audio cassette recorder.
If your amplifier is not stereo (mono), connect it to the TV’s
WMONO
jack. Consult the equipment’s owner’s manual for the
manufacturer’s recommended hookup.
Operation:
Select a TV channel and
down the sound on the TV, or
off TV’s internal speakers. Adjust sound with controls on the
amplifier or cassette recorder. If the amplifier or cassette recorder
is part of a “system” that has its own remote, use the system’s
remote to adjust sound.
* Optional accessories are available from most
RCA
dealers or electronics supply stores.
42
Summary of Contents for P52151WK
Page 1: ......
Page 43: ..._ _ _ _ _l __ __ _ _ I _ _ ...