1. Place both thumbs on the camera ball assembly, above the
camera lens.
2. Push your thumbs downwards, whilst pulling the cover away
from the base of the camera with the rest of your grip.
3. Once the cover is detached, slide it up and off the camera.
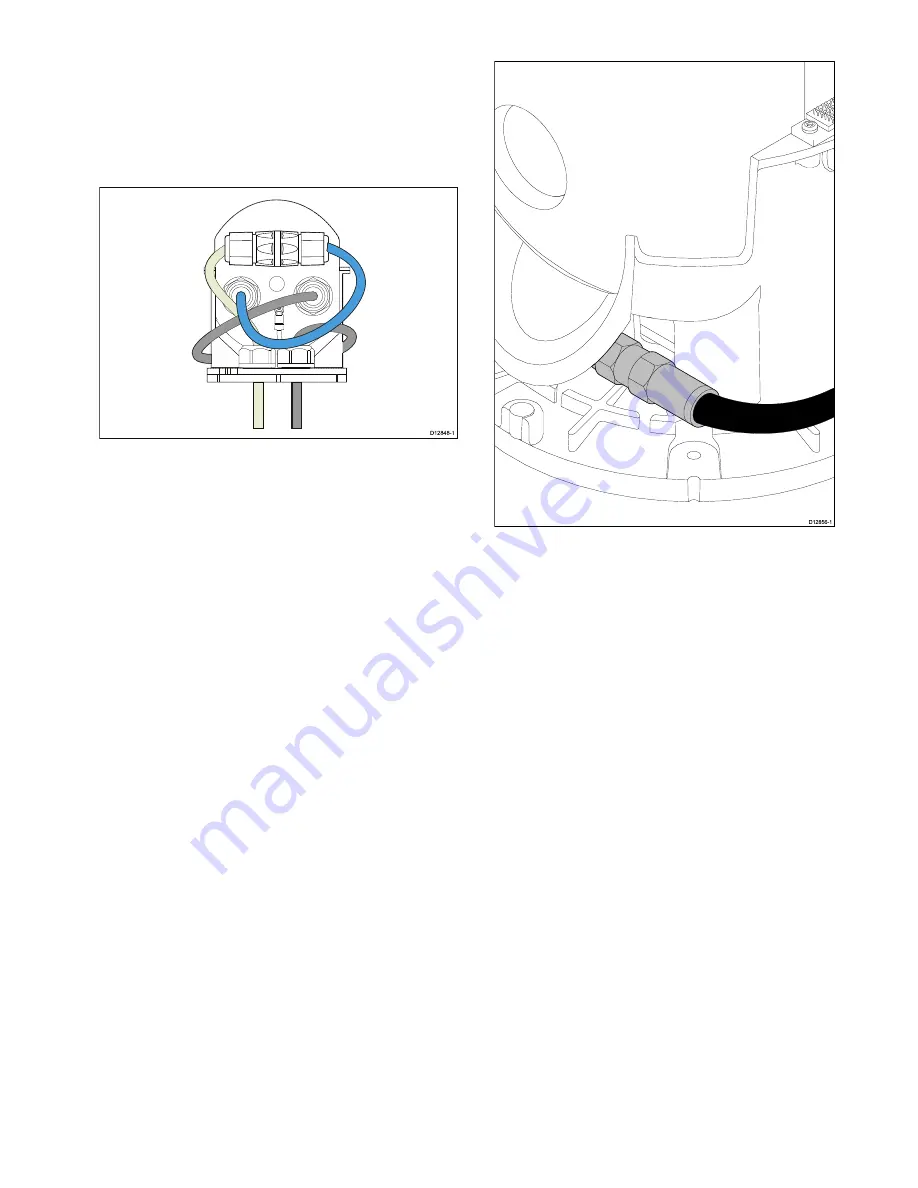
Making internal connections
If there is limited space or you want the cable connection to be
made internally follow the steps below.
D12848-1
1. Remove the camera’s outer cover.
2. Unscrew the light grey cable capture nuts on both of the
cable glands on the base of the camera.
3. Pull the rubber glands and clamping claws out of the bore
holes.
4. Pull both cables up through the base.
5. Remove the rubber gland, clamping claw and capture nut
from both cables.
6. Connect the camera’s ethernet cable to one end of the
ethernet coupler (supplied).
7. Thread the external ethernet and video cables through the
bore holes.
8. Thread the external ethernet cable through the rubber gland,
clamping claw and capture nut.
9. Connect the external ethernet cable to the other end of the
ethernet coupler.
10. Using the zip ties (supplied) secure the ethernet coupler to
the rear of the camera ball assembly.
11. Pull any excess cable back through the bore hole.
12. Secure the ethernet cable by reassembling the rubber gland
and clamping claw into the bore hole and tightening the
capture nut.
13. Feed the camera’s video cable around the front of the
camera ball assembly.
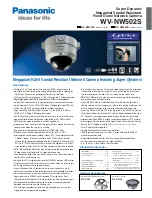
14. Apply Locktite to both ends of a female to female connector.
15. Connect a female to female connector to the camera’s video
cable.
D12856-1
16. Feed the external video cable through the bore hole.
17. Connect the external video cable to the other end of the
female to female connector.
18. Wrap the video connection with marine grade sealing tape
(e.g. 3M Scotch-Seal 2229 or equivalent).
19. Secure the video cable to the front of the ball assembly using
the zip tie (supplied).
20. Pull any excess cable back through the bore hole.
21. Secure the video cable by reassembling the rubber gland
and clamping claw into the bore hole and tightening the
capture nut.
Installation


