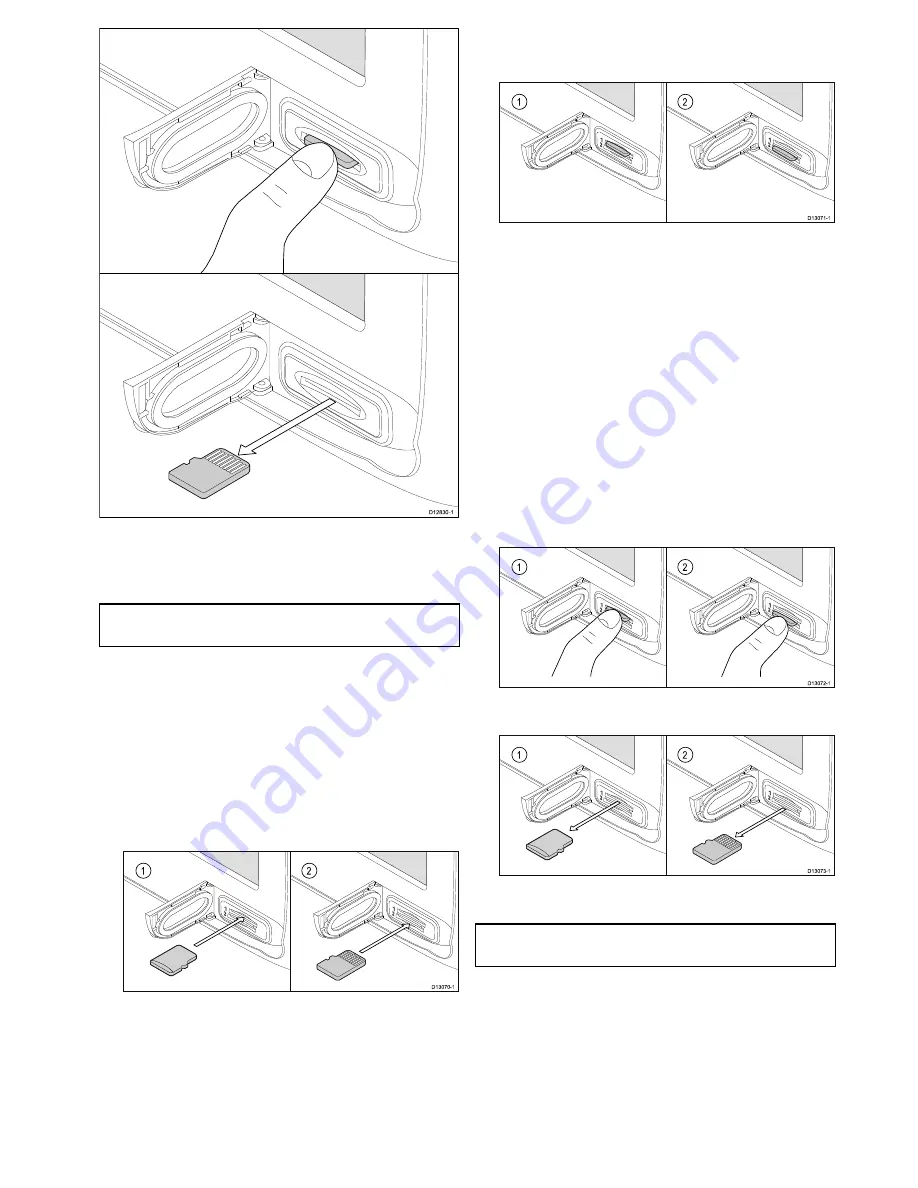
D12830-1
5. Use your fingers to pull the card clear of the card
slot, using the edge of the card.
6. To prevent the ingress of water and consequent
damage, close the card reader door.
Note:
You can also power off the multifunction
display and follow steps 4 to 7 above.
a9x and a12x
Inserting a memory card or chart card
1. Open the card reader door.
2. Insert the card, as shown in the diagram below.
For slot 1, the card contacts should be facing
DOWN. For slot 2, the card contacts should
be facing UP. Do NOT force the card. If the
card does not fit easily into the slot, check the
orientation.
1
2
D13070-1
3. Gently press the card all the way in to the card
slot, as shown in the diagram below. The card is
secure when an audible click is heard.
1
2
D13071-1
4. To prevent the ingress of water and consequent
damage, close the card reader door.
Removing a memory card or chart card
From the homescreen:
1. Select
My Data
.
2. Select
Eject Card
.
A message is displayed prompting you to select
the memory device you want to eject.
3. Select
SD1
for a memory card in the top card slot,
or
SD2
for a memory card in the bottom card slot.
4. Open the card reader door.
5. Push the edge of the card towards the unit, until
an audible click is heard.
The card is released from the card slot
mechanism, as shown in the following diagram:
1
2
D13072-1
6. Use your fingers to pull the card clear of the card
slot, using the edge of the card.
1
2
D13073-1
7. To prevent the ingress of water and consequent
damage, close the chart card door.
Note:
You can also power off the multifunction
display and follow steps 4 to 7 above.
c and e Series
Inserting a memory card or chart card
1. Open the chart card door, located on the front
right of the display.
2. Insert the card, as shown in the diagram below.
For slot 1, the card contacts should be facing
DOWN. For slot 2, the card contacts should
be facing UP. Do NOT force the card. If the
Getting started
93
Summary of Contents for A series
Page 2: ......
Page 4: ......
Page 34: ...34 a Series c Series e Series installation instructions...
Page 102: ...102 a Series c Series e Series installation instructions...
Page 124: ...124 a Series c Series e Series installation instructions...
Page 138: ...138 a Series c Series e Series installation instructions...
Page 156: ...156 a Series c Series e Series installation instructions...
Page 157: ......
Page 158: ...www raymarine com...


