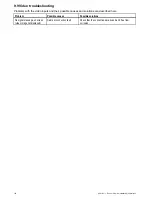
9.2 Power up troubleshooting
Problems at power up and their possible causes and solutions are described here.
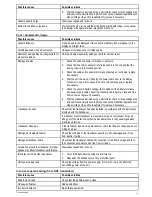
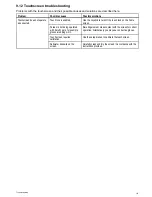
Product does not turn on or keeps turning off
Possible causes
Possible solutions
Blown fuse / tripped breaker
1.
Check condition of relevant fuses and breakers and connections, replace
if necessary (Refer to the
Technical Specification
section of your product’s
installation instructions for fuse ratings.)
2.
If fuse keeps blowing check for cable damage, broken connector pins or
incorrect wiring.
Poor / damaged / insecure power supply
cable / connections
1.
Check that the power cable connector is fully inserted into the unit and locked in
position.
2.
Check the power supply cable and connectors for signs of damage or corrosion,
replace if necessary.
3.
With the unit turned on, try flexing the power cable near to the display connector
to see if this causes the unit to re-boot/loose power, replace if necessary.
4.
Check the vessel’s battery voltage, the condition of the battery terminals and
power supply cables, ensuring connections are secure, clean and free from
corrosion, replace if necessary.
5.
With the product under load, using a multi-meter, check for high voltage drop
across all connectors/fuses etc, replace if necessary.
Incorrect power connection
The power supply may be wired incorrectly, ensure the installation instructions have
been followed.
Power source insufficient
With the product under load, using a multi-meter, check the power supply voltage as
close to the unit as possible to establish actual voltage when the current is flowing.
(Refer to the
Technical Specification
section of your product’s installation instructions
for power supply requirements.)
Product will not boot up (re-boot loop)
Possible causes
Possible solutions
Power supply and connection
See possible solutions from ‘Products does not turn on or keeps turning off’ above.
Software corruption
1.
In the unlikely event that the products software has become corrupted please
try re-flashing the latest software from the Raymarine website.
2.
On display products, as a last resort, you can try to perform a ‘Power on Reset’,
however this will delete all settings/presets and user data (such as waypoints
and tracks) and revert the unit back to factory defaults.
Performing a Power on Reset
Performing a ‘Power on Reset’ will delete all
settings/presets and user data (such as waypoints
and tracks) and revert the unit back to factory
defaults.
1. Power the unit off.
2. Power the unit back on.
3. When the
LightHouse
logo appears Press and
hold the
Power
button.
The Raymarine Initialization screen is displayed.
4.
Touch only displays:
i.
Press the
Power
button again to select ‘1 –
Reset to factory defaults’.
A 7 second countdown will begin. When the
countdown reaches zero the unit will be reset
to factory default settings.
ii. You can stop the reset process by pressing
the
Power
button again before the countdown
timer reaches zero.
This will select the second option: ‘2– Exit
and start the application’ and begin a new
countdown timer.
5.
Non-Touch and HybridTouch displays:
i.
Press the
WPT/MOB
button.
The unit will be reset to factory default
settings.
Troubleshooting
107
Summary of Contents for A series
Page 2: ......
Page 4: ......
Page 34: ...34 a Series c Series e Series installation instructions...
Page 102: ...102 a Series c Series e Series installation instructions...
Page 124: ...124 a Series c Series e Series installation instructions...
Page 138: ...138 a Series c Series e Series installation instructions...
Page 156: ...156 a Series c Series e Series installation instructions...
Page 157: ......
Page 158: ...www raymarine com...


