6.1 Switching the unit on and off
Powering the display on
1. Press the
POWER
button on the display.
2. Select
Accept
to acknowledge the disclaimer
message.
Powering the unit off
1. Press and hold the
Power
button for
approximately 6 seconds.
On display products a 3 second count-down timer
will be displayed.
To cancel the power off process, release the
power button before the unit powers off.
Note:
The unit will still draw a small amount of
power from the battery when powered off, if this
is a concern unplug the connector from the back
of the unit.
PowerSave mode
In PowerSave mode all functions of the multifunction
display remain active, but the unit is placed into
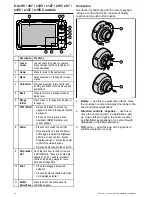
a low power state. The LED lights around the
Rotary controller will blink once every 1.5 seconds
to indicate that the unit is in PowerSave mode.
PowerSave mode is cancelled by pressing a physical
button or when an alarm event occurs.
Note:
To ensure user safety the PowerSave
feature will not be available if:
• any connected Radars are switched on
• the multifunction display is providing autopilot
control in a system without a dedicated pilot
head and the autopilot is engaged.
Attention
Leaving an
MFD
in PowerSave mode
will continue to consume some power from your
vessel’s batteries. The unit could drain your batteries
if left in PowerSave mode for prolonged periods of
time. When switching off the power to your vessel,
ensure that the unit is powered off using the power
button. For more information on the amount of power
consumed by the unit in PowerSave mode, refer to
the Technical specification section of your product’s
installation instructions.
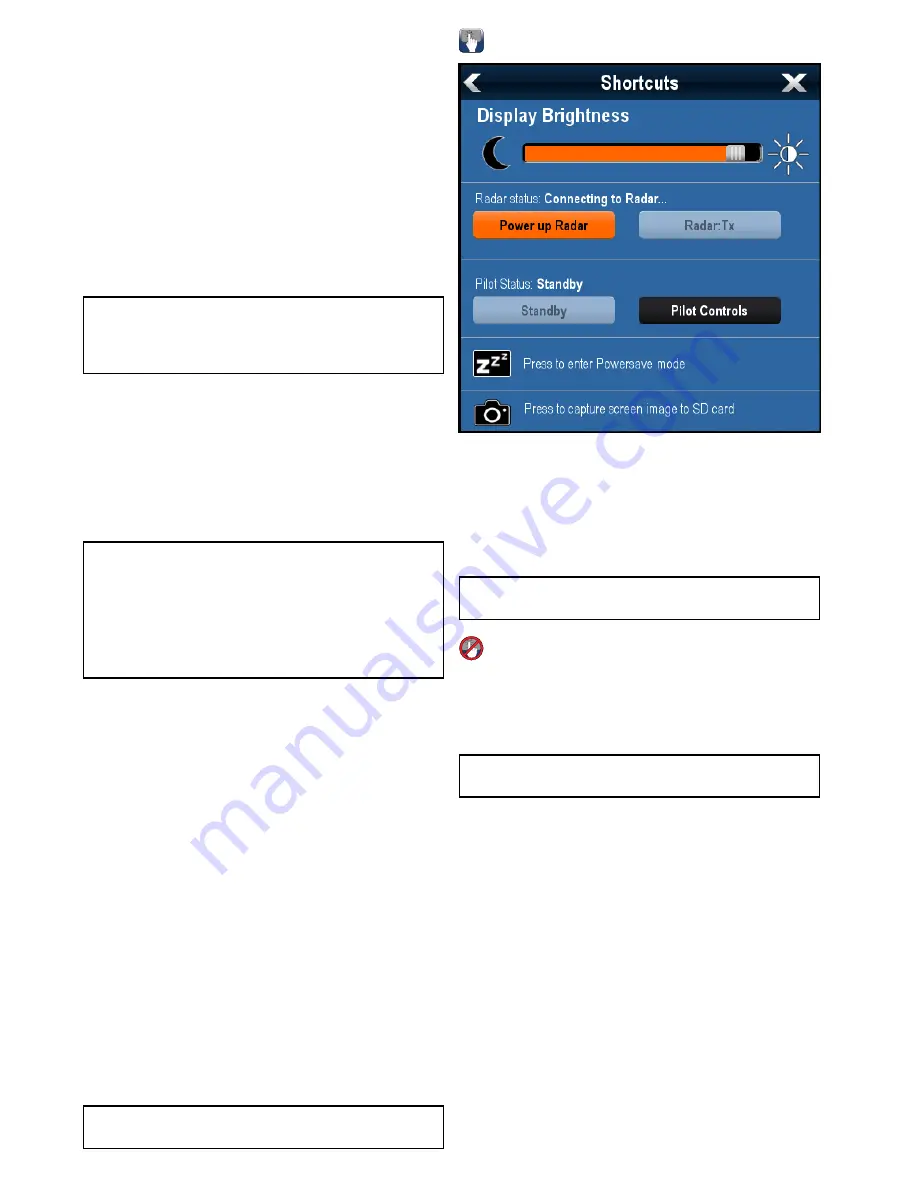
Enabling PowerSave mode
To enable PowerSave mode follow the steps below.
1. Ensure any radars connected to the system are
switched off.
2. Press the
POWER
button.
The shortcuts menu is displayed.
3. Select
PowerSave Mode
.
The multifunction displays is now in PowerSave
mode.
4. You can wake the unit from PowerSave mode
at anytime by pressing a physical button on the
multifunction display.
Note:
PowerSave mode is automatically cancelled
if an alarm event occurs.
Adjusting the display brightness
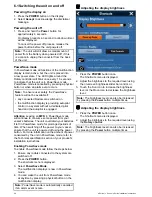
1. Press the
POWER
button once.
The Shortcuts menu is displayed.
2. Adjust the brightness to the required level using
the on-screen brightness slider bar control, or
3. Touch the Sun icon to increase the brightness
level or the Moon icon to decrease the brightness
level.
Note:
The brightness level can also be increased
by pressing the
Power
button multiple times.
Adjusting the display brightness
1. Press the
POWER
button once.
The Shortcuts menu is displayed.
2. Adjust the brightness to the required level using
the
Rotary control
.
Note:
The brightness level can also be increased
by pressing the
Power
button multiple times.
68
a Series / c Series / e Series installation instructions
Summary of Contents for A series
Page 2: ......
Page 4: ......
Page 34: ...34 a Series c Series e Series installation instructions...
Page 102: ...102 a Series c Series e Series installation instructions...
Page 124: ...124 a Series c Series e Series installation instructions...
Page 138: ...138 a Series c Series e Series installation instructions...
Page 156: ...156 a Series c Series e Series installation instructions...
Page 157: ......
Page 158: ...www raymarine com...


