22 P
ARAGON
II
/
C
OMMAND
C
ENTER
I
NTEGRATION
S
OLUTIONS
D
EPLOYMENT
G
UIDE
2.
Press the letter <
B
> on the Local Admin Console keyboard to begin the UST-IP Setup
Wizard.
3.
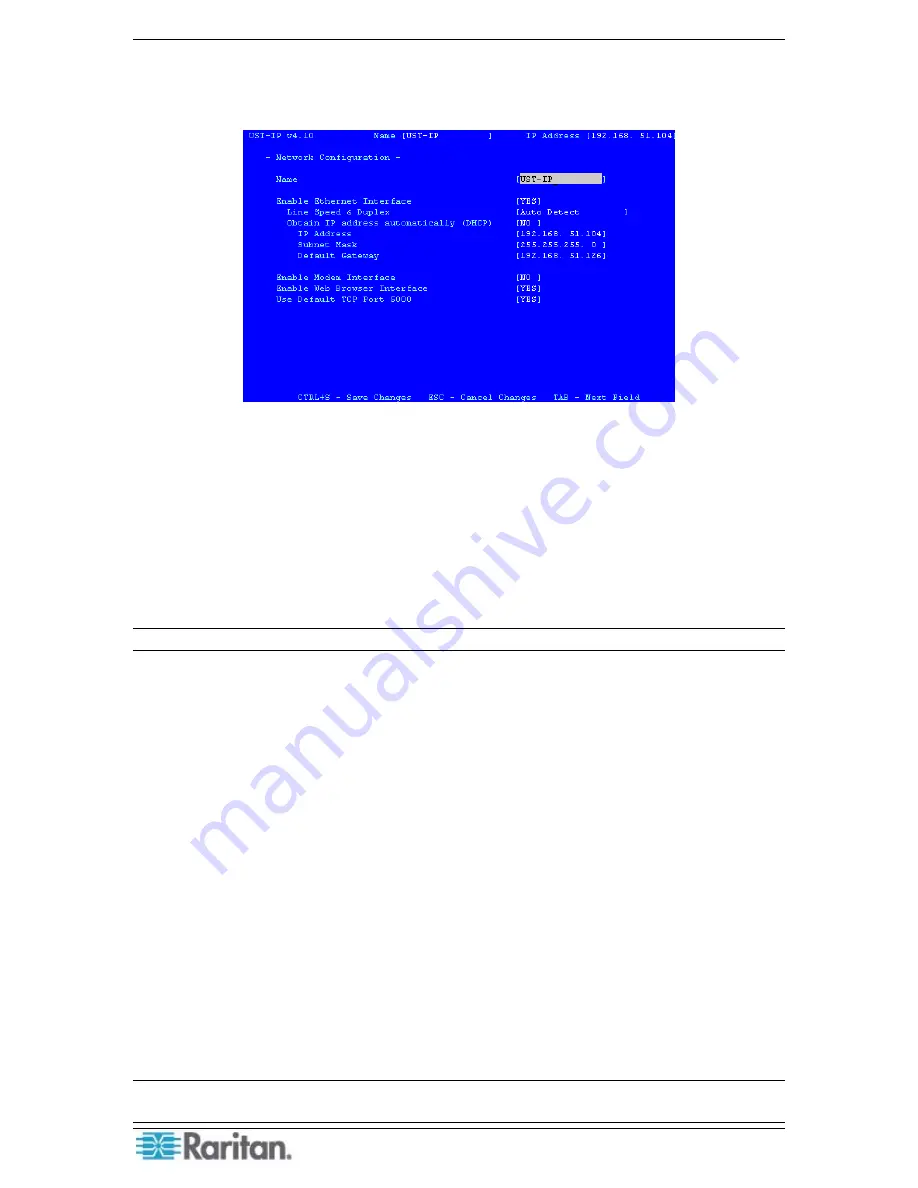
The Network Configuration Screen appears.
Figure 18 UST-IP Network Configuration
4.
Use the <
Tab
>, <
↑
> or <
↓
> keys to select each line on the Network Configuration screen
and the <
space bar
>, or the <
←
> or <
→
> keys to toggle between available entries. Press the
<
Enter
>, <
Tab
> or <
↓
> keys when your entry on each line is complete. Below are
descriptions of each field, and the appropriate values to assign.
A.
Name
: Designate a unique name for this UST-IP unit, for example, “MiamiDataCenter.”
(NOTE: no spaces; alphanumeric characters allowed) The default name is
UST-IP
.
B.
Enable Ethernet Interface
: Designates whether UST-IP should enable its Ethernet
adapter as active (default: YES).
Note: Network connections must be 10BASE-T or 100BASE-TX Ethernet
i.
Line Speed & Duplex:
Auto detect 10 Mbps/Full Duplex, 10 Mbps/Half Duplex,
100 Mbps/Full Duplex, or 100 Mbps/Half Duplex
ii.
Obtain IP address automatically (DHCP)
:
♦
YES:
Enables dynamic IP addressing for UST-IP. Each time UST-IP boots, it requests an
IP address from the local DHCP server. Note that this setting can make remote access to
UST-IP from outside the LAN difficult, since the dynamically assigned IP address must
be known in order to initiate a connection.
♦
NO (default)
: Assigns a fixed IP address to the UST-IP unit (recommended).
d.
IP Address
: Enter the IP address for UST-IP given by your Network
Administrator.
e.
Subnet Mask
: Enter a Subnet Mask provided by your Network
Administrator.
f.
Default Gateway
: Enter the Default Gateway if your Network Administrator
specifies one.
C.
Enable Modem Interface
: Enables Dial-up Modem access (default: YES). For UST-IP,
an external serial modem must be connected in order for this function to work properly.
D.
Enable Web Browser Interface
: Enables Web browser access to UST-IP (default: YES).
E.
Use Default TCP Port 5000:
i.
YES:
(default): Utilizes the default port 5000.
ii.
NO:
Enter an alternate port number.
Note: In order to access UST-IP from beyond a firewall, your firewall settings must enable two-
way communication through the default port 5000 or the non-default port configured above.
Summary of Contents for Paragon II
Page 4: ......
Page 8: ......
Page 12: ...4 PARAGON II COMMANDCENTER INTEGRATION SOLUTIONS DEPLOYMENT GUIDE...
Page 22: ......
Page 32: ......
Page 36: ...28 PARAGON II COMMANDCENTER INTEGRATION SOLUTIONS DEPLOYMENT GUIDE...
Page 40: ......
Page 50: ...42 PARAGON II COMMANDCENTER INTEGRATION SOLUTIONS DEPLOYMENT GUIDE...
Page 53: ...APPENDIX A P2SC COMPATIBILITY LIST 45...
Page 60: ......
Page 63: ......


