


4. Be sure that a proper tool bit is secure in the boring bar
and the cutting tip is not excessively worn. Sharp cutting
tips must be used at all times. A dull cutter will affect the
finish of both drums and rotors. If the cutting edge is
damaged, replace it promptly. Be sure no metal chips are
under tip when changing tips.
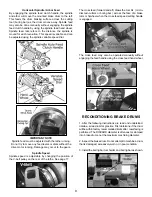
5. Mount the drum on the arbor using the proper adapters,
cones, and spacers.
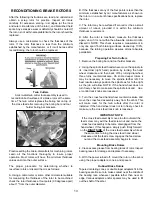
Mounting Hubbed Brake Drums
Tapered centering cones or double taper adapters fit in the
bearing seats. Be sure to make contact as close as possible to
the middle of the bearing race as possible. Various adapters
and/or spacers may be used to fill out the shaft of the arbor.
Mounting Hubless Brake Drums
Select the largest hubless adapter possible that will fit inside
the drum against the flat lug hole surface. Be sure to
straddle the bolt holes to avoid mounting against a burr, or
remove the burrs with a grinding stone before mounting.
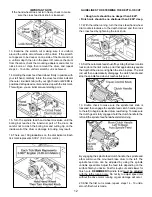
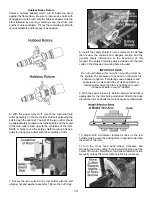
Slip the hubless adapter onto the arbor followed by a spring,
centering cone, the drum, and another similar size hubless
adapter. The centering cone will fit into the center hole of the
drum from the inside to center the drum on the arbor. Fill out
the remaining shaft with various adapters and/or spacers
as needed.
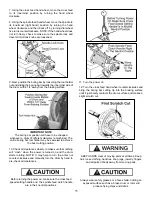
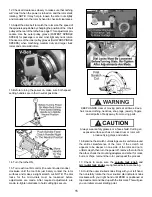
IMPORTANT NOTE
The arbor nut has
REVERSE THREADS
. Tighten by
turning the arbor nut
COUNTER-CLOCKWISE.
IMPORTANT NOTE
The self-aligning spacer should always be used next to
the arbor nut when tightening. To avoid overtightening,
wrench turn the arbor nut counterclockwise until the
drum and adapters become fixed snug on the arbor and
so that you are unable to freely turn them. Then continue
to advance the wrench 1/4 of a turn only. DO NOT
overtighten the arbor nut.
Handle Adapters With Care
The adapters, arbor, and spindle are made
of top grade steel, hardened, and precision ground to
close tolerances. Great care should be taken in their use,
handling, and storage. The smallest nick or scratch can
cause incorrect drum or rotor alignment resulting in
inaccurate resurfacing.
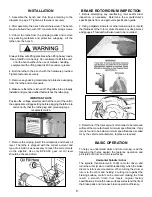
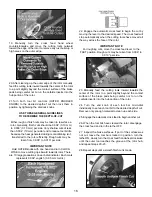
6. Wrap a drum silencing band snugly around the drum.
Be sure it is positioned towards the right-hand edge or
nearest the open side of the drum.
IMPORTANT
- Failure
to use a silencing band will cause premature wear of tool
cutters and result in a poor finish cut.
10


