© 2011 Racktivity NV
21/52
Antwerpsesteenweg 19 - 9080 Lochristi - Belgium - www.racktivity.com
v 2014.3.27
8.
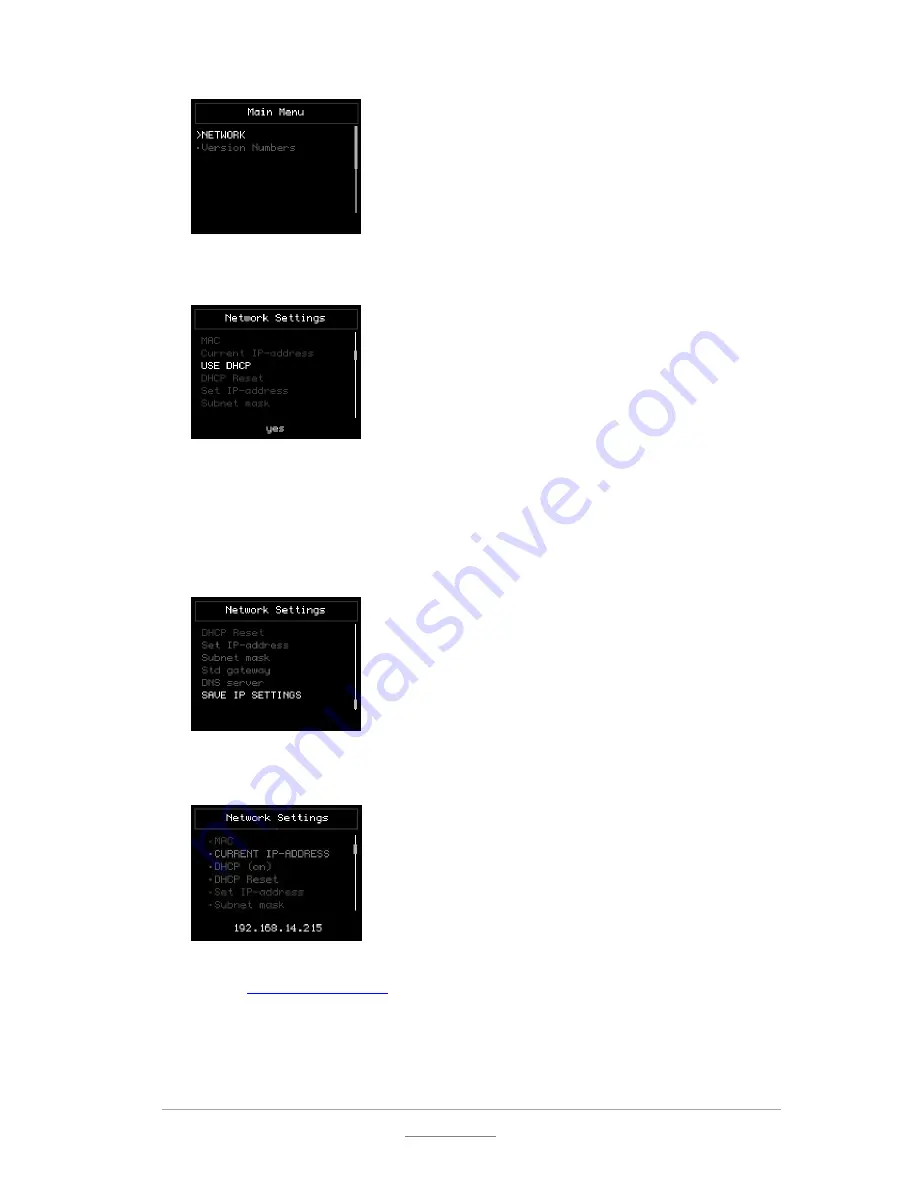
Within the
NETWORK
menu, select
Use DHCP
. When the value in yellow at the bottom of the
screen shows
yes
, the device already has dynamic IP assignment enabled; if not, press
OK
.
9.
Use the
UP
and
DOWN
buttons to change the setting. Select
yes
and press
MENU
to confirm
and return to the
NETWORK
menu.
10.
Use the
UP
and
DOWN
buttons to select
Save IP Settings
and press
OK.
Use the
UP
and
DOWN
buttons to change the setting. Select
yes
and press
MENU
to save and return to the
NETWORK
menu.
11.
Press
UP
to select
CURRENT IP-ADDRESS
. The assigned IP-address is shown in yellow at the
bottom of the TFT.
12.
On a computer in the same network, use a browser to open the assigned IP-address, for
example
http://192.168.14.250
13.
When surfing to the web portal, a login screen appears. The default user name is
admin
and
the default password is
1234
Summary of Contents for ES2000 Seriesl
Page 1: ...User Manual ES2000 Series ES6000 Series EnergySwitch ...
Page 52: ......


