background image

QuadroE1/T1 Manual I: Installation Guide 

Configuring the Quadro E1/T1 


QuadroE1/T1;  (SW Version 3.2.x) 

30 

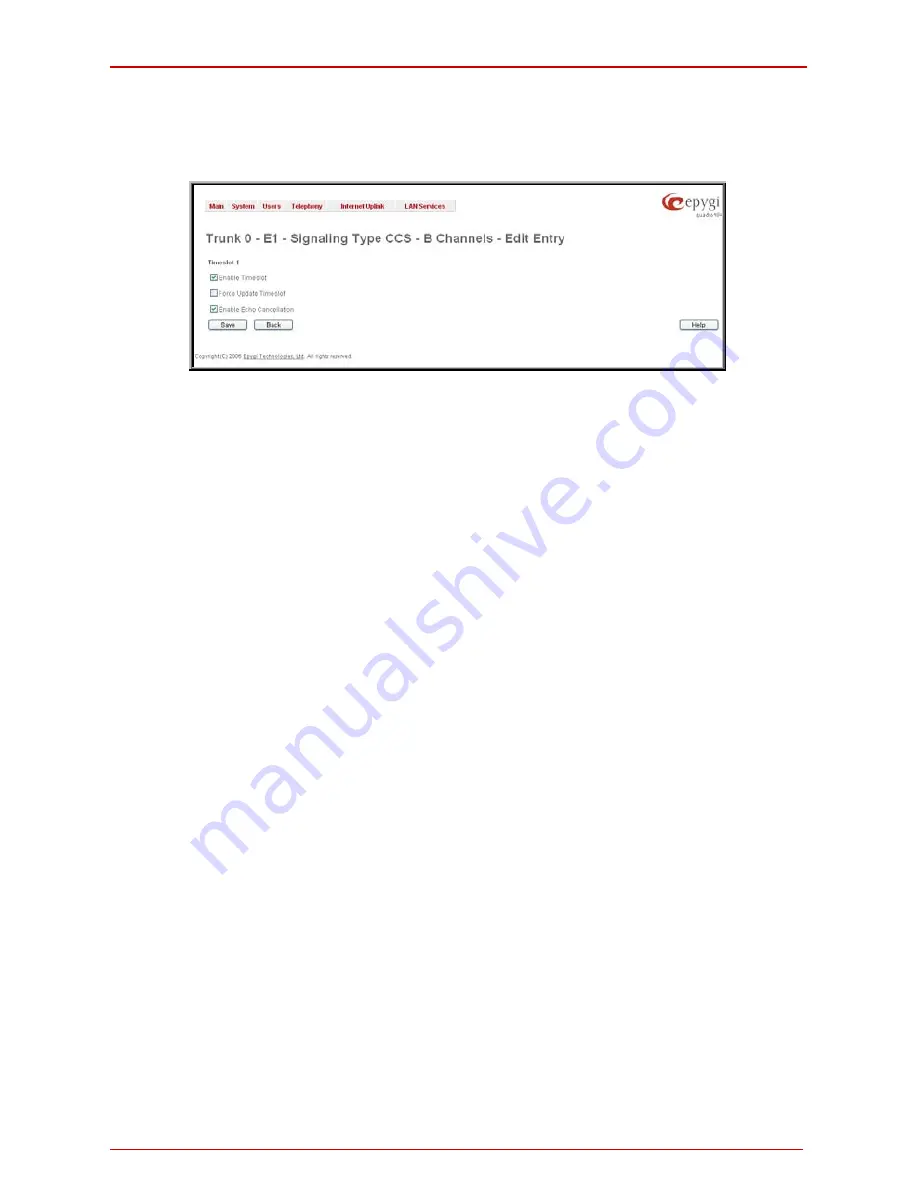
Edit will display the first page of the CAS signaling Wizard page (see below) where the sig-
naling settings for the selected timeslots may be enabled or disabled and the Force Update 
Timeslot
 service may be enabled to apply new settings immediately. This will force the 
timeslot(s) to be restarted and any active connection on the selected timeslot(s) will be inter-
rupted. 


Fig. I-26: Trunk T1 Signaling Type CCS - B-Channels Edit page  


Summary of Contents for QuadroE1/T1

Page 1: ......

Page 2: ... 850 Plano Texas 75024 Notice to Users This Installation Guide in whole or in part may not be reproduced translated or reduced to any machine readable form without prior written approval Epygi provides no warranty with regard to this Installation Guide or other information contained herein and hereby expressly disclaims any implied warranties of merchantability or fitness for any particular purpos...

Page 3: ...oes not disable your alarm equipment If you have any questions about what will disable alarm equipment consult your telephone company or a qualified installer Electrical Safety Advisory To reduce the risk of damaging power surges we recommend you install a 1 T1 is powered from which the QuadroE Industry Canada Statement Th pr is oduct meets the applicable Industry Canada technical specifications a...

Page 4: ...ion Wizard 16 Run the Internet Configuration Wizard 17 Uplink Configuration 18 WAN IP Configuration 18 PPP PPTP Configuration 19 WAN Interface Configuration 20 DNS Settings 21 Finishing the Internet Configuration Wizard 21 Configuring the Firewall 23 Configuring the E1 T1 Settings 24 Editing the E1 T1 Trunk 25 Signaling Type CCS 26 Signaling Type CAS 31 Setting up Call Routing 37 Registering on Ep...

Page 5: ...integrate the Quadro into a network environment and to setup the voice features The chapter in cludes information about the System and Internet Configuration Wizards to integrate the QuadroE1 T1 in your network environment about the basic E1 T1 settings and about the basic setting up of the call routing functionality Please Note The Quadro configuration described in this Installation Guide describ...

Page 6: ...connector to connect to the QuadroE1 T1 LAN port One PC with a 10Mbps or a 10 100 Mbit s Ethernet card or adapter installed TCP IP network protocol installed on each PC For optimal results Internet Explorer 5 5 or higher or Netscape Navigator 4 7 or higher are recommended Please Note The QuadroE1 T1 is shipped with one RJ 11 cable and one straight RJ 45 CAT 5 cable If the LAN connector of the Quad...

Page 7: ... router or switch is used a crossover cable may be required 4 RJ 45 socket to attach the Internet Uplink WAN via an Ethernet CAT 5 cable 5 RJ 45 socket to attach the E1 T1 trunk See Appendix Pin Assignment of E1 T1 6 The Reset button may be used in two ways 1 to initiate a normal reset 2 to carry out a factory reset A normal reset is executed by pressing the Reset button with a pa per clip for an ...

Page 8: ...f no link flickering traffic on the link 7 Line1 green Status of the E1 T1 link on frame synchronization is ok off frame synchronization is not ok flickering link is down 8 Line2 green Status of the E1 T1 link on Link ok off RED alarm indication flickering link is down LED Indication during a firmware update A firmware update is indicated by the red Fault and yellow Info LED Both will blink si mul...

Page 9: ... and the LAN port transmits at 10 Mbps or 100 Mbps Fig I 3 Connection overview Every device within an IP network requires a unique IP address to identify itself Since the QuadroE1 T1 connects to both the LAN Admin PC and the WAN Private Data Network or Internet it has to be part of both networks and must have two IP addresses one for the WAN side and one for the LAN side The QuadroE1 T1 s integrat...

Page 10: ...e modem power up the modem before the Quadro Connect the power adapter to the POWER port on the QuadroE1 T1 s rear panel and plug the power adapter into a power outlet Only use the original power adapter and plug it into a power strip with surge protection or to a UPS if available The red LED Fault will glow for several seconds followed by the yellow LED Info which w tional Power up any hub or swi...

Page 11: ... use a DHCP server please config ure it to deliver a static IP address In this case QuadroE1 T1 will get its IP address automatically as it acts as a DHCP client on the WAN side Bandwidth used to regulate the number of calls allowed by the QuadroE1 T1 to avoid degradation in low bandwidth conditions Regional Settings if your QuadroE1 T1 is located outside the United States it is important to prope...

Page 12: ...t LAN IP address into the address field The Login page of the QuadroE1 T1 will be displayed see picture below Fig I 5 QuadroE1 T1 s login page Enter admin as the Username and 19 as the Password to log in as the administrator After logging in the QuadroE1 T1 Management page will be displayed Please Note If you enter a wrong password and or username five times the device will be unavailable for logi...

Page 13: ... for the administrator to configure the WAN settings and to adjust Quadro s connectivity in the global network It must be run if Quadro is desired to be connected to the Internet Please Note It is strongly recommended that factory default settings are left unchanged if their meanings are not completely clear Run the System Configuration Wizard Open the System Configuration Wizard by selecting the ...

Page 14: ...sting LAN insert the new LAN IP address into the IP Address text field and have it handy You need it to re access Quadro management Fig I 8 System Configuration page Clicking on Next shows the page DHCP Settings for the LAN Interface DHCP Settings for the LAN Interface If the DHCP server is enabled the QuadroE1 T1 will assign dynamic IP addresses to the Admin PC connected to its LAN port If you di...

Page 15: ...em The Regional Settings determine the proper telephony parameters for the specified country Select the country where the QuadroE1 T1 is located If you do not find your coun try in the list pick the closest If this setting does not work issue a request to Epygi technical support under the Support section of www epygi com The Quadro gets the correct time automatically over the Internet from a time ...

Page 16: ...on Wizard finishing page Click the Finish button to complete the System Configuration Wizard The Quadro will then stop internal functions and apply the changes made in the wizard Fig I 12 Wizard execution process After this is complete the Quadro will reply with the Confirm Settings page requesting con firmation of the changes Press the OK button to confirm the settings ...

Page 17: ...C might be unable to establish a connection to Quadro If you changed the network configuration of the LAN you may have to reboot your PC to get a new IP address from the new network You can then access the Web Management of the Quadro on the new IP address you assigned to the Quadro Run the Internet Configuration Wizard Open the Internet Configuration Wizard by selecting the corresponding menu ite...

Page 18: ...eserved for data applications The value entered here needs to be smaller that the value specified for Up stream Bandwidth Specify the WAN Interface Protocol by choosing between available WAN interface proto cols PPPoE Point to Point over Ethernet PPTP Point to Point Tunneling Protocol and Ethernet Use Ethernet for DHCP or static IP For Ethernet clicking Next will display the WAN IP Configuration p...

Page 19: ...and the Password used for the authentica tion on the ISP server Dial Behavior radio buttons Dial Manually if this radio button is activated a button will be displayed in the main management window that serves to switch the Internet connection on off When ac cessing the Internet every station of the connected LAN has to connect to Quadro first Always connected Quadro stays in the always connected m...

Page 20: ...by sending control packets dedicated for the link state verification Click the Next button to display the WAN Interface Configuration page WAN Interface Configuration If your ISP requires a specific MAC address e g for authentication it can be entered on this page The required MAC address can be entered into the User defined field If a spe cific MAC address is not required leave the default select...

Page 21: ...ally whenever a connection to the Internet is estab lished If Fixed Nameserver Address is selected manually enter the IP addresses provided by your ISP for the name server and the alternative name server Clicking Next shows the summary page of the Internet Configuration Wizard Finishing the Internet Configuration Wizard Fig I 20 Internet Configuration Wizard Summary page Click the Finish button to...

Page 22: ...able to establish a connection to QuadroE1 T1 If you changed the network configuration of the LAN you may have to reboot your PC to get a new IP address from the new network You can then access the Web Management of the QuadroE1 T1 on the new IP address you assigned to the QuadroE1 T1 Your QuadroE1 T1 is now configured If your QuadroE1 T1 has direct connectivity to the Internet you may verify the ...

Page 23: ... configuration and specify the E1IT1 Settings Configuring the Firewall The configuration of the firewall is only required if the Quadro is managed through the WAN port To configure the firewall open Firewall Configuration from the Security menu select Fil tering Rules and configure the rule Management Access accordingly Fig I 21 Filtering Rules page ...

Page 24: ...ge Trunk Settings that is displayed when you select E1 T1 Settings from the Telephony menu Fig I 22 E1 T1 Trunk Settings page The Trunk Settings page is used to configure the E1 T1 trunk and timeslots settings The table lists the available E1 T1 trunks of Quadro and their settings Trunk name E1 T1 mode interface and signaling type Clicking on the trunk will open its Signaling Settings page Trunk C...

Page 25: ...priate parameters should be requested from the service provider or in case of connect ing to a PBX according to the settings in the PBX manual CAS signaling allows using the same timeslot both for voice and data transmission CCS signaling uses a single timeslot for signaling data transmission for the whole trunk all other timeslots are used for voice transmission E1 the European system enables 30 ...

Page 26: ...l be established on the first available TEI while in non automatic mode a specific TEI may be reserved for the connection In this case both call partners need to specify the same TEI in their settings In the Network Mode PBX connected you need to specify the same TEI address on both sides Quadro and PBX if the Non Automat mode is selected If the Automat mode is se lected the user on the PBX side m...

Page 27: ... where available timeslots may be enabled or disabled for the voice transfer The Force Update option can be optionally used to apply new settings immediately This will force the timeslot s to be restarted and any active connection on the selected timeslot s will be interrupted The Restart option can be used to bring timeslot s to the initial idle state on the both sides Note that when applying one...

Page 28: ...either the timeout defined in the T302 field or the Sending Complete Information Element messages to es tablish a call Independent from the value in this field Sending Complete Information Ele ment and pound sign always cause call establishment The Generate Progress tone on IP checkbox selection will generate the progress tone to IP H 323 or SIP Select the Generate Progress Tone to PSTN PBX checkb...

Page 29: ...used for the call request Channel Selection Ordering drop down list is used to choose the B channels selection Ascending or Descending When Ascending selection is configured B channels will be defined starting from B1 to B23 B30 For Descending selection B channels will be defined from B23 30 to B1 If your CO PBX has Ascending B channels selection configured it is recommended to use Descending B ch...

Page 30: ...page see below where the sig naling settings for the selected timeslots may be enabled or disabled and the Force Update Timeslot service may be enabled to apply new settings immediately This will force the timeslot s to be restarted and any active connection on the selected timeslot s will be inter rupted Fig I 26 Trunk T1 Signaling Type CCS B Channels Edit page ...

Page 31: ... Incoming Interdigit Ser vice is used to configure E1 T1 dial plan for the incoming calls from CO PBX to the Quadro This service allows you to speed up the call establishment procedure by detecting the prefix The calls will be speed up by the timeout defined in the Incoming Digits Timeout text field see below Consult with your CO before making changes in the E1 T1 dial plan In the Incoming Digits ...

Page 32: ...timeslot s In User mode the Quadro cannot route incoming calls from the E1 T1 trunk to extensions if the timeslot in the trunk does not have DID service enabled Incoming call routing takes place according to the received caller ID If the DID service is enabled on some timeslot s an incoming call on these timeslots may be routed to the specified extension the Attendant or the routing client dependi...

Page 33: ... only for R2 compelled and non compelled both with and without ANI signaling types Force Update Timeslots checkbox can be optionally selected in order to apply new settings immediately This will force the timeslot s to be restarted and any active connection on the selected timeslot s will be interrupted Please Note Quadro does not support the Forward Digit selected on the CO when acting in the Use...

Page 34: ...ignaling Wizard Fig I 30 CAS Signaling Wizard page 3 From this page the destination for incoming calls to be routed to can be selected and other routing settings might be configured Route Incoming Call to drop down appears when Both incoming and outgoing calls or Incoming calls only is selected from the Allowed Call Type list and allows selecting the destination where incoming calls should be rout...

Page 35: ...ss Through Pound Sign checkbox is only available when signaling selected from the Signaling Type drop down list on the CAS Signaling Wizard Page 2 is different from E M FGD or R2 except for R2 DTMF When this checkbox is selected the pound sign detected in the dialed number will be passed through and will be considered as a part of the dialed number When this checkbox is not selected the detected p...

Page 36: ...Transmit and ANI Request Receive drop down lists allow to select the Caller ID request R2 tones for transmit and receive Seize Acknowledge Timeout text field is used to define a timeout in a range from 2 to 2000 milliseconds between incoming seize signal and the corresponding feedback Answer Guard Timeout text field is used to define a wait timeout in a range from 0 to 1000 milliseconds Group B An...

Page 37: ... enabled on the PBX Group B Support manipulation radio button group is present only when R2 signaling se lected from Signaling Type drop down list on the previous page is different from R2 DTMF and is used to enable disable the Group B Support The Group B Support manipulation radio button group offers following selection Enable selection enables Group B Support both answer and busy recognitions ar...

Page 38: ...xample we will assume you have the phone number set 854603 30 to 854603 59 and you assigned the numbers as follows Quadro 2x IP 10 20 30 10 Quadro4x IP 10 20 30 20 QuadroE1 T1 IP 10 20 30 30 Auto Attendant 854603 30 Auto Attendant 854603 40 Extension 1 854603 50 Extension 1 854603 31 Extension 1 854603 41 Extension 2 854603 32 Extension 2 854603 42 Extension 3 854603 43 Extension 4 854603 44 Auto ...

Page 39: ...leph ony menu and select Local Routing Table The Call Routing Local Routing page will be displayed it is a wide table thus it is shown here in two parts Fig I 35 Call Routing Local Routing page Before you can start defining the local call routing paths you have to select Add to define the first call routing path that leads the incoming PSTN calls 854603 30 31 and 32 to the Quadro2x ...

Page 40: ...f Discarded Symbols NDS specifies the number of digits that that should be discarded from the beginning of the routing pattern In this example no digits have to be dis carded so leave that field empty Prefix specifies digits that will be inserted at the beginning of the routing pattern Leave the field empty if no digits need to be added Suffix specifies digits that will be inserted at the end of t...

Page 41: ...time period during which the route shall be valid For this purpose and own page is displayed as the third page of the Local Call Routing Wiz ard Next will display the second page of the Local Routing Wizard Fig I 37 Local Call Routing Wizard Routing Call Settings Add Entry page 2 Use Extension Settings is applicable to SIP and IP PSTN call types only and allows to se lect the extension also Auto A...

Page 42: ...equired selection is used to choose one or more Authentication Authorization and Accounting AAA settings Local Authentication with this checkbox selected callers will need to pass au thentication through Local AAA table see below when dialing the current pattern RADIUS Authentication and Authorization checkbox is present when RA DIUS client is enabled With this checkbox selected when dialing the c...

Page 43: ...r replaced depending on the configuration of the SIP server before being sent to the destination If the Set Date Time Period s checkbox has been checked on the first page of the Local Call Routing Wizard the following page is displayed to specify one ore more time periods during which the path shall be valid Fig I 38 Call Routing Wizard Date Time Rules Add Entry page The last page of the Local Cal...

Page 44: ...X path to AA for not used num bers 3 8546034 5 9 8 00 PBX path to AA for not used num bers 4 8546035 1 9 8 00 PBX path to AA for not used num bers 5 E1 T1 path for all outgoing calls to PSTN Quadro2x Pattern Call Type Destination Address Description 89546034 0 4 SIP 10 20 30 20 path to Quadro4x SIP 10 20 30 30 path for all outgoing calls via QuadroE1 T1 to PSTN Quadro4x Pattern Call Type Destinati...

Page 45: ...s Technical Support web page gives you the user name and password to login to the Epygi SIP Server To register you need to know the serial number of your QuadroE1 T1 which you will find on QuadroE1 T1 s bottom label and its purchase date Next open the Epygi home page www epygi com select Support and click on Registration Form The online registration page will appear Complete all fields and record ...

Page 46: ...n simply power it on Verify the LAN LED is lit If not check the cable connections Follow the instructions below to install TCP IP and enable DHCP functionality TCP IP and DHCP under Windows 2000 Windows XP Windows 2000 and Windows XP PCs with Ethernet cards or adapters normally are config ured with a TCP IP network connection by default Nothing additional needs to be installed To enable the DHCP f...

Page 47: ...ick on the Network icon to open your Network window Select the Con figuration tab 3 Click Add 4 Double click on Protocol 5 Highlight Microsoft under the list of manufacturers 6 Find and double click on TCP IP in the list to the right 7 The Network window will appear with the TCP IP protocol now listed 8 Highlight TCP IP and click on Properties 9 Select Getting IP address automatically to enable th...

Page 48: ...ssword functional button from the User Right Management page toolbar The Change Password page will be displayed Fig I 41 Change Password page Enter the Old Password 19 and the New Password in both the New Password and Con firm New Password fields Please note that only numeric digits may be entered here Leave Store password in persistent area Factory reset save disabled Write down the password some...

Page 49: ...NAT Traversal Setup Install the QuadroE1 T1 behind the router If the QuadroE1 T1 is configured with its factory default settings it is already configured for DHCP and will obtain an IP address automatically from the router If the DHCP was changed please Run the System Con figuration Wizard to place the QuadroE1 T1 in DHCP mode Power up the QuadroE1 T1 Connect a PC or laptop to the QuadroE1 T1 LAN ...

Page 50: ...For Max mapped RTP RTCP port 6059 Click the Save button to save the contents The QuadroE1 T1 will activate the settings and register the extension on the Epygi SIP Server after a few minutes You can verify the settings from the main QuadroE1 T1 Man agement menu under Status in the SIP Registration Status section ...

Page 51: ...test the output of the system looks as follows Basic Tests Checking for physical link WAN link ok Checking IP configuration dynamically via DHCP Client DHCP Client is running Checking internet connectivity ICMP ping Gateway reached Primary nameserver reached Secondary nameserver not configured www epygi com reached STUN Network Address Translation NAT Check External visibible address 212 126 210 1...

Page 52: ... you are using the STUN functionality the page shown above will additionally display the Detected Connection Type Unsupported Connection types will cause one of the following messages Unknown connection unexpected error Symmetric NAT Symmetric Firewall Blocked UDP If the Detected Connection Type is any of the types listed above QuadroE1 T1 cannot work behind your router You must either connect the...

Page 53: ...I Installation Guide Appendix Pin Assignment of E1 T1 QuadroE1 T1 SW Version 3 2 x 53 Appendix Pin Assignment of E1 T1 Pin Signal 1 RXRING 2 RXTIP 3 N C 4 TXRING 5 TXTIP 6 N C 7 N C 8 N C Fig I 44 Pin Assignment of E1 T1 ...

Page 54: ...QuadroE1 T1 Manual I Installation Guide Appendix Pin Assignment of E1 T1 QuadroE1 T1 SW Version 3 2 x 54 QIG QUADRO 02 30 ...

Reviews: