Page 38
7014-188L
September 24, 2015
R
1200-I Pellet Insert
15. Soot and Fly Ash: Formation & Need for Removal
in Exhaust Venting System.
• Frequency:
Yearly or more frequently depending on
ash build-up.
• By:
Qualifi ed Service Technician/Homeowner
Be sure the appliance is allowed to cool, has been unplugged
and the exhaust blower is off.
The products of combustion will contain small particles of fl y
ash. The fl y ash will collect in the exhaust venting system
and restrict the fl ow of the fl ue gases.
At start-up if there is incomplete combustion, or if there is a
shutdown or incorrect operation of the appliance it will lead
to some soot formation. This will collect in the exhaust vent-
ing system.
The venting system may need to be cleaned at least once a
year or more often depending upon the quality of your fuel
or if there is a lot of horizontal pipe sections. Ash will build
up more quickly in the horizontal sections.
13. Cleaning Exhaust Blower - Requires No Lubrication
• Frequency:
Yearly or as needed
• By:
Quality Service Technician/Homeowner
• Task:
:
Contact your local dealer.
14. Cleaning Convection Blower - Requires No
Lubrication
• Frequency:
Yearly or as needed
• By:
Qualifi ed Service Technician
•
Task: Contact your local dealer.
12. Door Gasket Inspection
• Frequency:
Prior to heating season
• By:
Homeowner
a.
Be sure the appliance is allowed to cool, has been
unplugged and the exhaust blower is off
b. To inspect the door rope (gasket), open the door and
see that the door rope extends approximately 1/8 inch
(3mm) to 3/16 inch (9.5mm) from the door rope channel.
c. It should show signs of compaction all the way around
the door where the rope contacts the face of the appli-
ance. Confi rm there are no air leaks.
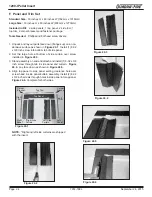
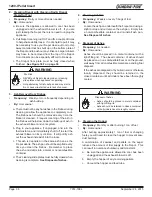
Left & Right Access Covers
Remove Screws
Exposed Heat Exchanger Tubes
Drop Tube
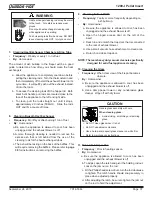
Figure 38.1 - Baffl e Removed
18. Vacuum Heat Exchanger Tubes, Firebox Area and
Drop Tube
1. Use a Shop Vac to vacuum any fl y ash and soot from the
heat exchanger tubes and fi rebox area.
Figure 38.1
2. Remove any debris that may be in the drop tube.
16. Preparing Firebox for Non-Burn Season
• Frequency:
Yearly
• By:
Homeowner
a. Be sure the appliance is allowed to cool, has been
unplugged and the exhaust blower is off.
b.
Remove all ash from the fi rebox and vacuum thoroughly.
c. Paint all exposed steel, including cast-iron.
• Use the Touch-Up paint supplied with the appliance;
or,
• Purchase paint from your local dealer.
• Must use a high-temperature paint made specifi -
cally for heating appliances.
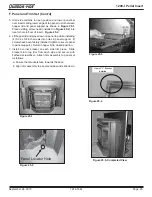
17. Remove Baffl e to Access Heat Exchanger Tubes
and Firebox Exhaust Exits
1. Open the right side access door and then open the glass
door.
2. Grasp the bottom of the baffl es and pull up to dislodge
from hook attachment.
3. Use a standard screw driver to unlatch the covers beneath
the baffl es of each side.
4. Re-install in reverse order.
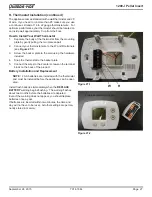
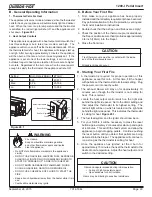
Exhaust Blower
Left Access Cover
Figure 38.2
Summary of Contents for PELLET INSERT CB1200MI-MBK
Page 52: ...Page 52 7014 188L September 24 2015 R 1200 I Pellet Insert F Warranty Policy ...
Page 53: ...R September 24 2015 7014 188L Page 53 1200 I Pellet Insert ...
Page 54: ...Page 54 7014 188L September 24 2015 R 1200 I Pellet Insert ...
Page 55: ...R September 24 2015 7014 188L Page 55 1200 I Pellet Insert ...

