


Page 4 of 16 ft8_II_assy_smd_diode_072020.pdf
Assembly:
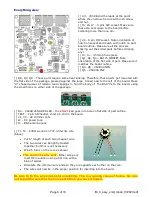
The first step is to sort the parts into groups of similar types. This will make finding the needed
part type and value quicker.
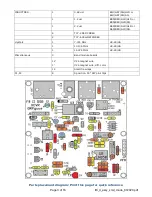
All components mount on the front side of the pcb.
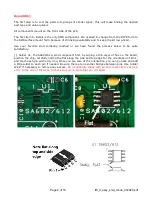
The first item to install is the only SMD component. We needed to change from the DIP8 form to
the SO8 surface mount form because of shrinking availability and to keep the kit low priced.
Use your favorite smd soldering method or we have found the process below to be quite
satisfactory.
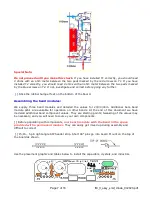
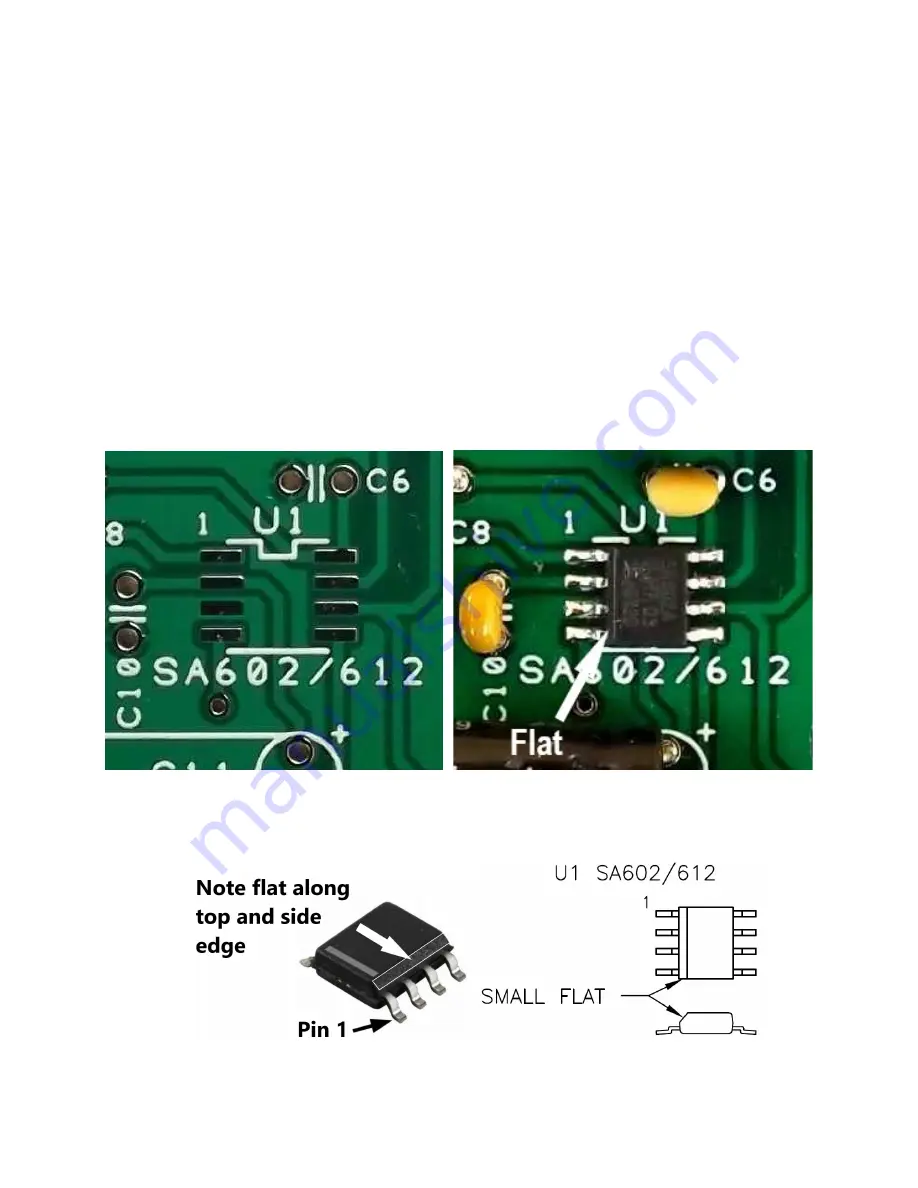
[ ] Solder U1, the SA602/612, smd component first, by wiping a thin layer of flux on the board,
position the chip, carefully noting the flat along the side and top edge for the orientation of Pin 1,
and touch each pin with a dry iron. Once you are sure of the orientation, you can go back and add
a little solder to each pin if needed. Be sure there are no solder bridges between pins. Use Solder
Wick
®
if necessary to remove any excess.
Do a continuity check with an ohm meter from each pin
of U1 to the end of the trace to check your work. Note that pin 3 is GND.