background image

3 – Managing Fabrics
Zoning a Fabric

3-50

59097-01 A

0

4.

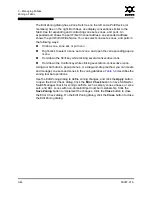
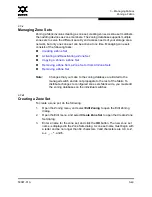
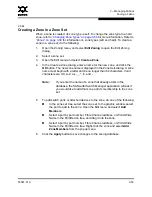
To create new zones in a zone set, do one of the following:

„

Right-click a zone set and select 

Create A Zone

 from the popup menu. 

In the Create a Zone dialog, enter a name for the new zone, and click 
the 

OK

 button. The new zone name is displayed in the Zone Sets 

dialog.

„

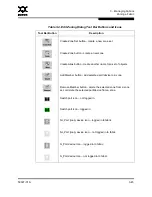
Select a zone set in the zone sets tree, and click the 

Zone

 button in the 

Zoning toolbar. In the Create a Zone dialog, enter a name for the new 
zone, and click the 

OK

 button. The new zone name is displayed in the 

Zone Sets dialog.

„

Copy an existing zone by dragging a zone into the new zone set. Refer 
to 

”Copying a Zone to a Zone Set” on page 3-50

.

5.

Click the 

Apply

 button to save changes to the zoning database.

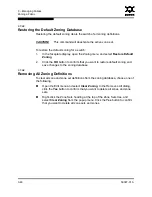
3.7.4.2

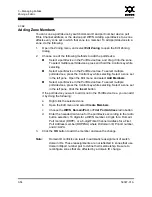
Activating and Deactivating a Zone Set

You must activate a zone set to apply its zoning definitions to the fabric. Only one 
zone set can be active at one time. When you activate a zone set, the switch 
distributes that zone set to the temporary zoning database on every switch in the 
fabric. 

The purpose of the deactivate function is to suspend all fabric zoning which 
results in free communication fabric wide or no communication depending on the 
default visibility setting. Refer to 

”Default Visibility” on page 3-47

 for more 

information. It is not necessary to deactivate the active zone set before activating 
a new one. 

„

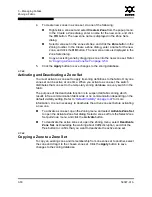
To activate a zone set, open the Zoning menu and select 

Activate Zone Set


to open the Activate Zone Set dialog. Select a zone set from the Select Zone 
Set pull-down menu, and click the 

Activate

 button.

„

To deactivate the active zone set, open the Zoning menu, select 

Deactivate 

Zone Set

. Acknowledge the warning about traffic disruption, and click the 

Yes

 button to confirm that you want to deactivate the active zone set.

3.7.4.3

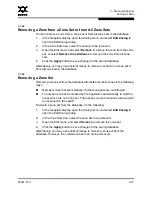
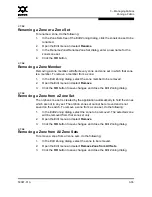
Copying a Zone to a Zone Set

To copy an existing zone and its membership from one zone set to another, select 
the zone and drag it to the chosen zone set. Click the 

Apply

 button to save 

changes to the zoning database.

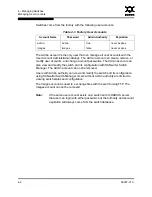
Summary of Contents for SANbox 5602

Page 1: ...S i m p l i f y 0 59097 01 A Page i SANbox 5602 Switch Management User s Guide Firmware Version 5 0...

Page 2: ...umes no responsibility for any errors that may appear in this document This product is covered by one or more of the following patents 6697359 other patents pending QLogic SANbox SANsurfer SANblade SA...

Page 3: ...laris 2 8 2 3 Starting SANsurfer Switch Manager 2 10 2 4 Exiting SANsurfer Switch Manager 2 12 2 5 Uninstalling SANsurfer Switch Manager 2 13 2 5 1 SMS Uninstall 2 14 2 5 2 Standalone Uninstall 2 15 2...

Page 4: ...IUS Server 3 4 3 1 3 Editing RADIUS Server Information 3 5 3 1 4 Modifying Authentication Order RADIUS Server Information 3 6 3 2 Securing a Fabric 3 7 3 2 1 Connection Security 3 7 3 2 2 User Account...

Page 5: ...Replacing a Failed Switch 3 26 3 5 Displaying Fabric Information 3 27 3 5 1 Fabric Status 3 27 3 5 2 Displaying the Event Browser 3 29 3 5 2 1 Filtering the Event Browser 3 31 3 5 2 2 Sorting the Even...

Page 6: ...emoving a Zone Set 3 51 3 7 5 Managing Zones 3 52 3 7 5 1 Creating a Zone in a Zone Set 3 53 3 7 5 2 Adding Zone Members 3 54 3 7 5 3 Renaming a Zone or a Zone Set 3 55 3 7 5 4 Removing a Zone Member...

Page 7: ...t 4 22 4 7 2 6 In band Management 4 22 4 7 3 Advanced Switch Properties 4 23 4 7 3 1 Interop Mode for Zoning 4 23 4 7 3 2 Legacy Port Address Format 4 24 4 7 3 3 Timeout Values 4 24 4 7 4 System Servi...

Page 8: ...Wizard 5 14 5 4 Resetting a Port 5 15 5 5 Testing Ports 5 16 5 6 Graphing Port Performance 5 18 5 6 1 Starting SANsurfer Performance Viewer 5 19 5 6 2 Exiting SANsurfer Performance Viewer 5 19 5 6 3 S...

Page 9: ...re Install Command A 23 Group Command A 25 Hardreset Command A 33 Help Command A 34 History Command A 35 Hotreset Command A 36 Image Command A 37 Lip Command A 40 Passwd Command A 41 Ping Command A 42...

Page 10: ...2 28 3 1 Add Radius Server 3 2 3 2 Remove Radius Server 3 4 3 3 Edit Radius Server Information 3 5 3 4 Modify Authentication Order Radius Server Information 3 6 3 5 Edit Security Dialog 3 10 3 6 Crea...

Page 11: ...gnate Donor Ports 5 15 5 4 Port Loopback Test Dialog 5 16 5 5 Fabric View Graphs 5 18 5 6 Save Default Performance View File Dialog 5 20 5 7 Load Default View File Dialog 5 20 5 8 Preferences SANsurfe...

Page 12: ...ion Defaults A 47 A 10 Port Configuration Defaults A 48 A 11 Port Threshold Alarm Configuration Defaults A 49 A 12 Zoning Configuration Defaults A 49 A 13 SNMP Configuration Defaults A 50 A 14 RADIUS...

Page 13: ...ibes fabric management tasks Section 4 describes switch management tasks Section 5 describes port and device management tasks Appendix A describes the command line interface A glossary of terms and an...

Page 14: ...logos available at http www jdom org images logos THIS SOFTWARE IS PROVIDED AS IS AND ANY EXPRESSED OR IMPLIED WARRANTIES INCLUDING BUT NOT LIMITED TO THE IMPLIED WARRANTIES OF MERCHANTABILITY AND FI...

Page 15: ...link at www qlogic com you may choose Electronic Based Training or schedule an intensive hands on Certification course Technical Certification courses include installation maintenance and troubleshoot...

Page 16: ...1 Introduction Technical Support 1 4 59097 01 A 0 Notes...

Page 17: ...nt Application Starting SANsurfer Switch Manager Exiting SANsurfer Switch Manager Uninstalling SANsurfer Switch Manager Changing the Encryption Key for the Default Fabric View File Saving and Opening...

Page 18: ...was shipped with a SANsurfer Switch Manager Disk refer to SANsurfer Switch Manager on page 2 3 for instructions on how to install SANsurfer Switch Manager If your switch was shipped with a SANsurfer M...

Page 19: ...rogram with the following path data files Management_Software Windows Windows_5 00 xx xx exe For a Linux platform Open the CD and run the installation program with the following path data files Manage...

Page 20: ...MS Installation for Windows SMS Installation for Linux SMS Installation for Solaris 2 2 2 1 SMS Installation for Windows Close all programs currently running and insert the SANsurfer Management Suite...

Page 21: ...rom the pull down menu Locate the description for SANsurfer Switch Manager for Windows under Management Software b If the release version number 5 00 xx is greater than what is currently installed dow...

Page 22: ...om Start_Here htm d The SANsurfer Management Suite start page opens in your browser 2 On the SANsurfer Management Suite start page click the SANbox Switch Software button 3 On the SANbox Switch Softwa...

Page 23: ...grade is needed and the SMS installation is complete 11 From the tar gz file extract the SANsurferSwitchMgr_Linux_5 00 xx bin file and make the file executable chmod x sansurferswitchmgr_linux_5 02 xx...

Page 24: ...ea 4 In the Operating System column click the Solaris SPARC link 5 Click the SANsurfer Management Software link to open the Save As dialog 6 Enter a path name to save the sansurfer_solaris_install bin...

Page 25: ...SANsurfer Switch Manager package pkgadd d sansurferswitchmgr_QLGCsol_5 00 xx 13 Change directories to the package location cd usr opt QLGCsol bin 14 Locate and execute the file sbm_over_sms sh sbm_ov...

Page 26: ...itial Start dialog click the Open Configuration Wizard button When you power up the switch the Configuration Wizard will recognize the switch and lead you through the configuration process To start SA...

Page 27: ...ain box This has the same effect as disabling the Display Initial Startup Dialog preference Refer to Setting SANsurfer Switch Manager Preferences on page 2 16 for information about setting preferences...

Page 28: ...witch Manager Window 2 4 Exiting SANsurfer Switch Manager To exit a SANsurfer Switch Manager application session open the File menu and select Exit If you have not yet defined an encryption key the Sa...

Page 29: ...ferences on page 2 16 for more information In your next SANsurfer Switch Manager session the Load Default Fabric File dialog shown in Figure 2 4 prompts you to load the default fabric view file and to...

Page 30: ..._Corporation SANsurfer For Solaris opt QLogic_Corporation SANsurfer To uninstall the SANsurfer Management Suite application do the following For Windows browse for the uninstall program file or the sh...

Page 31: ...am file or the shortcut link that points to the uninstall program file The uninstall program shortcut is in the same folder as the program shortcut Start menu program group on desktop or user specifie...

Page 32: ...t an existing file 3 If the fabric view file was saved with a password enter the password and click the OK button 4 Click the OK button to open the view 2 8 Setting SANsurfer Switch Manager Preference...

Page 33: ...port type default port speed port operational state or port transceiver media Regardless of the default port view you choose you can change the port view in the faceplate display by opening the View...

Page 34: ...he online help file are open the Help menu and select Help Topics or click the Help button in the tool bar You can also display context sensitive help for all SANsurfer Switch Manager dialogs by choos...

Page 35: ...isplay and the faceplate display The topology display shows all switches that are able to communicate and all connections between switches The faceplate display shows the front of a single switch and...

Page 36: ...nus and the options offered in them vary depending on the display For example the Port menu and many of the Switch menu selections are available only in the faceplate display 2 11 1 1 Topology Display...

Page 37: ...ensitive menus that pop up when you right click in the graphic window Refer to Opening the Faceplate and Topology Display Popup Menus on page 2 27 for more information about these popup menus 2 11 1 3...

Page 38: ...able 2 2 Tool Bar Buttons Tool Bar Button Description Add Fabric button adds a new fabric to the fabric view Open View File button opens an existing fabric view file Save View As button saves the curr...

Page 39: ...tus A green icon indicates normal operation A yellow icon indicates that a switch is operational but may require attention to maintain maximum performance A red icon indicates a potential failure or n...

Page 40: ...e adjusted by clicking and dragging the border that it shares with the graphic window Adjust the column width by moving the pointer over the column heading border shared by two columns until a right l...

Page 41: ...witch and Link Status Working with Switches and Links Topology Data Windows Figure 2 10 Topology Display 2 12 1 Switch and Link Status Switch icon shape and color provide information about the switch...

Page 42: ...Select Select All Switches or Select All Links from the popup menu To cancel a selection press and hold the Control key and select the item again To cancel all selections click in the graphic window b...

Page 43: ...plate display right click the faceplate in the graphic window 2 12 3 Topology Data Windows The topology display provides the following data windows corresponding to the data window tabs Devices displa...

Page 44: ...1 Faceplate Display 2 13 1 Port Views and Status Port color and text provide information about the port and its operational state Green indicates active gray indicates inactive The faceplate display p...

Page 45: ...in between in port number sequence To select several non consecutive ports hold the Control key and select To select all ports right click on the faceplate image Select Select All Ports from the popup...

Page 46: ...sts and storage targets connected to the switch Switch displays current switch configuration data Port Statistics displays performance data for the selected ports Port Information displays information...

Page 47: ...on RADIUS is designed to authenticate users and devices using a challenge response protocol Basic implementations consist of a central RADIUS server containing a database of authorized users as well a...

Page 48: ...in Figure 3 1 click the Add Server tab 3 Select the server type Device User Account 4 In the IP Address field enter the remote IP address of the server 5 In the UDP Port field enter the remote UDP po...

Page 49: ...S server A valid Message Authenticator attribute will be required in all RADIUS server responses 9 In the Secret field enter the server secret A secret is required for all RADIUS servers The secret is...

Page 50: ...Figure 3 2 Remove Radius Server To remove a RADIUS server do the following 1 Open the faceplate display open the Switch menu and select Radius Servers 2 In the Radius Server Information dialog shown...

Page 51: ...the faceplate display open the Switch menu and select Radius Servers 2 In the Radius Server Information dialog shown in Figure 3 3 click the Edit Server tab 3 In server list at the top of the dialog...

Page 52: ...of a RADIUS server do the following 1 Open the faceplate display open the Switch menu and select Radius Servers 2 In the Radius Server Information dialog shown in Figure 3 4 click the Modify Authentic...

Page 53: ...exchanging of certificates These certificates contain the public and private keys that define the encryption The switch certificate is valid for one year beginning with its creation date and time The...

Page 54: ...ch validates your user account and SANsurfer Switch Manager grants access to its menus according to your authority level If you do not have Admin authority you are limited to monitoring tasks 3 2 3 Se...

Page 55: ...ity database for the entire fabric resides on the server In this way the security database can be managed centrally rather than on each switch You can configure up to five RADIUS servers to provide fa...

Page 56: ...curity files consists of renaming and removing security sets groups and members Use the Edit menu options or popup menu options to access Edit Security dialog options Select a security item in the gra...

Page 57: ...ity SetCreating a Security Set 3 2 4 2 Creating a Security Set There is a maximum of 4 security sets To add a security set do the following 1 On the faceplate display click the Security button on the...

Page 58: ...Group dialog is displayed after clicking the Security Group button on the toolbar or after you right click on a security set in the graphic window and select Create a Security Group from the popup men...

Page 59: ...lect Edit Security to open the Edit Security dialog 2 Choose one of the following methods to open the Create a Security Group dialog In the graphic window click a security set and click the Security G...

Page 60: ...aracters with valid WWN format xx xx xx xx xx xx xx xx The authentication choices are None and Chap The Secret field is disabled if authentication is set to None If authentication is Chap the Secret f...

Page 61: ...he graphic window click a security group and click the Security Member button in the toolbar Right click on a security group and select Create Members from the popup menu 3 Open the Group Member pull...

Page 62: ...the OK button to save the changes Edit Security Group Member Open the Edit menu and select a Edit Security Group Member option In the Edit Security Group Member dialog enter a new Group Member WWN ch...

Page 63: ...fig Dialog Use the Security Config dialog shown in Figure 3 8 to save the active security configuration on the switch to non volatile or to temporary memory and to require the domain ID of a switch be...

Page 64: ...e security file 3 2 4 11 Activating a Security Set Only one security set can be active at one time To activate a security set do the following 1 On the faceplate display open the Security menu and sel...

Page 65: ...read community string and a write community string that are basically the passwords that control read and write access to the switch The read community string public and write community string private...

Page 66: ...aseline of current system version information which can be viewed analyzed and compared to other snapshot files and exported to a file Information includes date and time SANsurfer Switch Manager versi...

Page 67: ...r one If the two snapshots have the same timestamp the arrow will not be displayed The scroll bars are synchronized to view the same portion of each snapshot file simultaneously Click and drag the sep...

Page 68: ...To add a fabric to the database do the following 1 Open the Fabric menu and select Add Fabric to open the Add a New Fabric dialog shown in Figure 3 10 Figure 3 10 Add a New Fabric Dialog 2 Enter a fab...

Page 69: ...View dialog enter the name of the file to open and enter a file password if a password was entered when this fabric view file was saved 3 Click the OK button Note A switch supports a combined maximum...

Page 70: ...menu and select Rediscover Fabric The rediscover function is more comprehensive than the refresh function 3 4 6 Deleting Switches and Links The SANsurfer Switch Manager application does not automatica...

Page 71: ...o manage the switch through the Ethernet port you must first configure the IP address using the Network Properties dialog or the Configuration Wizard 3 Configure any special switch settings Consider c...

Page 72: ...moved b Install the SFPs using the same ports as were used on the failed switch c Attach the AC cords and power up the switch 3 Select the failed switch in the topology display Open the Switch menu an...

Page 73: ...as they occur You can allow the fabric to update the display status or you can refresh the display at any time To refresh the topology display do one of the following Click the Refresh button Open the...

Page 74: ...perational with errors Yellow Critical potential failure Red Unknown communication status unknown unreachable or unmanageable Blue Fabric Management Switch Ethernet connection normal Green Ethernet co...

Page 75: ...use the switch time stamp while event entries generated by the application have a workstation time stamp You can filter sort and export the contents of the Event Browser to a file The Event Browser be...

Page 76: ...te attention from a user or service representative Warning event An event that indicates errors or other conditions that may require attention to maintain maximum performance Warning messages will not...

Page 77: ...a will be shown You can filter the event browser in the following ways Severity Check one or more of the corresponding check boxes to display alarm events critical events warning events or informative...

Page 78: ...scription Successive sort operations of the same type alternate between ascending and descending order 3 5 2 3 Saving the Event Browser to a File You can save the displayed Event Browser entries to a...

Page 79: ...page 3 36 for exporting device information Table 3 3 Devices Data Window Entries Entry Description Port WWN Port world wide name Nickname Device port nickname To create a new nickname or edit an exis...

Page 80: ...w on page 4 13 for information about the zone set definitions on a particular switch Refer to Zoning a Fabric on page 3 38 for more information about zone sets and zones The Active Zoneset data window...

Page 81: ...ow click the Link tab below the data window in the topology display 3 6 Working with Device Information and Nicknames SANsurfer Switch Manager enables you to do the following Displaying Detailed Devic...

Page 82: ...urfer Switch Manager maintains nicknames in Nicknames xml which is found in your working directory In addition to creating editing and deleting nicknames you can also export the nicknames to a file wh...

Page 83: ...names or WWN columns and edit the nickname in the text field Click the OK button to save the changes In the topology or faceplate display click the Devices tab to display the Devices data window Doubl...

Page 84: ...ckname file in the Open dialog and click Open When prompted to overwrite existing nicknames click Yes 3 7 Zoning a Fabric Zoning enables you to divide the ports and devices of the fabric into zones fo...

Page 85: ...n replace a device on the same port without having to edit the member entry as you would with a WWN member Domain ID Port number entries define zone membership by switch domain ID and port number All...

Page 86: ...ones you can create an alias An alias is a named set of ports or devices that are grouped together for convenience Unlike zones aliases impose no communication restrictions between its members You can...

Page 87: ...no active zone set Refer to Configuring the Zoning Database on page 3 46 for information about zoning configuration The following zoning limits will be enforced during the configuration of zoning and...

Page 88: ...here must be at least one target and at least one initiator in the name server Windows servers do not share devices well but sometimes they must share devices such as a tape drive The wizard helps you...

Page 89: ...tive zone set on a switch You must configure an inactive zone set to your needs and then activate that updated zone set to apply the changes to the fabric When you activate a zone set the switch distr...

Page 90: ...while clicking several consecutive icons Hold down the Control key while clicking several non consecutive icons Using tool bar buttons popup menus or a drag and drop method you can create and manage...

Page 91: ...create another name for a set of objects Add Member button add selected port device to a zone Remove Member button delete the selected zone from a zone set or delete the selected port device from a z...

Page 92: ...e saved to the zoning database on that switch Changes are saved when an updated zone set is activated Zoning changes are always saved to temporary memory However if Interop Auto Save is enabled the sw...

Page 93: ...remote switch 3 7 3 3 Saving the Zoning Database to a File You can save the zoning database to an XML file You can later reload this zoning database on the same switch or another switch To save a zoni...

Page 94: ...nd save changes to the zoning database 3 7 3 6 Removing All Zoning Definitions To clear all zone and zone set definitions from the zoning database choose one of the following Open the Edit menu and se...

Page 95: ...om All Zone Sets Removing a Zone Set 3 7 4 1 Creating a Zone Set To create a zone set do the following 1 Open the Zoning menu and select Edit Zoning to open the Edit Zoning dialog 2 Open the Edit menu...

Page 96: ...en you activate a zone set the switch distributes that zone set to the temporary zoning database on every switch in the fabric The purpose of the deactivate function is to suspend all fabric zoning wh...

Page 97: ...ne sets in the database 3 7 4 5 Removing a Zone Set Removing a zone set from the database affects the member zones in the following ways Member zones that are members of other zone sets are not affect...

Page 98: ...e or a Zone Set Removing a Zone Member Removing a Zone from a Zone Set Removing a Zone from All Zone Sets Changing Zone Types Note Changes that you make to the zoning database are limited to the manag...

Page 99: ...t begin with a letter and be no longer than 64 characters Valid characters are 0 9 A Z a z _ and 5 To add switch ports or attached devices to the zone do one of the following In the zone set tree sele...

Page 100: ...Select a port device in the Port Device tree To select multiple ports devices press the Control key while selecting Select a zone set in the left pane Click the Insert button If the port device you wa...

Page 101: ...utton to save changes and close the Edit Zoning dialog 3 7 5 5 Removing a Zone from a Zone Set The orphan zone set is created by the application automatically to hold the zones which are not in any se...

Page 102: ...e zoned together An alias is not a zone and can not have a zone or another alias as a member 3 7 6 1 Creating an Alias To create an alias do the following 1 Open the Zoning menu and select Edit Zoning...

Page 103: ...ice tree To select multiple ports devices press the Control key while selecting Select an alias Click the Insert button If the port device you want to add is not in the Port Device tree you can add it...

Page 104: ...Fabric B ZN1 contains a member specified by Domain ID 1 and Port 2 In this case the merge will fail because the two zones have the same name but different membership 3 7 7 2 Zone Merge Failure Recove...

Page 105: ...ng a Switch Restoring the Factory Default Configuration Downloading a Support File Upgrading the Switch Using License Keys Installing Firmware Displaying Hardware Status 4 1 Managing User Accounts Onl...

Page 106: ...be removed Users with Admin authority can view and modify the switch and its configuration using SANsurfer Switch Manager Users without Admin authority are limited to viewing switch status and config...

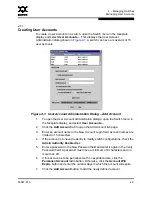
Page 107: ...Click the Add Account tab to open the Add Account tab page 3 Enter an account name in the New Account Login field Account names are limited to 15 characters 4 If the account is to have the ability to...

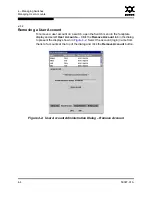
Page 108: ...the Switch menu in the faceplate display and select User Accounts Click the Remove Account tab in the dialog to present the display shown in Figure 4 2 Select the account login name from the list of...

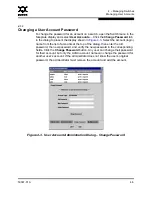
Page 109: ...nt login name from the list of accounts at the top of the dialog then enter the old password the new password and verify the new password in the corresponding fields Click the Change Password button A...

Page 110: ...t tab Select the account login name from the list of accounts at the top of the dialog Click the Admin authority Enabled check box to grant admin authority to the account name Click an Account Expirat...

Page 111: ...4 5 Faceplate Display Switch Information The fabric updates the topology and faceplate displays by forwarding changes in status to the management workstation as they occur You can allow the fabric to...

Page 112: ...for more information about the Switch data window To open the Switch data window select one or more switches in the topology display or open the faceplate display and click the Switch tab below the da...

Page 113: ...State Switch administrative state that is stored in the switch configuration R_A_TOV Resource allocation timeout value E_D_TOV Error detect timeout value Interop Mode Zoning merge status When a zone s...

Page 114: ...is enabled or disabled default In band Enabled In band management status Permits True or prevents False a switch from being managed over an ISL Temperature Failure Port Shutdown Non configurable alwa...

Page 115: ...or disables the web applet on the switch Inactivity Timeout Number of minutes the switch waits before terminating an idle command line interface session Zero 0 disables the time out threshold GUI Mgm...

Page 116: ...n Click the down arrow to open the pull down menu Open the pull down menu and select Absolute to view the total count of statistics since the last switch reset Select Rate to view the number of statis...

Page 117: ...en the topology display and click the Active Zonesets data window tab The Configured Zonesets data window uses display conventions for expanding and contracting entries that are similar to the fabric...

Page 118: ...ent set triggers set a sample window and enable or disable an individual alarm Figure 4 7 Port Threshold Alarm Configuration Dialog 2 Check the Enable All Port Threshold Alarms check box to enable mon...

Page 119: ...conds The sample window defines the period of time in which to count events 8 Repeat steps 3 through 7 for each alarm you want to configure or enable 9 Click the OK button to save all changes 4 4 Pagi...

Page 120: ...the Switch menu and select Set Date Time 3 Choose one of the following Enter the year month day time and time zone in the Switch Date Time dialog then click OK The new date and time take effect immedi...

Page 121: ...revious switch code releases is not supported To reset a switch using SANsurfer Switch Manager do the following 1 Select the switch to be reset and open the faceplate display 2 Open the Switch menu an...

Page 122: ...n Wizard is a series of dialogs that guide you through the chassis network and SNMP configuration steps on new or replacement switches 4 7 1 Using the Configuration Wizard The Configuration Wizard is...

Page 123: ...e new values into effect Use the Switch Properties dialog to change the following switch configuration parameters Symbolic Name Switch Administrative States Domain ID and Domain ID Lock Fabric Device...

Page 124: ...changes to the configured administrative state The configured administrative state is displayed in the Switch Properties dialog The current administrative state is the state that is applied to the swi...

Page 125: ...or taking it offline then back online The principal switch will reassign the domain ID and the switch will join the fabric 4 7 2 4 Fabric Device Management Interface Fabric Device Management Interfac...

Page 126: ...standard specified in Multi Switch Broadcast for FC SW 3 T11 Presentation Number T11 02 031v0 Fabric Shortest Path First FSPF is used to set up a fabric spanning tree used in transmission of broadcas...

Page 127: ...Use the Advanced Switch Properties dialog to change the following switch configuration parameters Timeout values Interop mode for zoning Legacy port address format Figure 4 10 Advanced Switch Propert...

Page 128: ...witch timeout values determine the timeout values for all ports on the switch Table 4 5 describes the switch timeout parameters The timeout values must be the same for all switches in the fabric Note...

Page 129: ...log open the Switch menu and select Services Figure 4 11 System Services Dialog Use caution when disabling the Embedded GUI GUI Mgmt Telnet SSL and SSH as it is possible to disable all access to the s...

Page 130: ...th Telnet command line interface when SSH is enabled SNMP Simple Network Management Protocol Allows management of the switch through third party applications that use SNMP NTP Network Time Protocol Al...

Page 131: ...2 to change IP configuration parameters and enable remote logging After making changes click the OK button to put the new values into effect To open the Network Properties dialog select a switch in th...

Page 132: ...rvals If no IP address is obtained the switch reverts to the previously configured IP address DHCP Dynamic Host Configuration Protocol Acquires the IP configuration from a DHCP server If no satisfacto...

Page 133: ...perating system documentation for information on how to configure Remote Logging The syslog conf file on the remote host must contain an entry that specifies the name of the log file in which to save...

Page 134: ...the OK button to put the new values into effect To open the SNMP Properties dialog select a switch in the topology display or open the faceplate display open the Switch menu and select SNMP Propertie...

Page 135: ...on the switch and the SNMP management server must be the same The default is public Trap Community Trap community password up to 32 characters that authorizes an SNMP agent to receive traps This is a...

Page 136: ...unique For example if trap 1 and trap 2 have the same address then they must have different port values Similarly if trap 1 and 2 have the same port value they must have different addresses Specifies...

Page 137: ...opology and faceplate displays The graphic window upper right pane of the faceplate display displays one faceplate image for each switch in the stack In the fabric tree left pane of the faceplate disp...

Page 138: ...e and Enabling NTP Client on page 4 16 for more information Firmware load and activation Refer to Installing Firmware on page 4 42 for more information Switch reset Refer to Resetting a Switch on page...

Page 139: ...figuration to be loaded into the Edit Zoning dialog when making zoning changes to all switches in a stack The Select Source dialog is only displayed if the zoning configuration on all switches in the...

Page 140: ...statistics Alarm configuration Zoning configuration Configured security RADIUS Server information This archive file can be used to restore the configuration on the same switch or on a replacement swi...

Page 141: ...4 36 for more information To restore a switch do the following 1 Log in to the fabric through the switch you want to restore You cannot restore a switch over an ISL 2 Open the Switch menu in the face...

Page 142: ...other network properties Switch Properties Restores all settings presented in the Switch properties dialog except the domain ID Refer to Switch Properties on page 4 19 Domain ID Restores switch domain...

Page 143: ...ect To restore user accounts you must select the Reset Password File option in the maintenance menu Refer to Recovering a Switch in the Installation Guide for your switch for information about mainten...

Page 144: ...ed False NTP Server IP Address 10 0 0 254 Contact Undefined Location Undefined Trap Enabled False Trap Port 162 Trap Address Trap 1 10 0 0 254 Traps 2 5 0 0 0 0 Trap Community Public Read Community Pu...

Page 145: ...the support file is saved to your workstation click the Close button to close the Download Support File dialog 4 13 Upgrading the Switch Using License Keys A port license key is a password that you ca...

Page 146: ...ade description 8 Click the Add Key button to upgrade the switch Allow a minute or two for the upgrade to complete The switch will need to be reset after the upgrade 4 14 Installing Firmware Installin...

Page 147: ...ion is complete management connections must be re initiated SANsurfer Switch Manager sessions will re connect automatically Telnet sessions must be restarted manually Applicable Code Versions Future s...

Page 148: ...up text box rest the cursor over the chassis LED cluster in the faceplate display Input Power LED indicates the voltage status of the switch Heartbeat LED indicates the status of the internal switch p...

Page 149: ...a Port Testing Ports Graphing Port Performance 5 1 Displaying Port Information Port information is available primarily in the faceplate display shown in Figure 5 1 The faceplate display data windows...

Page 150: ...types and their meanings Table 5 1 Port Types State Description F_Port Fabric port Supports a single public device N_Port FL_Port Fabric loop port Self discovers a single device N_Port or a loop of up...

Page 151: ...ds Table 5 2 Port Operational States State Description On Online port is active and ready to send data Ia Inactive port operational state is offline but administrative state is online Iso Isolated E_P...

Page 152: ...View menu and select View Port Media Table 5 4 lists the port media states and their meanings Table 5 4 Port Transceiver Media View Media Icon Description Optical SFP Online Green Optical SFP Offline...

Page 153: ...changes from unreachable to reachable Table 5 5 Port Statistics Data Window Entries Entry Description Start Time The beginning of the period over which the statistics apply The start time for the Abs...

Page 154: ...eive buffers are full The normal Fabric Login exchange of flow control credit should prevent this from occurring The frame will be discarded FReject Number of frames from devices that have been reject...

Page 155: ...primitives received from an attached device Rx Offline Sequences Number of offline sequence primitives received by the port Total Errors Total number of primitive and non primitive port link errors T...

Page 156: ...ffline Diagnostics or Down which has been set by the user This state may be different from the configured administrative state if the user has not saved it in the switch configuration This state is us...

Page 157: ...The number of credits available to be donated by the selected port Donor Group The donor group of the selected port Valid Donor Groups The number of separate groups within which extended credits may...

Page 158: ...nding type of Port Properties dialog select one or more ports open the Port menu and select Port Properties or Port Properties 10G Figure 5 2 Port Properties Dialog The 1 Gbps 2 Gbps 4 Gbps and 10 Gbp...

Page 159: ...s switch resets The current administrative state is set using the Set Port command Refer to the Set Port Command on page A 79 Table 5 7 describes the port administrative states To change port administ...

Page 160: ...port speed do the following 1 Select one or more 1 Gbps 2 Gbps 4 Gbps ports in the faceplate display 2 Open the Port menu and select Port Properties 3 Click the Port Speed radio button you want 4 Cli...

Page 161: ...Port Properties Click the radio button that corresponds to one of the following Enable Suppresses the reception of RSCN messages from other ports for which I O Stream Guard is enabled Disable Allows...

Page 162: ...ometers at 1 Gbps 0 6 credits per Km 13 kilometers at 2 Gbps 1 2 credits per Km or 6 kilometers at 4 Gbps 2 4 credits per Km Longer distances can be spanned at full bandwidth by borrowing credits from...

Page 163: ...or ports Click the Finish button to apply the changes and redistribute the credits 5 4 Resetting a Port The Reset Port option reinitializes the port using the saved configuration To reset a port do th...

Page 164: ...from the ASIC through the SerDes chip and back to the ASIC for the selected ports The port passes the test if the frame that was sent by the ASIC matches the test frame that was received This test req...

Page 165: ...for the type of loopback test to be run Internal External or Online If you choose the internal or external test SANsurfer Switch Manager will prompt you to confirm that the port state needs to be chan...

Page 166: ...u launch the SANsurfer Performance Viewer application from the SANsurfer Switch Manager application and SANsurfer Performance Viewer can not connect to the fabric for example if you have reached the m...

Page 167: ...ally open the fabric in the SANsurfer Performance Viewer topology display 5 6 2 Exiting SANsurfer Performance Viewer To exit a SANsurfer Performance Viewer session open the File menu and select Exit T...

Page 168: ...fer Performance Viewer from prompting you to save the default performance view file between sessions set the Auto Load and Save Graphing Environment setting to Enable default Refer to Setting SANsurfe...

Page 169: ...abric file you will be prompted for this password If you leave the File Password field blank no password is required To open a performance view file do the following 1 Open the File menu and select Op...

Page 170: ...performance view file Enable or disable the Display Dialog When Making Non secure Connections checkbox If enabled the Non secure Connections Check dialog is displayed when you attempt to open a non se...

Page 171: ...e Display on page 5 24 for more information To remove a graph click the graph Remove button To remove all graphs open the Window menu and select Close All To remove a fabric and its graphs select the...

Page 172: ...indow menu to bring that graph to the front 5 6 7 3 Customizing Graphs You can customize the graph polling frequency what is plotted in the graphs and the graph color scheme To set the polling frequen...

Page 173: ...e color for each data type the unit grid and the background by clicking the corresponding color field or button In each case you can choose a color using the Swatches Red Green Blue RGB or Hue Saturat...

Page 174: ...menu and select Rescale Selected Graph or right click on the graph and select Rescale from the popup menu 3 View the data in the graph window 5 6 8 Printing Graphs To print a graph select a graph then...

Page 175: ...mmand line window on the workstation and enter the Telnet command followed by the switch IP address telnet ip_address A Telnet window opens prompting you for a login Enter an account name and password...

Page 176: ...Refer to Passwd Command on page A 41 for information about changing passwords A 3 Working with Switch Configurations Successful management of switches and fabrics with the command line interface depe...

Page 177: ...with the Config Edit command and indicate which configuration you want to modify If you do not specify a configuration name the active configuration is assumed The Config Edit session provides access...

Page 178: ...All named switch configurations including the default configuration This includes port switch port threshold alarm and zoning configuration components All SNMP and network information defined with the...

Page 179: ...config_switch_169_10112003 configdata Local file config_switch_169_10112003 Remote file configdata ftp quit The restore process replaces all configuration information on the switch and afterwards the...

Page 180: ...Delete keyword can be abbreviated Del The command line completion feature makes entering and repeating commands easier Table A 1 describes the command line completion keystrokes Table A 1 Command Lin...

Page 181: ...mmands Configuration Command Help History Ping Ps Quit Show Show Config Show Log Show Perf Show Setup Uptime Whoami A 34 A 35 A 42 A 43 A 44 A 91 A 106 A 109 A 112 A 114 A 122 A 126 Admin A 8 Admin Se...

Page 182: ...Opens the admin session end or stop Closes the admin session The Hardreset Hotreset Logout Shutdown and Reset Switch commands will also end an admin session cancel Terminates an Admin session opened b...

Page 183: ...mber Domain IDs can be 1 239 port numbers can be 0 255 6 character hexadecimal device Fibre Channel address hex 16 character hexadecimal worldwide port name WWPN with the format xx xx xx xx xx xx xx x...

Page 184: ...space to delimit ports devices in member_list A port device in member_list can have any of the following formats Domain ID and port number pair Domain ID Port Number Domain IDs can be 1 239 port numb...

Page 185: ...made clear Clears all CIM listener and subscription configurations from the switch edit Opens a CIM edit session limits Displays the maximum allowed number of CIM listeners subscriptions and subscrip...

Page 186: ...you in a line by line fashion to create a CIM listener with the name given by listener_name listener_name can have up to 32 characters 0 9 A Z a z _ and The CIM listener configuration parameters are...

Page 187: ...r a new value or simply press the ENTER key to accept the current value If you wish to terminate this process before reaching the end of the list press q or Q and the ENTER key to do so Name listener_...

Page 188: ...can modify the CIM subscription given by subscription_name Refer to Table A 4 for a description of the CIM subscription configuration parameters Table A 4 CIM Subscription Configuration Parameters Par...

Page 189: ...erminate this process before reaching the end of the list press q or Q and the ENTER key to do so FilterID values 1 Create ComputerSystem 2 Modify ComputerSystem 3 Delete ComputerSystem 4 Create FCPor...

Page 190: ...download this file open an FTP session log in with account name password of images for both and type get configdata Refer to Backing up and Restoring Switch Configurations on page A 4 cancel Terminat...

Page 191: ...rs excluding semicolon and comma The switch supports up to 10 configurations including the default configuration Notes If you edit the active configuration changes will be held in suspense until you r...

Page 192: ...configdata from the workstation to the switch and then restore the configuration ftp symbolic_name or ip_address user images password images ftp bin ftp put configdata ftp quit SANbox Manager admin st...

Page 193: ...p file dump_support tgz on the switch If your workstation has an FTP server you can proceed with the command prompts to send the file from the switch to a remote host Otherwise you can use FTP to down...

Page 194: ...st localdomain FTP server Version wu 2 6 1 18 ready 331 Password required for johndoe Password xxxxxxx 230 User johndoe logged in cd bin support 250 CWD command successful lcd itasca conf images Local...

Page 195: ...mode with the Get command SANbox Manager admin create support Log Msg Creating the support file this will take several seconds FTP the dump support file to another machine y n n SANbox Manager admin q...

Page 196: ...e this requires an admin session If you omit MMDDhhmmCCYY the current date is displayed which does not require an admin session Notes Network Time Protocol NTP must be disabled to set the time with th...

Page 197: ...rmware If possible a non disruptive activation is performed The command prompts you for the following IP address of the remote host An account name and password on the remote host Pathname for the fir...

Page 198: ...Connected to 10 20 33 130 10 20 33 130 220 localhost localdomain FTP server Version wu 2 6 1 18 ready 331 Password required for johndoe Password xxxxxxxxx 230 User johndoe logged in bin 200 Type set...

Page 199: ...sion and a Security Edit session Refer to the Security Command on page A 53 for information about starting a Security Edit session The List Members Securitysets and Type keywords are available without...

Page 200: ...does not support the Primary Hash the switch will use the Secondary Hash Primary Secret Hexadecimal string that is encrypted by the Primary Hash for authentication with the ISL group member The string...

Page 201: ...he Primary Hash the switch will use the Secondary Hash Primary Secret Hexadecimal string that is encrypted by the Primary Hash for authentication with the Port group member The string has the followin...

Page 202: ...witches Port Configures security for attachments to N_Port devices MS Configures security for attachments to N_Port devices that are issuing management server commands Table A 7 MS Group Member Attrib...

Page 203: ...does not support the Primary Hash the switch will use the Secondary Hash Hash MS Groups The hash function to use to decipher the encrypted Secret sent by the MS group member Hash values are MD5 or SH...

Page 204: ...group is a member This keyword is available without an Admin session type group Displays the group type for the group given by group This keyword is available without an Admin session Notes Refer to t...

Page 205: ...ue Binding domain ID 1 239 0 None 0 Finished configuring attributes To discard this configuration use the security cancel command The following is an example of the Group Edit command SANbox Manager a...

Page 206: ...SANbox Manager group list Group SecuritySet group1 ISL alpha group2 Port alpha The following is an example of the Group Members command SANbox Manager group members group1 Current list of members for...

Page 207: ...tivates the pending firmware and clears the alarm log To save the alarm log before resetting refer to the Set Log Command on page A 75 Authority Admin session Syntax hardreset Notes To reset the switc...

Page 208: ...Displays a list of all available commands including command variations Examples The following is an example of the Help Config command SANbox Manager help config config CONFIG_OPTIONS The config comm...

Page 209: ...and_string Enter line number to re execute the corresponding command from the History display Enter partial command string to re execute a command that matches the command string Enter to re execute t...

Page 210: ...ng to re initialize attached devices under the following conditions The current firmware version is a 4 2 x version that precedes the upgrade version No changes are being made to switches in the fabri...

Page 211: ...ver with the IP address given by ip_address and an account name given by account_name If an account name needs a password to access the FTP server the system will prompt you for it install Downloads f...

Page 212: ...tchname where xxx xxx xxx xxx is the switch IP address and switchname is the switch name associated with the IP address 3 Enter the following account name and password user images password images 4 Ac...

Page 213: ...s an example of the Image Install command SANbox Manager admin image install Warning Installing new firmware requires a switch reset Continuing with this action will terminate all management sessions...

Page 214: ...Reinitializes the specified loop port Authority Admin session Syntax lip port_number Keywords port_number The number of the port to be reinitialized Ports are numbered beginning with 0 Examples The fo...

Page 215: ...The user account name To change the password for an account name other than your own you must open an admin session with the account name Admin If you omit account_name you will be prompted to change...

Page 216: ...witch to query Broadcast IP addresses such as 255 255 255 255 are not valid Examples The following is an example of a successful Ping command SANbox Manager ping 10 20 11 57 Ping command issued Waitin...

Page 217: ...01 18 35 ds 342 327 0 2 00 11 29 3 01 18 35 mgmtApp 343 327 0 0 00 00 04 3 01 18 35 fc2 344 327 0 0 00 02 16 3 01 18 35 nserver 345 327 0 0 00 02 44 3 01 18 35 mserver 346 327 0 8 00 35 12 3 01 18 35...

Page 218: ...A Command Line Interface Quit Command A 44 59097 01 A 0 Quit Command Closes the Telnet session Authority None Syntax quit exit or logout Notes You can also enter Control D to close the Telnet session...

Page 219: ...ust activate the configuration for the changes to take effect for switch port and port threshold alarm configuration default values factory Resets switch configuration port configuration port threshol...

Page 220: ...owing Activates the pending firmware Closes all management sessions Clears the event log To save the event log before resetting refer to the Set Log Command on page A 75 To reset the switch with a pow...

Page 221: ...nfiguration values Table A 9 Switch Configuration Defaults Parameter Default Admin State Online Broadcast Enabled True InbandEnabled True FDMIEnabled True FDMIEntries 1000 DefaultDomain ID 1 0x Hex Do...

Page 222: ...line Link Speed Auto 10 Gbps Port Type GL G Symbolic Name Portn where n is the port number 10G n where n is the port number ALFairness False N A DeviceScanEnabled True True ForceOfflineRSCN False Fals...

Page 223: ...er FallingTrigger SampleWindow True 25 1 10 DecodeErrorsMonitoringEnabled RisingTrigger FallingTrigger SampleWindow True 200 0 10 ISLMonitoringEnabled RisingTrigger FallingTrigger SampleWindow True 2...

Page 224: ...ysLocation undefined Description SANbox 5602 FC Switch Trap 1 5 Address Trap 1 10 0 0 254 Traps 2 5 0 0 0 0 Trap 1 5 Port 162 Trap 1 5 Severity Warning Trap 1 5 Version 2 Trap 1 5 Enabled False Object...

Page 225: ...ries 0 SignPackets False Table A 15 Services Configuration Defaults Parameter Default TelnetEnabled True SSHEnabled False GUIMgmtEnabled True SSLMgmtEnabled False EmbeddedGUIEnabled True SNMPEnabled T...

Page 226: ...rameter Default Ethernet Network Discovery Static Ethernet Network IP Address 10 0 0 1 Ethernet Network IP Mask 255 0 0 0 Ethernet Gateway Address 10 0 0 254 Admin Timeout 30 minutes InactivityTimeout...

Page 227: ...clear Clears all inactive security sets from the volatile edit copy of the security database This keyword does not affect the non volatile security database However if you enter the Security Clear co...

Page 228: ...urity database that have been made during the current Security Edit session since the last Security Save command was entered save Saves the changes that have been made to the security database during...

Page 229: ...activatedOn day month date time year Database Checksum 00000000 Inactive Database Information ConfigurationLastEditedBy admin IB session11 ConfigurationLastEditedOn day month date time year Database C...

Page 230: ...Information SecuritySet Group GroupMember No active securityset defined Configured Security Information SecuritySet Group GroupMember alpha group1 ISL 10 00 00 00 00 10 21 16 Authentication Chap Prim...

Page 231: ...Close the Security Edit session using the Security Save or Security Cancel command before using this keyword active Displays the name of the active security set This keyword is available to without a...

Page 232: ...group will not be removed until the security set has been deactivated rename security_set_old security_set_new Renames the security set given by security_set_old to the name given by security_set_new...

Page 233: ...g clear Clears the alarm log history This value requires an Admin session on Enables the display of alarms in the session output stream off Disables the display of alarms in the session output stream...

Page 234: ...ion Refer to the Set Port Command on page A 79 setup option Changes SNMP and system configuration settings Refer to the Set Setup Command on page A 81 switch state Changes the administrative state for...

Page 235: ...r q to end the configuration for one port or qq to end the configuration for all ports Table A 18 describes the port parameters ports port_number Initiates an editing session in which to change config...

Page 236: ...for 200 ms for locally attached devices and 400 ms for devices connected through other switches The default is False This parameter is ignored if IOStreamGuard is enabled ARB_FF 1 Gbps 2 Gbps ports on...

Page 237: ...ndling This parameter appears only if AutoPerfTuning is False Prevents True or allows False the interleaving of frames in a sequence The default is False Enabling MFSEnable disables LCFEnable and VIEn...

Page 238: ...alues Enable Suppresses the reception of RSCN messages from other ports for which IOStreamGuard is enabled Disable Allows free transmission and reception of RSCN messages Auto Suppresses the reception...

Page 239: ...0 The default is 1000 DefaultDomainID Default domain ID The default is 1 DomainIDLock Prevents True or allows False dynamic reassignment of the domain ID The default is False SymbolicName Descriptive...

Page 240: ...tire zoning database Interop 1 non compliant The default is Standard LegacyAddressFormat Available only when the InteropMode parameter is Interop 1 this parameter enables True or disables False the us...

Page 241: ...shold Parameters Parameter Description Threshold Monitoring Enabled Master enable disable parameter for all events Enables True or disables False the generation of all enabled event alarms The default...

Page 242: ...nent memory Refer to InteropMode on page A 66 The default is True Disabling the Autosave parameter can be useful to prevent the propagation of zoning information when experimenting with different zoni...

Page 243: ...nline LinkSpeed 1 1Gb s 2 2Gb s 3 Auto Auto PortType GL G F FL Donor GL SymPortName string max 32 chars Port1 ALFairness True False False DeviceScanEnable True False True ForceOfflineRSCN True False F...

Page 244: ...the ENTER key to do so Configuring Port Number 16 AdminState 1 Online 2 Offline 3 Diagnostics 4 Down Online LinkSpeed 10 10Gb s 10Gb s PortType G F G SymPortName string max 32 chars 10G 16 DeviceScan...

Page 245: ...ues will follow Enter a new value or simply press the ENTER key to accept the current value If you wish to terminate this process before reaching the end of the list press q or Q and the ENTER key to...

Page 246: ...his process before reaching the end of the list press q or Q and the ENTER key to do so AdminState 1 Online 2 Offline 3 Diagnostics Online BroadcastEnabled True False True InbandEnabled True False Tru...

Page 247: ...gTrigger decimal value 1 1000 200 FallingTrigger decimal value 0 1000 0 SampleWindow decimal value 1 1000 sec 10 ISLMonitoringEnabled True False True RisingTrigger decimal value 1 1000 2 FallingTrigge...

Page 248: ...er a new value or simply press the ENTER key to accept the current value If you wish to terminate this process before reaching the end of the list press q or Q and the ENTER key to do so InteropAutoSa...

Page 249: ...ogfile that is maintained in switch memory where it can be downloaded using FTP To download logfile open an FTP session log in with account name password of images for both and type get logfile clear...

Page 250: ...lter filter can be one of the following values Critical Critical severity level events The critical level describes events that are generally disruptive to the administration or operation of the fabri...

Page 251: ...normal fabric This is the default severity level None Monitors none of the severity levels port port_list Specifies one or more ports to monitor for events Choose one of the following values port_lis...

Page 252: ...tical warn and informative severity levels the highest event severity level is alarm The alarm level describes events that are disruptive to the administration or operation of a fabric and require adm...

Page 253: ...al Address ALPA or to all ALPAs on the arbitrated loop alpa can be a specific ALPA or the keyword ALL to choose all ALPAs clear Clears the counters on the port This keyword does not require an admin s...

Page 254: ...the port online This activates and prepares the port to send data Offline Places the port offline This prevents the port from receiving signal and accepting a device login Diagnostics Prepares the por...

Page 255: ...ocal Authenticate devices using the RADIUS server security database first If the RADIUS server is unavailable then use the local switch security database UserAuthOrder Authenticator priority for user...

Page 256: ...The accounting server UDP port number is the ServerUDPPort value plus 1 default 1813 Timeout Number of seconds to wait to receive a response from the RADIUS server before timing out The default is 2 R...

Page 257: ...n your workstation must use an SSH client The default is False GUIMgmtEnabled Enables True or disables False out of band management of the switch with SANsurfer Switch Manager the SANsurfer Switch Man...

Page 258: ...e synchronizing of switch and workstation dates and times with an NTP server This helps to prevent invalid SSL certificates and timestamp confusion in the event log The default is False This parameter...

Page 259: ...0 Addresses other than 0 0 0 0 for all traps must be unique Trap 1 5 Port Specifies the workstation port to which SNMP traps are sent Valid workstation port numbers are 1 65535 The default is 162 Tra...

Page 260: ...les True or disables False SNMP communication with other switches in the fabric The default is True Note Changing the IP address will terminate all Ethernet management sessions Table A 26 System Confi...

Page 261: ...tocol NTP client on the switch This client enables the switch to synchronize its time with an NTP server This feature supports NTP version 4 and is compatible with version 3 An Ethernet connection to...

Page 262: ...ver True False True AccountingServer True False False Timeout decimal value 10 30 secs 10 Retries decimal value 1 3 0 None 0 SignPackets True False False Secret 32 hex or 16 ASCII char value Do you wa...

Page 263: ...y see allowed options above warning Trap1Version 1 2 2 Trap1Enabled True False False Trap2Address dot notated IP Address 0 0 0 0 Trap2Port decimal value 162 Trap2Severity see allowed options above war...

Page 264: ...Q and the ENTER key to do so Eth0NetworkDiscovery 1 Static 2 Bootp 3 Dhcp 4 Rarp Static Eth0NetworkAddress dot notated IP Address 10 0 0 1 Eth0NetworkMask dot notated IP Address 255 255 255 0 Eth0Gate...

Page 265: ...r_name cimsubscription subscription_name config option domains donor fabric fdmi port_wwn interface log option lsdb mem count ns option pagebreak perf option port port_number post log setup option ste...

Page 266: ...listener listener_name Displays CIM indicator services listener information for the listener given by listener_name If you omit listener_name the command displays all listeners cimsubscription subscri...

Page 267: ...d option can have the following values all Displays name server information for all switches and ports domain_id Displays name server information for the switch given by domain_id domain_id is a switc...

Page 268: ...s port ClassXToss Number of times an SOFi3 or SOFn3 frame is tossed from TBUF DecodeError Number of decode errors detected EpConnects Number of times an E_Port connected through ISL negotiation FBusy...

Page 269: ...ed by FC AL 2 LossOfSync Number of synchronization losses 100 ms detected by this port A loss of synchronization is detected by receipt of an invalid transmission word PrimSeqErrors Primitive sequence...

Page 270: ...sed for diagnosing problems This keyword is intended for use at the request of your authorized maintenance provider The commands that are executed include the following Alias List Config List Date Gro...

Page 271: ...rtAddress FC address of switch port 0 FlashSize MBytes Size of the flash memory in megabytes LogLevel Event severity level used to record events in the event log MaxPorts Number of ports available on...

Page 272: ...emp 1 Degrees Celsius 36 FanStatus 1 Good FanStatus 2 Good FanDirection 1 BackToFront FanDirection 2 BackToFront PowerSupplyStatus 1 Good PowerSupplyStatus 2 Good HeartBeatCode 1 HeartBeatStatus Norma...

Page 273: ...Domain 103 0x67 WWN 10 00 00 60 69 50 0b 6c Domain 104 0x68 WWN 10 00 00 c0 dd 00 b8 b7 The following is an example of the Show Fabric command SANbox Manager show fabric Domain WWN Enet IP Addr FC IP...

Page 274: ...wareVersion 03 02 13 OperatingSystem SunOS 5 8 MaximumCTPayload 2040 NumberOfPorts 1 Port 21 01 00 e0 8b 27 aa bc SupportedFC4Types FCP SupportedSpeed 2Gb s CurrentSpeed 2Gb s MaximumFrameSize 2048 OS...

Page 275: ...56 FC4Type FCP FC4Desc NULL The following is an example of the Show Interface command SANbox Manager show interface eth0 Link encap Ethernet HWaddr 00 C0 DD 00 BD ED inet addr 10 20 68 107 Bcast 10 20...

Page 276: ...e MediaVendorID 00000485 LoginStatus LoggedIn SymbolicName Port8 ALInit 5 LIP_F8_AL_PS 0 ALInitError 0 LIP_F8_F7 0 BadFrames 0 LinkFailures 2 Class2FramesIn 0 Login 3 Class2FramesOut 0 Logout 2 Class2...

Page 277: ...day month date time year PendingImageVersion build date Vx x x 0 17 day month date time year ActiveConfiguration default AdminState Online AdminModeActive False BeaconOnStatus False OperationalState...

Page 278: ...1 PortID 650100 PortWWN 20 01 00 c0 dd 00 91 11 PortType F Remote Link Information Device 0 NodeWWN 50 80 02 00 00 06 d5 38 PortType NL Description NULL IPAddress 0 0 0 0 Device 1 NodeWWN 20 00 00 20...

Page 279: ...e Interface SHell CLISH SystemDescription SANbox 5602 FC Switch Eth0NetworkAddress 10 20 11 192 use set setup system to update MACAddress 00 c0 dd 00 71 ee WorldWideName 10 00 00 c0 dd 00 71 ed Chassi...

Page 280: ...ports are specified security Displays the security database Autosave parameter value switch Displays configuration parameters for the switch threshold Displays alarm threshold parameters for the swit...

Page 281: ...ox Manager show config switch Configuration Name default Switch Configuration Information AdminState Online BroadcastEnabled False InbandEnabled True FDMIEnabled False FDMIEntries 10 DomainID 19 0x13...

Page 282: ...RisingTrigger 25 FallingTrigger 0 SampleWindow 10 ISLMonitoringEnabled True RisingTrigger 2 FallingTrigger 0 SampleWindow 10 LoginMonitoringEnabled True RisingTrigger 5 FallingTrigger 1 SampleWindow...

Page 283: ...Keywords number_of_events Specifies the number of the most recent events to display from the event log number_of_events must be a positive integer component Displays the components currently being mon...

Page 284: ...ys all events related to SNMP Switch Displays all events related to switch management Zoning Displays all events related to zoning level Displays the event severity level logging setting and the displ...

Page 285: ...isplayLevel Critical Warn Info None The following is an example of the Show Log command SANbox Manager show log 327 day month date time year I Eport Port 0 8 Eport State E_A0_GET_DOMAIN_ID 328 day mon...

Page 286: ...ou omit port_number ports 0 15 are displayed Type q and press the Enter key to stop the display port_number Displays continuous performance data in bytes second transmitted for the set of 16 ports 0 1...

Page 287: ...ow perf Port Bytes s Bytes s Bytes s Frames s Frames s Frames s Number in out total in out total 0 7K 136M 136M 245 68K 68K 1 58K 0 58K 1K 0 1K 2 0 0 0 0 0 0 3 0 0 0 0 0 0 4 0 0 0 0 0 0 5 0 0 0 0 0 0...

Page 288: ...tch service status information snmp Displays the current SNMP settings system Displays the current system settings Examples The following is an example of the Show Setup Mfg command SANbox Manager sho...

Page 289: ...tup RADIUS command SANbox Manager show setup radius Radius Information DeviceAuthOrder RadiusLocal UserAuthOrder RadiusLocal TotalServers 1 Server 1 ServerIPAddress 10 20 11 8 ServerUDPPort 1812 Devic...

Page 290: ...ress 10 0 0 254 Trap1Port 162 Trap1Severity warning Trap1Version 2 Trap1Enabled False Trap2Address 0 0 0 0 Trap2Port 162 Trap2Severity warning Trap2Version 2 Trap2Enabled False Trap3Address 0 0 0 0 Tr...

Page 291: ...w setup system System Information Eth0NetworkDiscovery Static Eth0NetworkAddress 10 20 11 32 Eth0NetworkMask 255 255 252 0 Eth0GatewayAddress 10 20 8 254 AdminTimeout 30 InactivityTimeout 0 LocalLogEn...

Page 292: ...itch at convenient points and closes the Telnet session Always power cycle the switch after entering this command Authority Admin session Syntax shutdown Notes Always use this command to perform an or...

Page 293: ...lt The port must be in diagnostics mode to perform this test external Tests both the SerDes and transceiver for all port speeds that are supported by the transceiver The port must be in diagnostics mo...

Page 294: ...of test parameters are displayed on the screen Press the Enter key to accept each default parameter value or type a new value for each parameter and press the Enter key The TestLength parameter is the...

Page 295: ...ome cases parameter is the number of bytes in each frame and the DataPattern parameter is the pattern in the payload Before running the test make sure that the device attached to the port can handle t...

Page 296: ...st reset and reset method A hot reset or non disruptive firmware activation does not reset the elapsed up time reported by this command Authority None Syntax uptime Examples The following is an exampl...

Page 297: ...Admin command to open an admin session from which all commands can be entered Without Admin authority you are limited to view only commands The expiration date is expressed in the number of days unti...

Page 298: ...Press q and the ENTER key to abort this command account name 1 15 chars user1 account password 8 20 chars please confirm account password set account expiration in days 0 2000 0 never 0 100 should thi...

Page 299: ...n y The following is an example of the User List command SANbox Manager admin user list User Ethernet Addr Port Logged in Since admin OB session1 10 20 68 108 1031 day month date time year admin OB se...

Page 300: ...Displays the account name session number and switch domain ID for the Telnet session Authority None Syntax whoami Examples The following is an example of the Whoami command SANbox Manager whoami User...

Page 301: ...he following formats Domain ID and port number pair Domain ID Port Number Domain IDs can be 1 239 port numbers can be 0 255 6 character hexadecimal device Fibre Channel address hex 16 character hexade...

Page 302: ...r Domain IDs can be 1 239 port numbers can be 0 255 6 character hexadecimal device Fibre Channel address hex 16 character hexadecimal worldwide port name WWPN with the format xx xx xx xx xx xx xx xx A...

Page 303: ...23bd31 zone_set_1 wwn_221416 zone_set_1 wwn_2215c3 zone_set_1 wwn_0160ed zone_set_1 wwn_c001b0 zone_set_1 wwn_401248 zone_set_1 wwn_02402f zone_set_1 wwn_22412f zone_set_1 The following is an example...

Page 304: ...A Command Line Interface Zone Command A 130 59097 01 A 0 The following is an example of the Zone Zonesets command SANbox Manager zone zonesets zone1 Current List of ZoneSets for Zone zone1 zone_set_1...

Page 305: ...e set Close the Zoning Edit session before using this keyword active Displays the name of the active zone set This keyword does not require Admin session add zone_set zone_list Adds a list of zones an...

Page 306: ...et Displays all zones that are components of the zone set given by zone_set This keyword does not require an Admin session Notes A zone set must be active for its definitions to be applied to the fabr...

Page 307: ...ion for the active zone set including component zones and zone members This keyword does not require an Admin session cancel Closes the current Zoning Edit session Any unsaved changes are lost clear C...

Page 308: ...ges to the zoning database that have been made during the current Zoning Edit session since the last Zoning Save command was entered save Saves changes made during the current Zoning Edit session The...

Page 309: ...nd The following is an example of the Zoning Limits command SANbox Manager zoning limits Zoning Attribute Maximum Current Zoning Name MaxZoneSets 256 6 MaxZones 2000 17 MaxAliases 2500 1 MaxTotalMembe...

Page 310: ...d 31 wwn_221416 50 06 04 82 bf d2 18 c2 50 06 04 82 bf d2 18 d2 10 00 00 00 c9 22 14 16 wwn_2215c3 50 06 04 82 bf d2 18 c2 50 06 04 82 bf d2 18 d2 10 00 00 00 c9 22 15 c3 Configured Zoning Information...

Page 311: ...A named set of ports or devices An alias is not a zone and can not have a zone or another alias as a member AL_PA Arbitrated Loop Physical Address Arbitrated Loop A Fibre Channel topology where ports...

Page 312: ...anaged Fabric Name User defined name associated with the file that contains user list data for the fabric Fabric Port An F_Port Fabric View File A file containing a set of fabrics that were opened and...

Page 313: ...r maintenance purposes Management Information Base A set of guidelines and definitions for SNMP functions Management Workstation PC workstation that manages the fabric through the fabric management sw...

Page 314: ...s of the same zone Target A storage device that responds to an initiator device User Account An object stored on a switch that consists of an account name password authority level and expiration date...

Page 315: ...display list A 9 display members A 10 remove 3 57 rename A 10 Alias command A 9 Arbitrated Loop Physical Address A 79 archive configuration 4 36 authentication device 3 1 A 27 trap 4 31 user 3 1 auth...

Page 316: ...command A 22 Decode error 4 14 default configuration 4 39 visibility 3 47 3 50 zoning 3 48 default fabric view file auto save 2 16 SANsurfer Switch Manager 2 16 defaults alarm configuration A 49 port...

Page 317: ...ee 2 23 zoning 3 38 Fabric Device Management Interface 4 21 A 92 fabric view file 5 21 auto save 5 22 open 2 16 3 23 password 5 19 save 2 16 3 24 faceplate display data window 2 30 description 2 19 2...

Page 318: ...scription 4 22 enable 3 20 indication service listener A 12 Initial Start Dialog 2 16 Input Power LED 4 44 internal test 5 16 A 119 internet browser 2 2 interoperability 4 23 IP address 4 28 A 86 conf...

Page 319: ...s A 92 IP address A 86 mask A 86 properties 4 27 4 30 Network Time Protocol client A 87 description 4 16 interaction with Date command A 22 server address A 87 service 4 26 A 84 nickname create 3 36 d...

Page 320: ...rfer Switch Manager 2 16 principal switch 4 21 processor 2 2 properties network 4 27 4 30 port 5 10 Ps command A 43 Q Quit command A 44 R RADIUS See Remote Authentication Dial In User Service RADIUS s...

Page 321: ...on cancel A 53 initiate A 53 revert changes A 54 save changes A 54 security set activate 3 18 A 57 add member group A 57 copy A 57 create 3 11 A 57 deactivate 3 18 A 57 delete A 58 delete member group...

Page 322: ...lace 3 26 reset 4 16 A 122 reset without POST 4 17 A 46 restore factory defaults 4 39 selecting 2 26 services A 46 A 83 A 114 stack 4 33 status 2 25 Switch data window 4 8 symbolic name port 5 14 swit...

Page 323: ...irements 2 2 write community 4 31 Z zone access control list 3 40 add member port 3 54 A 127 copy 3 50 A 127 create 3 53 A 127 definition 3 39 delete A 127 delete member port A 128 discard inactive 3...

Page 324: ...uration 3 46 A 68 configuration defaults A 49 configuration display A 106 database 3 41 3 43 A 46 default 3 48 edit A 133 history A 134 limits A 134 list definitions A 134 remove all 3 48 revert chang...

Reviews: