


33
To ensure that the SLATE keeps paired with your SMH300 device, an is not unexpectedly unpair by another user, you can use a 4 digits pairing PIN
code.
☛
Each time the pairing
PIN code
,
H ostname
or
Test card
parameters are modified, the SLATE is unpaired temporarily until the configuration is
taken by the SLATE. So do change them with the right parameters values all at once.
◬
The pairing
PIN code
can be modified successfully only when first a pairing has already been completed.
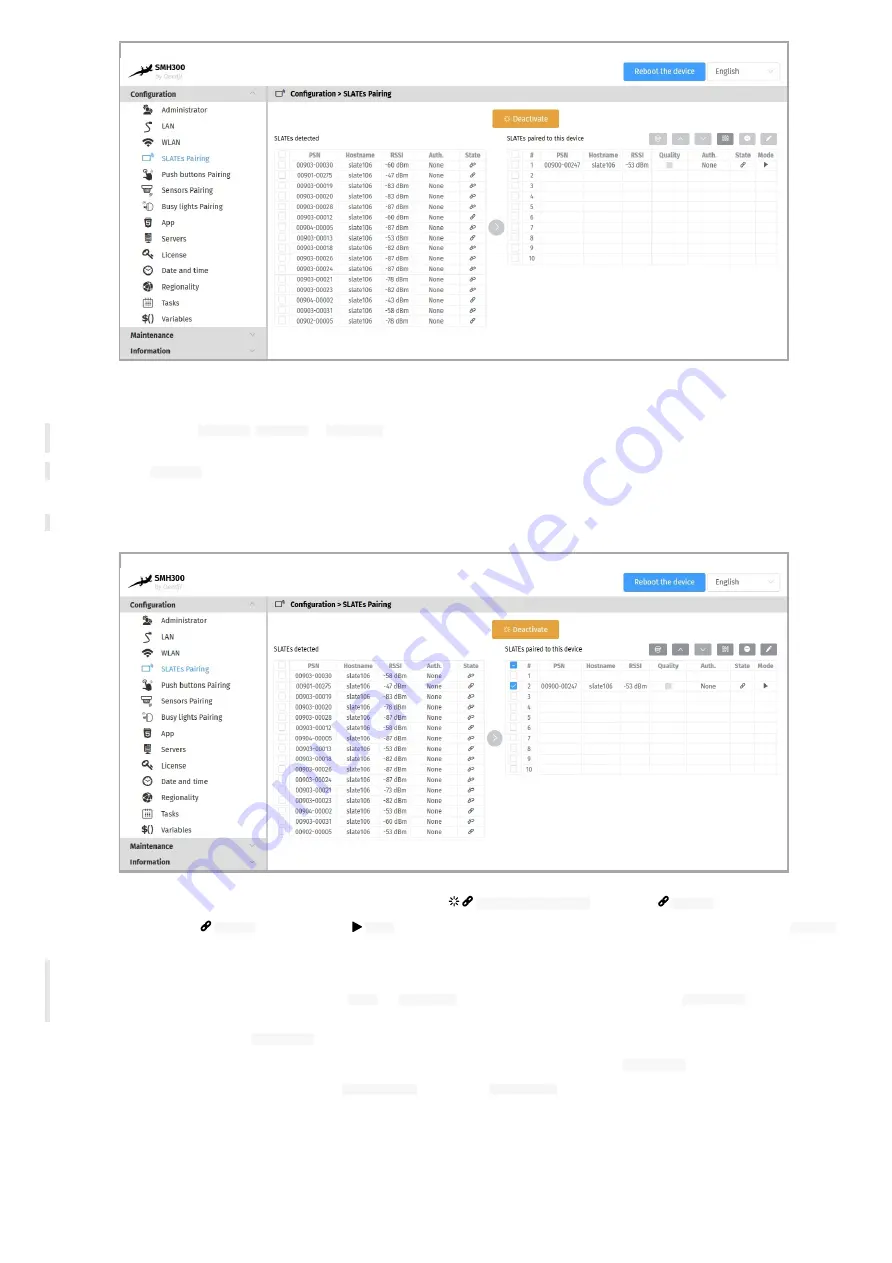
Move the SLATE to the appropriate index.
◬
If you are using a Room booking App, the index must be aligned with the booking resource index configured in its form.
Then wait for the next SLATE wakes up to see the paired status going from
Pairing in progress
state to the
Paired
state.
When all your devices are in
Paired
state , and are in
Play
mode, that means that all the SLATE devices are ready now to get a new
HUB.PPK
content.
◬
In case SMH300 device migration from 3.12.XX to 4.13.14, you should not be able to finalize right now the configuration of some SLATE, whose
the firmware version is V1.10.XX. These device must first take the new firmware version 1.11.11 before taking account the new APPLI.CFG
configuration file. Just ensure that the programmed
Play
(or
Test card
) mode is the right one then click now on
Deactivate
button. Wait for a
while that the SLATEs are installing the new software release V1.11.11 and are then able to take the configuration given by the SMH300.
d) Finalize the pairing procedure with
Deactivate
button:
To complete the SMH300 device configuration, and to allow the SLATE to update their content, click on the
Deactivate
button.
Then check the pairing index and the hostname in the
WPAN Devices
menu of the
Information
pane.
Summary of Contents for SMH300
Page 1: ...User manual SMH 30 0 4 13 14 0 0 2C...
Page 4: ...4 Part I Description and installation...
Page 8: ...8 1 2 2 Device dimensions...
Page 15: ...15 Part II Applicative user interface...
Page 17: ...17 Part III Administration console user interface...
Page 63: ...63 Part IV Con guration by script...
Page 65: ...65 Part V Technical information...
Page 68: ...68 Part V I Contacts...
Page 70: ...70 Part V II Appendix...
Page 73: ...73 Change the layout and the content according to your needs Add as much slides as required...
Page 76: ...76 15 16 17...


