


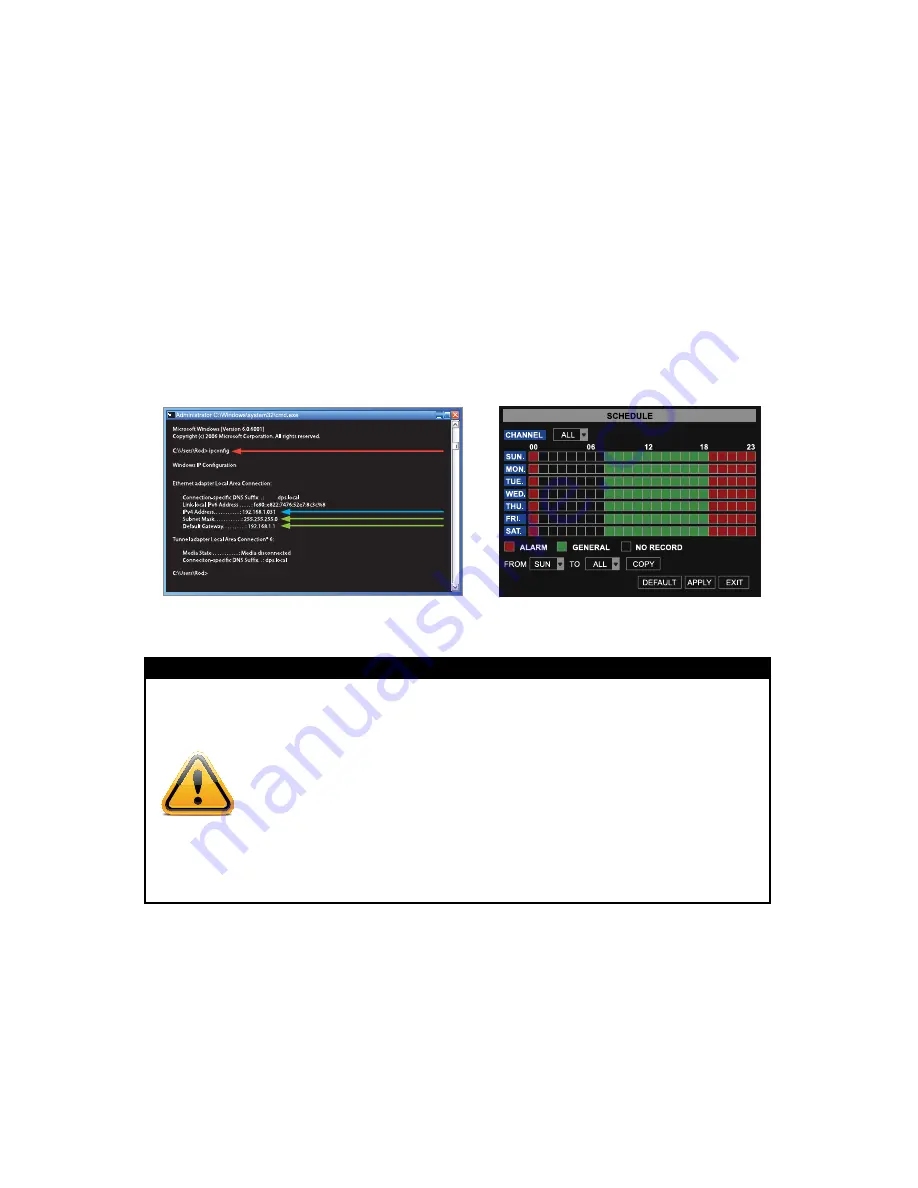
3.
Write down the gateway and subnet mask numbers (Green arrows on Image 14) so
you can enter them into the network settings of the DVR (
IMAge 15
)
4.
From the Network Setup, select the Static option from the “TYPE” drop-down list
5.
Enter the DVR’s IP address, using the same first 3 sets of numbers as the gateway
from the ipconfig (second green arrow in
IMAge 14
)
6.
Select a fourth set of numbers that is different than any other device attached to the
same router. If the IP address of your computer in the ipconfig (BLUE arrow in Image
14) was a single or two digit number any three digit number is ok. If the computer IP
address ends with a number in the 100s, then use a number in the 200’s.
7.
Select OK
IMAge 14
IMAge 15
CAUTION: If HTTP port 80 or 9000 cannot be used because they are being
used by another program, or it is being blocked by your service provider,
use another port in the same range. Forward the IP address of the router
to this new port, change the port in the DVR NeTWORK settings and add
the port number after the IP address when accessing the DVR remotely.
For example, setting the HTTP port to 82, “:82” needs to be added to the
end of the IP address: 192.168.0.25:82. User name and password are the
same as what is used on the DVR.
ddns setup
At the bottom of the NETWORK SETUP window there is an option to setup the DVR to be
accessed through a DDNS service.
1.
Selecting the DDNS SETUP button to open the DDNS Setup screen (
IMAge 16
).
2.
Complete the host name, username and password
WaRning!
CAUTION: If HTTP port 80 or 9000 cannot be used because they
are being used by another program, or it is being blocked by your
service provider, use another port in the same range. Forward the
IP address of the router to this new port, change the port in the DVR
NeTWORK settings and add the port number after the IP address
when accessing the DVR remotely. For example, setting the HTTP
port to 82, “:82” needs to be added to the end of the IP address:
192.168.0.25:82. User name and password are the same as what is
used on the DVR.