background image

19 

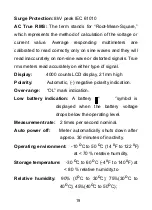
Surge Protection:

 8kV peak IEC 61010 

AC True RMS: 

The term stands for “Root-Mean-Square,” 

which represents the method of calculation of the voltage or 
current value. Average responding multimeters are 
calibrated to read correctly only on sine waves and they will 
read inaccurately on non-sine wave or distorted signals. True 
rms meters read accurately on either type of signal. 

Display:

       4000 counts LCD display, 21mm high 

Polarity:


Automatic, (-) negative polarity indication. 

Over-range:

    “OL” mark indication. 

Low battery indication: 

A battery  “     “symbol is 

displayed when the battery voltage 
drops below the operating level. 

Measurement rate:   

2 times per second nominal. 

Auto power off:

     Meter automatically shuts down after 

approx. 30 minutes of inactivity. 

Operating environment:

    -10 oC to 50 oC (14 oF to 122 oF) 

at < 70 % relative humidity. 

Storage temperature:

    -30 oC to 60 oC (-4 oF to 140 oF) at 

< 80 % relative humidity.to 

Relative humidity:  

90% (0oC to 30oC); 75%(30oC to 

40oC); 45%(40oC to 50oC); 

Summary of Contents for DT-9918T

Page 1: ...1 V mA A 10A V 10A C F OPERATING INSTRUCTION TRUE RMS AUTORANGING DIGITAL MULTIMETER...

Page 2: ...2...

Page 3: ...bus bars To measure voltage the instrument must not be switched to a current or resistance range or to the diode check or buzzer position Circuits must be de energised and isolated before carrying out...

Page 4: ...f it is damaged Warnings and precautions must be read and understood before an instrument is used They must be observed during the operation of this instrument Symbols used on this instrument are Caut...

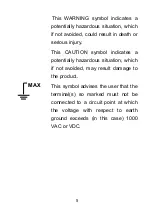
Page 5: ...s injury This CAUTION symbol indicates a potentially hazardous situation which if not avoided may result damage to the product This symbol advises the user that the terminal s so marked must not be co...

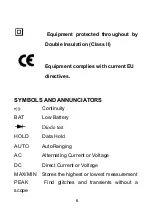
Page 6: ...ith current EU directives SYMBOLS AND ANNUNCIATORS Continuity BAT Low Battery Diode test HOLD Data Hold AUTO AutoRanging AC Alternating Current or Voltage DC Direct Current or Voltage MAX MIN Stores t...

Page 7: ...is meter has Auto OFF that automatically shuts the meter OFF if 30 minutes elapse between uses NOTE On some low AC and DC voltage ranges with the test leads not connected to a device the display may s...

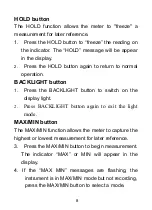
Page 8: ...button 1 Press the BACKLIGHT button to switch on the display light 2 Press BACKLIGHT button again to exit the light mode MAX MIN button The MAX MIN function allows the meter to capture the highest or...

Page 9: ...the MODE button to select AC or DC 3 Allow time for the display to stabilize 4 Press and Hold the PEAK button until CAL appears in the display This procedure will zero the range selected 5 Press the P...

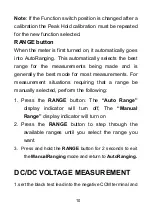
Page 10: ...mode for most measurements For measurement situations requiring that a range be manually selected perform the following 1 Press the RANGE button The Auto Range display indicator will turn off The Manu...

Page 11: ...t measurements up to 4000uA DC set the function switch to the uA position and insert the red test lead banana plug into the uA jack 3 For current measurements up to 400mA DC set the function switch to...

Page 12: ...ert the black test lead plug into the negative COM socket 2 For current measurements up to 10A set the function switch to the A position and insert the red test lead plug into the 10A jack 3 For curre...

Page 13: ...Apply power to the circuit 9 Read the current in the display The display will indicate the proper decimal point value and symbol RESISTANCE MEASUREMENT WARNING To avoid electric shock disconnect powe...

Page 14: ...display will indicate the proper decimal point value and symbol CONTINUITY CHECK WARNING To avoid electric shock never measure continuity on circuits or wires that have voltage on them 1 Set the range...

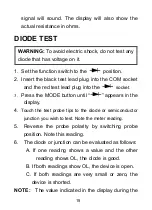
Page 15: ...MODE button until appears in the display 4 Touch the test probe tips to the diode or semiconductor junction you wish to test Note the meter reading 5 Reverse the probe polarity by switching probe pos...

Page 16: ...ed test lead banana plug into the CAP positive jack 3 Touch the test probe tips across the part under test 4 Read the capacitance value in the display 5 The display will indicate the proper decimal po...

Page 17: ...Read the frequency in the display The digital reading will indicate the proper decimal point symbols kHz MHz and value TEMPERATURE MEASUREMENT 1 Set the function switch to the Type K F or C position...

Page 18: ...CATIII 1000V NOTE These meters meet CAT III and CAT IV IEC 61010 standards The IEC 61010 safety standard defines four overvoltage categories CAT I to IV based on the magnitude of danger from transien...

Page 19: ...splay 4000 counts LCD display 21mm high Polarity Automatic negative polarity indication Over range OL mark indication Low battery indication A battery symbol is displayed when the battery voltage drop...

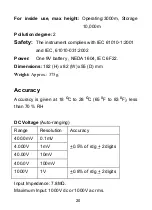
Page 20: ...9V battery NEDA 1604 IEC 6F22 Dimensions 182 H x 82 W x55 D mm Weight Approx 375g Accuracy Accuracy is given at 18 oC to 28 oC 65 oF to 83 oF less than 70 RH DC Voltage Auto ranging Range Resolution A...

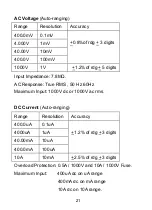
Page 21: ...pedance 7 8M AC Response True RMS 50 Hz 60Hz Maximum Input 1000V dc or 1000V ac rms DC Current Auto ranging Range Resolution Accuracy 400 0uA 0 1uA 1 2 of rdg 3 digits 4000uA 1uA 40 00mA 10uA 400 0mA...

Page 22: ...rotection 0 5A 1000V and 10A 1000V Fuse AC Response True RMS 50 Hz to 60 Hz Maximum Input 400uA ac rms on uA 400mA ac rms on mA 10A ac rms on 10A range Resistance Auto ranging Range Resolution Accurac...

Page 23: ...00uF 10nF 400 0uF 0 1uF 4 000mF 0 001mF 10 of rdg 10 dgts 40 00mF 10 00mF Input Protection 1000V dc or 1000V ac rms Frequency Auto ranging Range Resolution Accuracy 4 000kHz 1Hz 1 2 of rdg 3 dgts 40...

Page 24: ...or ac rms Diode Test Test current Resolution Accuracy 1mA typical Open MAX 3V 1 mV 10 of rdg 5 digits Open circuit voltage MAX 3V dc Overload protection 1000V dc or ac rms Audible continuity Audible t...

Page 25: ...rning symbol will appear in the LCD display The battery should be replaced 2 Follow instructions for installing battery See the Battery Installation section of this manual 3 Dispose of the old battery...

Page 26: ...the battery cover back in place Secure with the two screws NOTE If your meter does not work properly check the fuses and battery to make sure that they are still good and that they are properly inser...

Page 27: ...nto the holder 5 Always use a fuse of the proper size and value 0 5A 1000V fast blow for the 400mA range 10A 1000V fast blow for the 10A range 6 Put the fuse door back in place Insert the screw and ti...

Page 28: ...28...

Reviews: