2 Quick-start instructions
We get it. You just assembled the MMU2S according to Assembly Guide, connected it to
your printer and now you are eager to start printing. :) But give us just a second! There’s a
couple of important steps you need to take before you can print your first multi-material
G-Code. Please note that these instructions are just a quick overview for users who already
have experience with 3D printing. We highly recommend reading the full instructions.
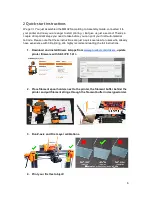
1. Download and install Drivers & Apps from
www.prusa3d.com/drivers
, update
printer firmware with Slic3r PE 1.41+.
2. Place filament spool holders next to the printer, the filament buffer behind the
printer and pull filament strings through the filament buffer in designed order.
3. Run Z-axis and First Layer calibrations.
4. Print your first test object!
6
Summary of Contents for i3 MK2.5S Multi Material Upgrade 2S
Page 1: ...ENG ...

