


8611311
180 MULTI-PROCESS MIG-ARC-TIG WELDER
V1.0
28
For technical questions call 1-800-665-8685
8. Place the tip holder over the end of the liner and screw into the torch neck trimming it up
tight (Fig. 68).
9. Screw down the liner nut the remaining 1/2 and trim it up tight. This method compresses
the liner inside the torch cable assembly preventing it moving during use and ensures good
wire feed (Fig. 69).
TORCH & WIRE FEED SET UP FOR ALUMINUM WIRE
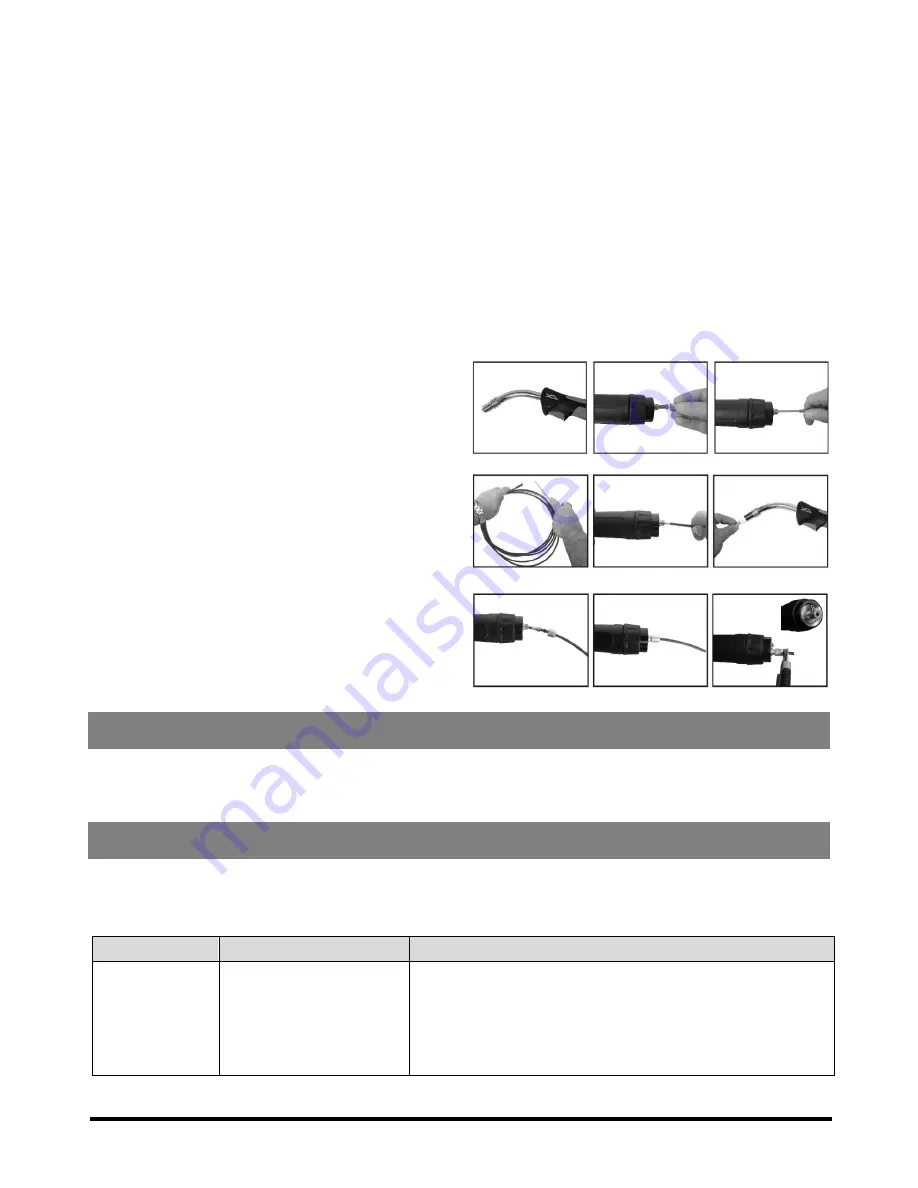
1. Lay the torch out straight on the ground and remove the front end parts (Fig. 70).
2. Remove the liner retaining nut (Fig. 71).
3. Carefully pull the liner out of the torch cable assembly (Fig. 72).
4. Select the correct new liner and carefully unravel avoiding putting any kinks in the liner, if
you kink the liner it will make it no good and will require replacement (Fig. 73).
5. Carefully and slowly feed the liner in short forward movements down the cable assembly all the
way through and out the torch neck end. Avoid kinking the liner. A kinked liner must be
discarded and replaced (Fig. 74).
6. Place the tip holder over the end of the liner
and screw into the torch neck trimming it
up tight (Fig. 75).
7. Fit the liner retaining nut together with the
liner o-ring and liner retaining nut (Fig. 76).
8. Push the liner firmly into the torch lead and
tighten the liner retaining nut (Fig. 77)
9. Cut the liner flush with the end of liner
retaining nut using a sharp box cutter knife
(Fig. 78).
10. Secure the torch’s connector to the welding
machine’s euro connection (H).
11. Open the welding machine’s side panel and
follow the instructions in Wire Installation
and Set Up to install the aluminum wire and
complete the set up.
DISPOSAL
Recycle a tool damaged beyond repair at the appropriate facility.
Contact your local municipality for a list of disposal facilities or by-laws for electronic devices,
batteries, oil or other toxic liquids.
TROUBLESHOOTING
Visit a Princess Auto Ltd. location for a solution if the tool does not function properly or parts
are missing. If unable to do so, have a qualified technician service the tool.
ARC (STICK) WELDING
PROBLEM(S)
POSSIBLE CAUSE(S)
SUGGESTED SOLUTION(S)
No arc.
1. Incomplete welding
circuit
2. Wrong mode selected
3. No power supply
1. Check earth lead is connected. Check all cable
connections.
2. Check the MMA selector switch is selected.
3. Check that the machine is switched on and has a power
supply.
Fig. 70
Fig. 71
Fig. 72
Fig. 73
Fig. 74
Fig. 75
Fig. 76
Fig. 77
Fig. 78


