Icons on the screen are used to operate the OSD. When you start up the OSD, the main
menu appears. Touching the icon of the item you want to adjust displays its submenu or
setting change screen. In the setting change screen, and icons are used to change the
setting. To apply the setting, press the
SET
button. Press the
SAVE
button to save the
defined settings.
Using the OSD
To quit the OSD, press the
ESC
button in the main menu or level the OSD as it is for at
least 30 seconds. If the OSD is automatically closed after 30 seconds of inactivity, the
values set before the OSD was closed will be applied.
Quitting the OSD
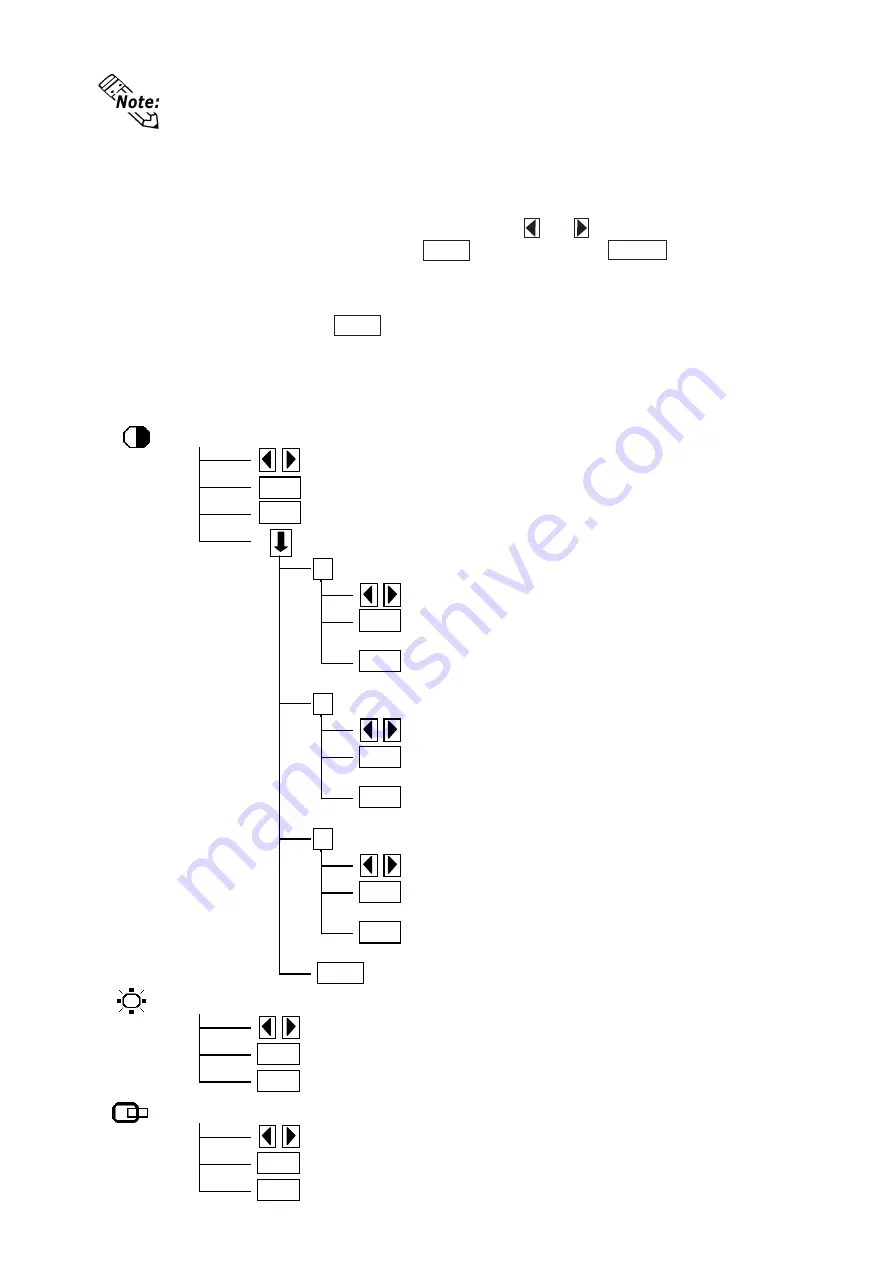
OSD Menu and Operation Tree
ESC
Cancels the setting and then returns to the main menu.
Adjustment buttons
SET
Applies the setting and then returns to the main menu.
BLACKLEVEL
ESC
Cancels the setting and then returns to the main menu.
H-POS
SET
Applies the setting and then returns to the main menu.
Adjustment buttons
ESC
Cancels the setting and then returns to the sub contrast
adjustment screen.
ESC
Returns to the contrast menu.
B
B contrast
Adjustment buttons
SET
Applies the setting and then returns to the sub contrast
adjustment screen.
SET
Applies the setting and then returns to the sub contrast
adjustment screen.
ESC
Cancels the setting and then returns to the sub contrast
adjustment screen.
ESC
Cancels the setting and then returns to the sub contrast
adjustment screen.
G
G contrast
Adjustment buttons
R
R contrast
Adjustment buttons
SET
Applies the setting and then returns to the sub contrast
adjustment screen.
CONTRAST
ESC
Cancels the setting and then returns to the main menu.
Sets the contrast setting and then moves to the sub contrast menu.
SET
Applies the setting and then returns to the main menu.
Adjustment buttons
• The OSD is not displayed when SW1-2 is set to ON.


