26 Create a Print File
7. Rename the swatch FXCUT.
8. Set the Color Type to "Spot Color."
9. Set the color to white. This necessary because any part of
the imported die line which is not covered by another
object will be printed unless you set the color to white.
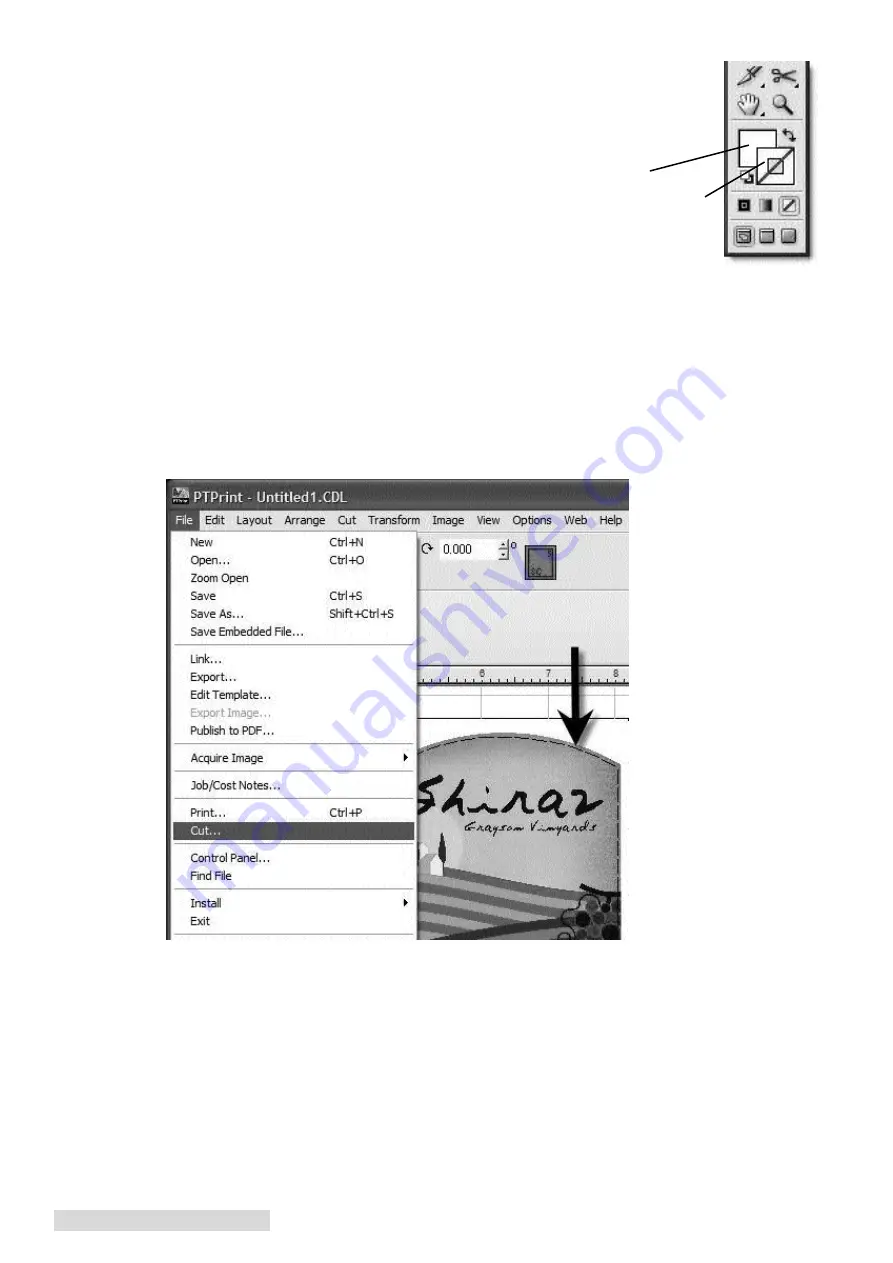
10. Make sure the fill of the object is set to the FXCUT
Swatch and the outline is transparent.
11. Click OK.
12. Save the file as an EPS (Encapsulated Post Script).
Note:
There is no need to separate the die
line from the graphic. They should be saved in the same file.
13. Follow the steps in the CX1200e manual to import and array the EPS graphic.
14. If your die line was correctly named, PTPrint will automatically convert the die line into a cut
line. You will know this was successful if the die line appears in PTPrint as a dashed line.
15. Go to the File menu and choose Cut. Save the cut file as a .plt file on a thumb drive or any
location that the FX1200e touch screen computer is setup to access.
Warning:
Always use this same PTPrint file to print to the CX1200e. The cut lines will not print.
If you change the layout of the graphics you must recreate the cut file or the cut will not align to the
graphics.
Important Note:
You must have the latest version of PTPrint for this procedure to work. Download the
latest version from the following location on the Primera website. Follow the installation instructions
provided on the website.
http://primeralabel.eu/europe/cx1200e-downloads.html
Fill = FXCUT
Outline = Transparent
Summary of Contents for Digital Color Label Press CX1200e
Page 4: ...iv CX1200e Color Label Press...
Page 5: ...v CX1200e Color Label Press...
Page 63: ......
Page 64: ......
Page 65: ...P N 511222 093011...


