64
MBOX
®
DIRECTOR USER MANUAL
Timecode Editing
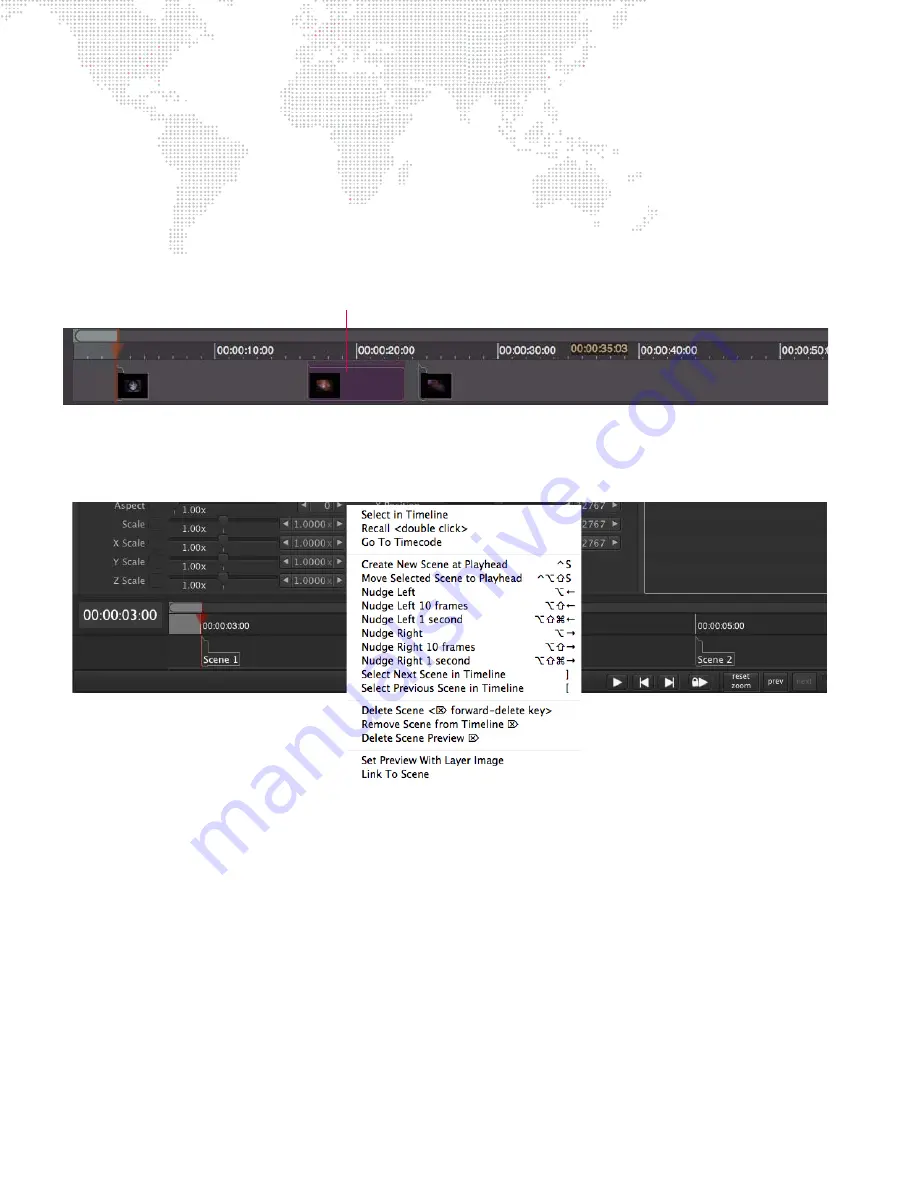
Timecode entries can be edited at any time by changing the values in the Scene List or by dragging the markers in the
timeline.
To edit timecode using the timeline:
Step
1. Be sure Play Lock button is not enabled.
Step
2. At timeline, single-click on a scene marker (it will turn purple) and drag to a new position. Changes will be
reflected in the Scene List timecode fields. A double-click will recall the scene and also select it in the
Scene List.
Timeline Pop-up Menu
The Timeline menu offers various timeline controls. The Timeline pop-up can be accessed by right-clicking on a scene
in either the Timeline or in the Scene List. It may also be accessed by double-clicking on a scene in the timeline.
Options are as follows:
+
Select in Timeline
- This is best used when the pop-up menu is accessed at the Scene List table (right-click in
the Scene List). When a scene in the table is selected, and "Select in Timeline" is chosen, the selected scene will
become selected in the timeline area at the bottom of the screen.
+
Recall
- Recalls the scene and selects it in the Scene List.
+
Go To Timecode
- Moves the playhead to the timecode position of the selected scene (also triggering recall of
that scene).
+
Create New Scene at Playhead
- Inserts a new scene at the current playhead position. (If timecode is running,
this could be used to create markers that could be updated at a later time.)
+
Move Selected Scene to Playhead
- Moves the scene to the current playhead position.
+
Nudge Left/Right
- Nudges the scene by one (1) frame to the left or right. If the keyboard [Shift] key is held down,
it will nudge by increments of ten (10) frames.
+
Select Next/Previous Scene in Timeline
- Selects the next or previous scene.
+
Delete Scene
- Deletes the selected scene.
Selected Scene


