7
Before use
o
Be sure to set up the unit for use in a dry area with no danger of liquid or particles such as
sand and grit coming into contact with the device.
o
Wipe the lid gasket to remove any grit, sand, hair or other particles that could cause the
seal to fail. Use a lint free cloth or a clean, dry finger.
o
Check the lid gasket for cracks or breaks. If found do not use unit. Contact Predator
Technology Ltd directly.
o
Check corresponding lid moulding for cracks or breaks. If found do not use unit. Contact
Predator Technology Ltd directly.
o
Insert the PVR into the control case making sure it is correctly oriented, with the screen
facing up and the arrows located on the front and rear panels of the PVR following the
direction of movement. Do
n’t force if difficult to insert but remove assess and adjust the
orientation of the PVR according to the instructions and retry.
o
Close the control case lid and ensure it is firmly secured by closing and locking the lid
catch.
o
Attach the camera to the recording unit via the lead and connector by removing the
protecting caps from both connector and the socket then lining them up so that the
connector can be inserted into the socket. To secure the connection turn the locking ring in
a clockwise direction being careful not to cross thread it on the socket thread.
o
Firmly tighten the locking ring using one hand. Do not use any tools to tighten the
connector as over tightening may damage the integral seal permanently and cause the
connector to leak.
o
Ensure the filter bezel on the camera’s front face is firmly hand-tighten into the body of the
camera. Do not use any tools to tighten the filter bezel as over tightening may damage the
integral seal permanently and cause the filter bezel to leak.
o
Check the function, memory and battery life of the video recording equipment before use. If
any battery or media changes need to be made at this stage it can be done in the safety of
a dry, safe environment.
Care Information
Warning
When connecting the A/V cable, be careful
not to cross thread the locking ring on the
socket thread. If the system is used whilst
cross threaded the waterproof seal will not
be effective and damage may occur to the
threads that will irreversibly affect the
connector’s waterproof properties.
Tip
Before connecting the camera to the
recording unit check both connector
threads for sand, grit or other particles.
Remove any particles and ensure the
threads are clean before attempting to
connect.
Summary of Contents for VX360
Page 1: ......
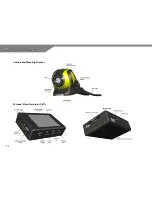
Page 11: ...11 Camera and Mounting Bracket Personal Video Recorder PVR...
Page 37: ...37...
Page 38: ...38...


