18
1.
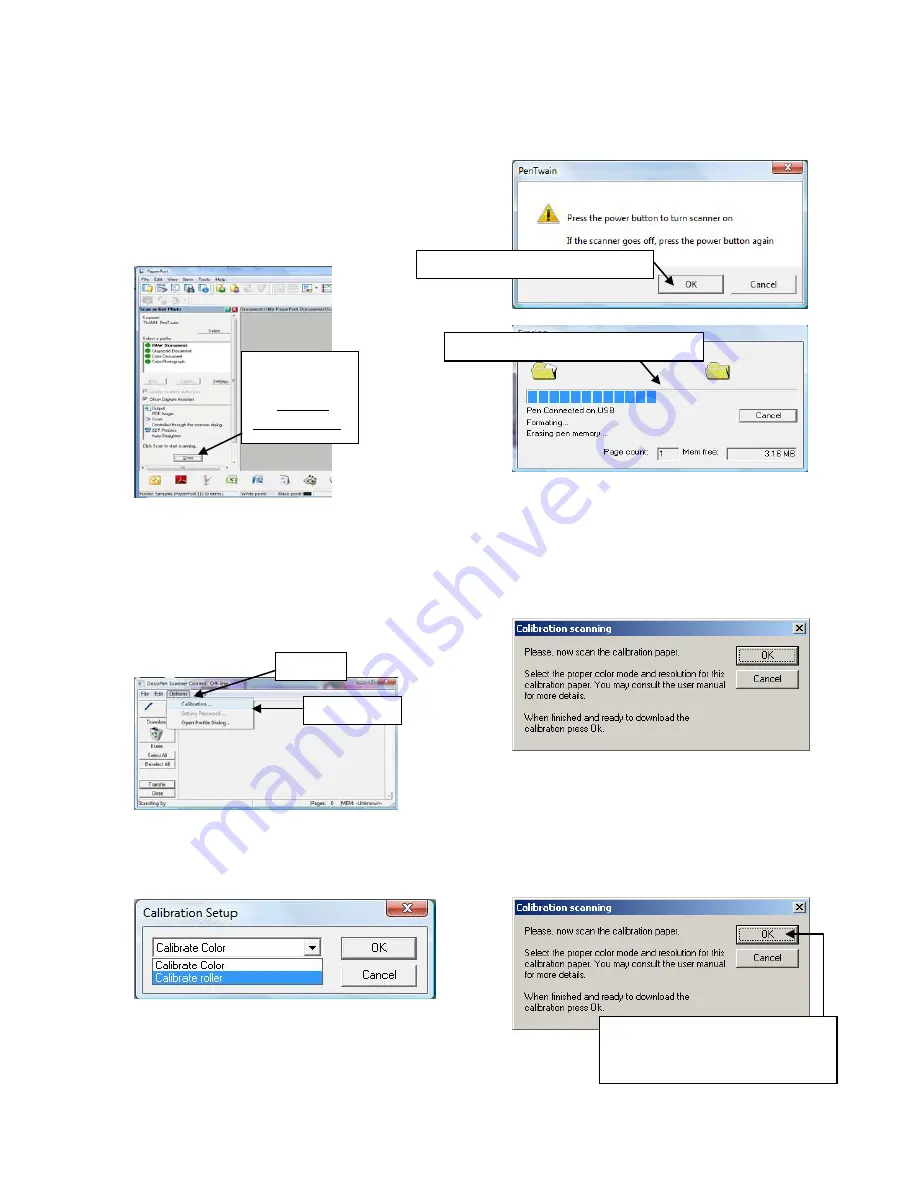
Connect the DocuPen Xseries scanner to your
computer using the USB cable.
2.
Start the PaperPort software
3.
Press and hold the left Shift and Ctrl keys on
your keyboard and then click the Scan button
within the PaperPort window.
4.
The DocuPen Scanner Control window will
appear with the Calibration function enabled.
In the DocuPen Scanner Control Window, click
on Options and select the Calibration function.
If you don’t see the Calibration function please
repeat step 3.
5.
In the Calibration Setup window that appears
please select Calibrate Roller from the drop
down menu and click OK.
6.
You will be prompted to turn the DocuPen
Xseries scanner ON. Press the Power ON
button and then click OK in the PenTwain
Dialog window.
7.
After the memory has been formatted, the
Calibration scanning dialog window will appear.
Please disconnect the DocuPen from the USB
cable and position it on top of the Roller
Calibration sheet. Please scan the sheet in the
B&W mode and high resolution (600 DPI).
8.
The DocuPen will now save the Calibration
Image into memory. After the image is saved,
please re-attach the DocuPen to the USB cable.
Now press the Power ON button within the
DocuPen and click the OK button within the
Calibration scanning dialog window.
Hold Shift and
Ctrl on Keyboard
and then click
the Scan button
Calibration…
Options
Make sure scanner is ON and click OK
Memory will be automatically formatted
Wait for Roller calibration sheet to be
saved, re-connect the USB connection
and turn the power ON, then click OK.
Summary of Contents for DocuPen X SERIES
Page 1: ...1 DocuPen XSERIES Scanner ...
Page 22: ...22 ...


