66
5
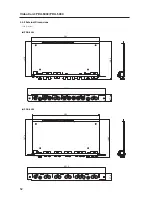
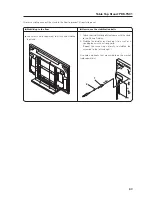
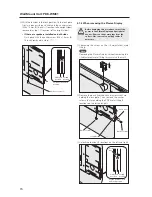
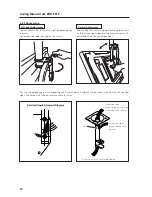
Attach the wall side hardware to the wall.
Install the wall side hardware (4 locations) symmetri-
cally on the left and right side (one at each location
from the center of the
). Wall strength and ma-
terial determines the type of screws and bolts (sold
separately) needed for this installation.
Note
Check the strength of the wall and beams before in-
stalling the display.
Tilt Mount Unit: PDK-5011
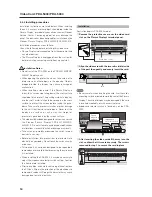
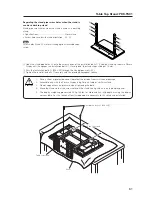
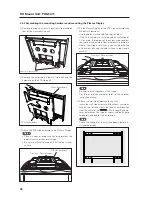
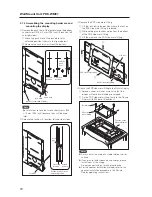
4.6.3 Assembling the mounting hardware and mounting the Plasma Display
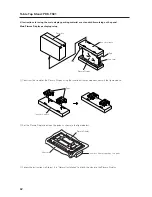
Special screws (M6)
2
Remove the hardware on the wall side half and the
hardware on the PDP side half.
3
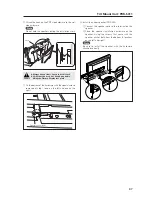
Attach the PDP side hardware to the Plasma Display.
Notes
• Place a sheet or protective cover to protect the
display from scratches or damage.
• Be sure to attach it on top of a flat table or similar
surface.
4
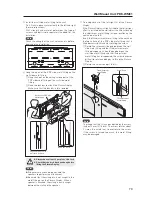
Fix the Plasma Display to the PDP side hardware with
M8 bolts (6 locations).
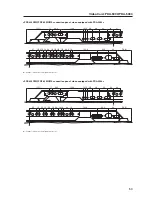
Use the holes marked with the red triangle "
%
".
If the 42-inch model is installed with an inclination of
18° or more, the top part of the screw used to adjust
the angle may be visible from a horizontal position in
front of the screen. In this case, you can hide the top
of the screw by using the holes without a red triangle
mark "
%
".
Wall side hardware
PDP side hardware
PDP side hardware
Top side of Plasma Display
1
Remove the special screws (2 locations) from the bot-
tom of the wall mounting unit.
Top side of Plasma Display
Note
Be sure to install speakers at this stage.
For the installation method, refer to the speaker
instruction manual.

