AVH-P3100DVD/XN/UC
96
1
2
3
4
1
2
3
4
C
D
F
A
B
E
1
2
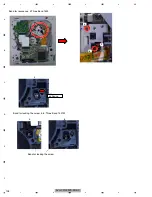
Remove the three screws
and then remove the Main Unit.
Straighten the tabs at two locations indicated.
Remove the screw.
3
1
2
2
3
3
3
-
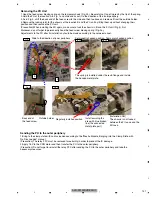
Removing the Mother Unit (Fig.9)
Fig.9
Mother Unit
NOTE: When you remove the top case
NG
OK
Use these holes to remove the top
case.
REASON: The rear panel may be
deformed.
Don't put tweezers or something
into these holes to remove the top
case
Summary of Contents for AVH-P3150DVD
Page 29: ...AVH P3100DVD XN UC 29 5 6 7 8 5 6 7 8 C D F A B E ...
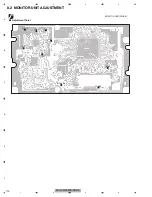
Page 61: ...AVH P3100DVD XN UC 61 5 6 7 8 5 6 7 8 C D F A B E Side A SCLOCK SDATA D CP_ RESET D DGND2 ...
Page 67: ...AVH P3100DVD XN UC 67 5 6 7 8 5 6 7 8 C D F A B E ...
Page 114: ...AVH P3100DVD XN UC 114 1 2 3 4 1 2 3 4 C D F A B E 9 1 PACKING ...
Page 116: ...AVH P3100DVD XN UC 116 1 2 3 4 1 2 3 4 C D F A B E 9 2 EXTERIOR 1 A A A B ...
Page 118: ...AVH P3100DVD XN UC 118 1 2 3 4 1 2 3 4 C D F A B E 9 3 EXTERIOR 2 A A E F 2 1 ...
Page 123: ...AVH P3100DVD XN UC 123 5 6 7 8 5 6 7 8 C D F A B E ...
Page 127: ...AVH P3100DVD XN UC 127 5 6 7 8 5 6 7 8 C D F A B E ...
Page 145: ...AVH P3100DVD XN UC 145 5 6 7 8 5 6 7 8 C D F A B E ...


