AVH-P3100DVD/XN/UC
106
1
2
3
4
1
2
3
4
C
D
F
A
B
E
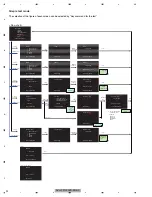
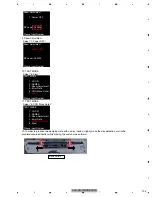
CRG Move Outer
1: DVD Single Layer
2: DVD Dual Layer
3: CD
4: CD-RW
5: Return
Please Input Number
CRG Move Outer
1: Power OFF
Please Input Number
TEST MODE
1: LD ON
2: ASMAX
3: Skew Adjustment
4: Error Rate
5: CRG Move Outer
6: Eject
Please Input Number
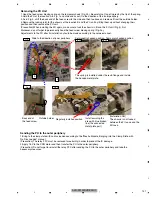
Disc Detection Arm
13. CRG Move Outer
Select “1: DVD Single Layer.”
The pickup moves to the outer periphery.
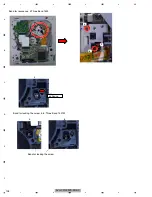
Apply the adhesive to fix the skew, the resonance adhesive and the screw lock.
Refer to the next page regarding the locations of adhesive joining.
14. CRG Move Outer
1: Power OFF
15. TEST MODE
Select “6: Eject.”
Summary of Contents for AVH-P3150DVD
Page 29: ...AVH P3100DVD XN UC 29 5 6 7 8 5 6 7 8 C D F A B E ...
Page 61: ...AVH P3100DVD XN UC 61 5 6 7 8 5 6 7 8 C D F A B E Side A SCLOCK SDATA D CP_ RESET D DGND2 ...
Page 67: ...AVH P3100DVD XN UC 67 5 6 7 8 5 6 7 8 C D F A B E ...
Page 114: ...AVH P3100DVD XN UC 114 1 2 3 4 1 2 3 4 C D F A B E 9 1 PACKING ...
Page 116: ...AVH P3100DVD XN UC 116 1 2 3 4 1 2 3 4 C D F A B E 9 2 EXTERIOR 1 A A A B ...
Page 118: ...AVH P3100DVD XN UC 118 1 2 3 4 1 2 3 4 C D F A B E 9 3 EXTERIOR 2 A A E F 2 1 ...
Page 123: ...AVH P3100DVD XN UC 123 5 6 7 8 5 6 7 8 C D F A B E ...
Page 127: ...AVH P3100DVD XN UC 127 5 6 7 8 5 6 7 8 C D F A B E ...
Page 145: ...AVH P3100DVD XN UC 145 5 6 7 8 5 6 7 8 C D F A B E ...

