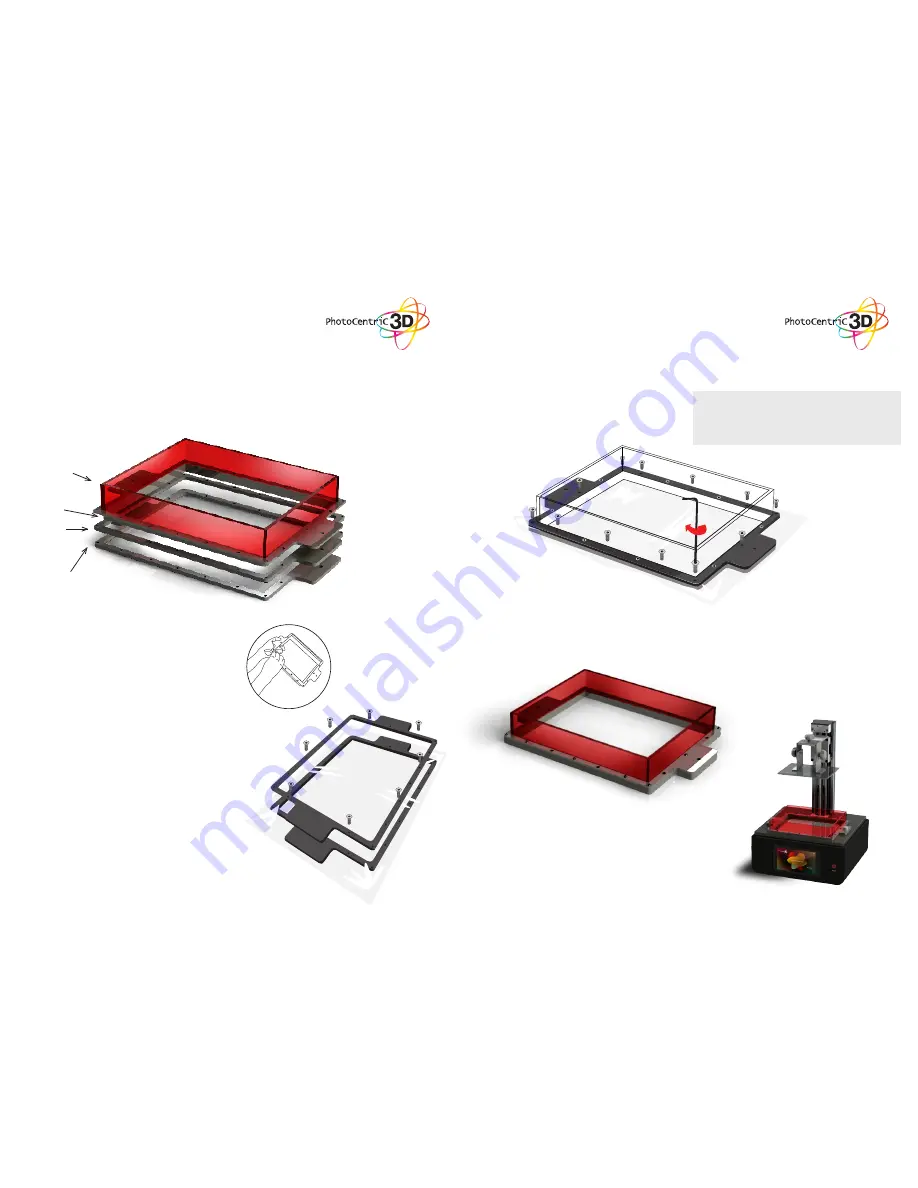
1.
Remove all the retaining bolts from the vat.
2.
Dispose of the vat film. Wipe the vat clean and
wash all parts with soap and water.
3.
Place the “Vat Base Flange D flat on a table”
with the brass inserts pointing down.
4.
Check the new vat film isn’t pierced or dented
and lay it on top of the “Vat Base Flange D”.
5.
Place the “Vat Retaining Flange C” on top of the
film, aligning the holes with the corresponding
ones on the “Base Flange D”.
6.
Loosely insert the 8 x M3 8mm bolts as shown.
7. RE-SKINNING
THE VAT
VAT Tensioning
Ring -
B
VAT Top
Flange -
A
Retaining
Flange -
C
Metal
Retaining
Base Flange -
D
7.
Place the main vat tray over the film and gently
press down. Screw the four corners first loosley.
Tighten the M3 bolts which were inserted in
step 6. Tighten the four corner bolts, insert and
tighten the remaining bolts.
Note: Do not fully tighten each bolt individually.
This will cause the Main Vat to tension at an
angle. Aim to half tighten the bolts and fully
tighten once all the bolts are secured.
8.
The vat should now be tensioned. Trim excess edges off the film.
9.
Fill with water and leave on absorbent paper to check for leaks. Drain and dry with paper towel
before use.
13
14
Important:
Clean all the
parts before
reassembly


