CON
TENTS
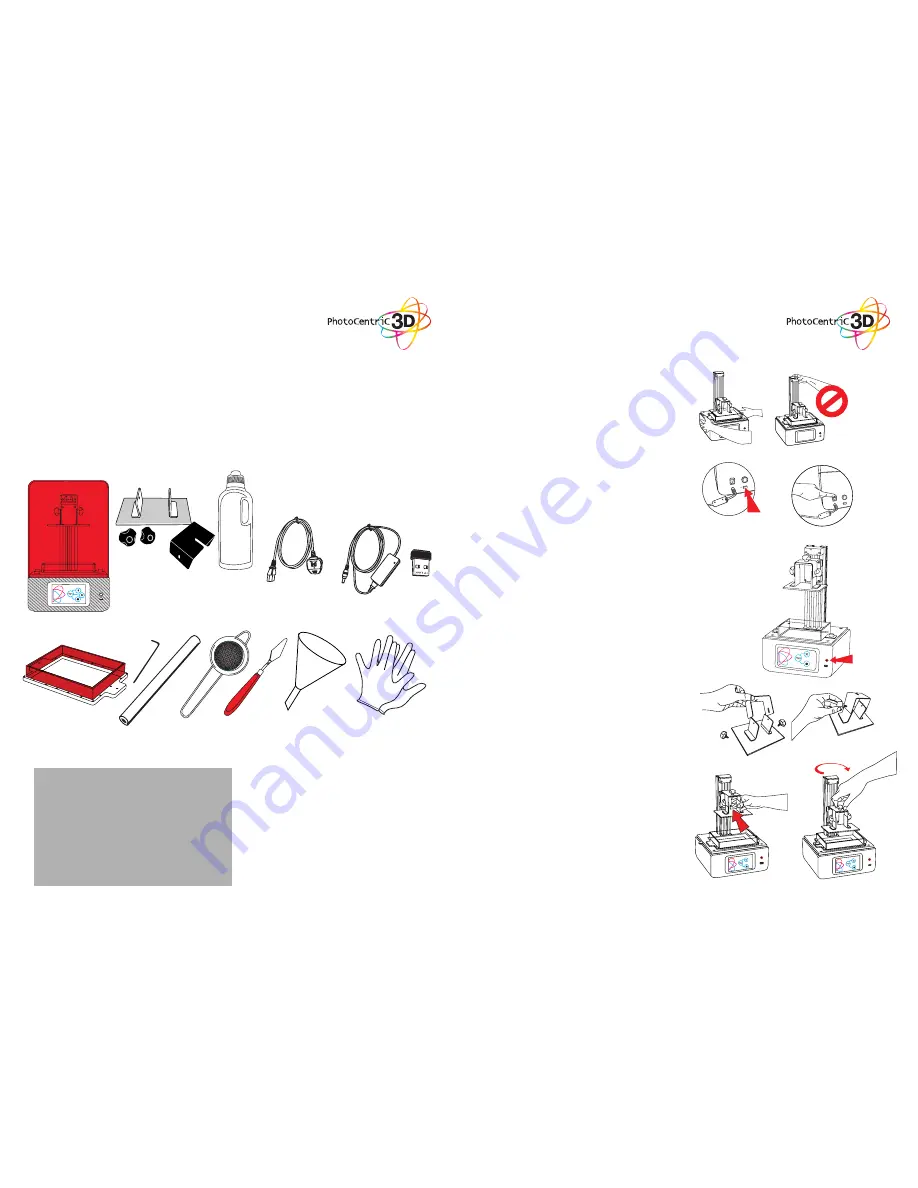
Allen key, vat film 2 sheets, strainer, small spatula, funnel, gloves
Vat ready to use
250g of Hard
Red resin
Power supply
for the printer
The box
contains
Liquid Crystal
HR 3D Printer
with red hood
RECOMMENDED ITEMS
• Extra gloves.
• Paper towels.
• Access to a sink with hot water to clean the
object.
• Liquid soap (detergent) to clean the object.
• Soft brush or sponge to clean the object.
• Glass or clear plastic container to post ex-
pose the object in.
• Ultrasonic cleaner (Optional)
MINIMUM COMPUTER
REQUIREMENTS
• 1.2 GHz processor or above.
• Windows
• 2 GB RAM memory or above.
WiFi
Dongle
1. INSTALLATION
& ASSEMBLY
INSTRUCTIONS
OK
1. Open the box and carefully remove the printer.
Do not pull the printer out by the linear drive/z-
axis.
2. Place the printer in the work area and screw in
the 4 feet supplied in the ancillary box. Make sure
it is level.
3. Connect the USB wifi dongle supplied in the back
of the printer.
4. Connect the B end of the power supply cable
to the power supply and insert into the back of
the printer. Turn the printer on using the rocker
switch located at the back of the printer. The
touchscreen at the front will turn on. The screen
will start making a system check and the welcome
screen will appear a few seconds later.
5. Assemble the platform from the ancillary box
by placing the black U bracket over the outside
of the L brackets. Slide it onto the printer arm
and tighten the top knob only, leave the two side
knobs loose.
6. If you are experiencing difficulties setting up your
printer please visit our website:
www.photocentric3d.com/support.
WIFI
DONGLE
ASSEMBLY INSTRUCTIONS
6
5
Platform
RED
A one year Creation Workshop
License is included with this printer.
The license will need activating within
30 days. The license number can be
found on the bottom of the printer.


