1. Go to
www.photocentric3d.com
and download
Creation Workshop in “support”. The latest version of
this is always online.
2.
Execute the Creation Workshop software by double
clicking on “CreationWorkshop.exe”. If the software
requires a license number insert the license number
supplied. If you experience difficulties visit our website
www.photocentric3d.com
, and click on “support”.
Note:
You will need to connect to the internet
within 30 days of using your license otherwise the
license will deactivate. The license number can
be found on the base of the printer. Then going
forward the codes will need to be recognized
online every 30 days after the first activation to
validate and update the software.
8. CREATION
WORKSHOP
INSTALLATION
INSTRUCTIONS
8.2 QUICKSTART CREATION
WOKRSHOP
MINIMUM COMPUTER
REQUIREMENTS
• Dual Core processor or above
• Windows
• Software NOT compatible with MAC and
Linux
• 2 GB RAM memory or above
In this chapter we will learn how to prepare our 3D
parts for printing.
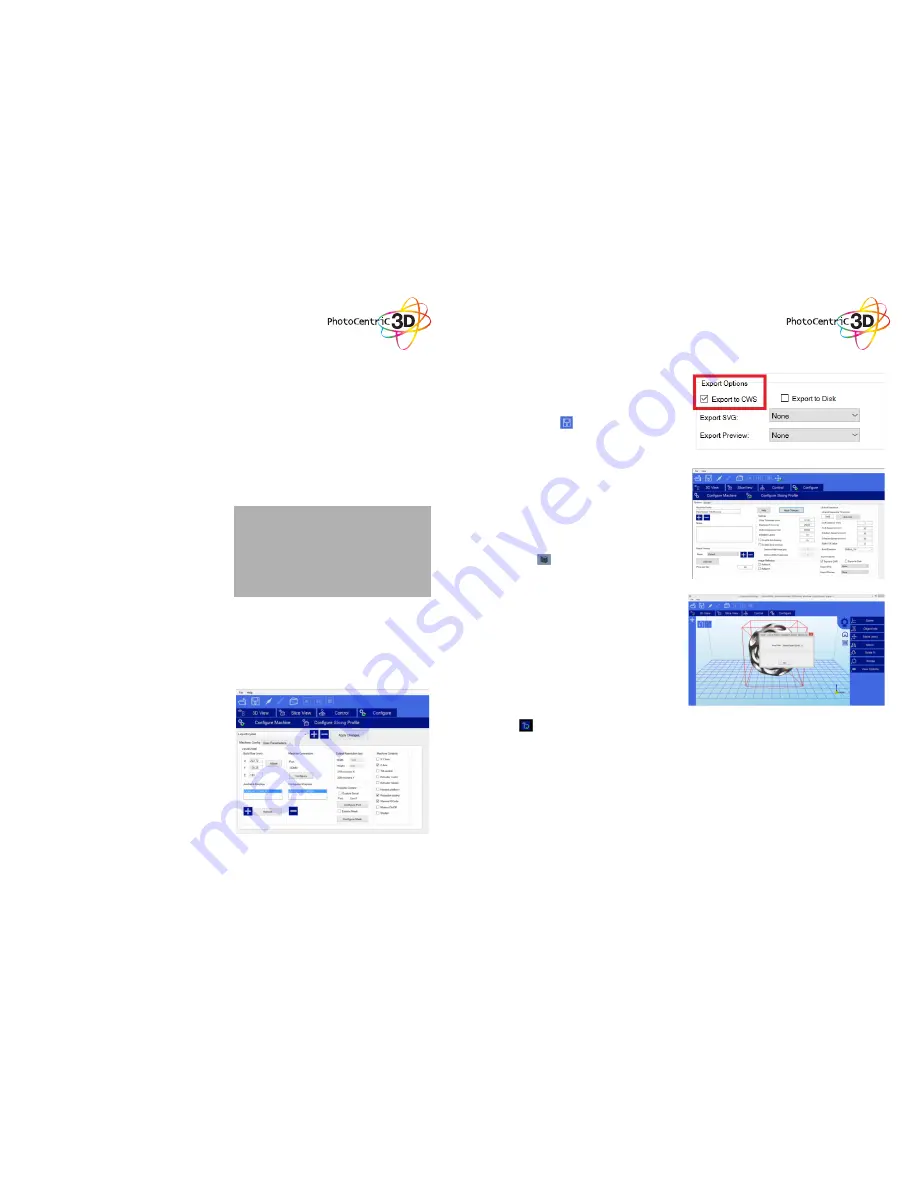
1. Switch on your computer and Open Creation
Workshop.exe. Now, load your object (STL, OBJ or
AMF).
2. With the object loaded and located in the build
area check the settings of the printing profile. Go to
the “Configure” screen and open the “Configure
Slicing Profile” tab. Select the printing profile from the
“Machine Profiles” list that matches your resin and
desired resolution for example “LCHR Hard Amber 100
Microns large objects”.
3. If you find your object to be slightly overexposed then
simply reduce the exposure time. Always click “Apply
Changes” to save if you had to change any values. If
you don’t click this your data will not be re-set.
8.1 INSTALL
CREATION WORKSHOP
The screen should look like this, make sure “Export to
CWS” is ticked:
4. Now click “3D View” and check that the object is
correctly placed inside the printing area. Make sure the
file is saved with the button before you start slicing.
Name your file and choose an appropriate location for
it. Saving directly to a usb can sometimes slow down
the slicing process, it is better to save it to a location on
your pc.
When saving, make sure you save the file
type as a scene file (*.cws) and that these symbols
are not included in the name of the .cws file;
Tilde (~), Number sign (#), Percent (%), Ampersand (&),
Asterisk (*), Braces ({ }), Backslash (\), Colon (:), Angle
brackets (< >), Question mark (?), Slash (/), Plus sign
(+), Pipe (|), Quotation mark (“).
5. Press the slice button to start the slicing
operation. A confirmation window will show.
Always re-click the “Slice” button if you adjust the file
in any way.
6. Now check the “Slice View” screen to check that
the first layer of every object is in contact with the build
base. If it is above the build platform it will not adhere.
If you click on the view box located in the bottom left
corner you can scroll forward through the slicing views
using the slider bar and check that the object is always
inside the build area. Make sure that your objects are 2
squares inside the edge of the build area shown.
See page 22 for detailed Creation Workshop
instructions.
15
16


