9 SENDING PRIN-
TABLE FILE TO
THE PRINTER
9.2 STARTING A PRINTER
FROM A BROWSER
.
Now you have your printer installed and configured.
There are 2 ways to start a print:
1. Save to USB Save the file as .cws or .zip format
on a USB stick and insert it in the front socket.
Then wait for 10 seconds and press Print to
refresh and the printable files will show on the
screen. Select your file and press ‘Print’.
2. Print from your web browser on your PC. These
instructions are described below.
Please read these software instructions to help you
start printing.
1. Make sure your printer is turned on and
connected to a network. If the LED at the front
button is illuminated then the printing screen is
turned on.
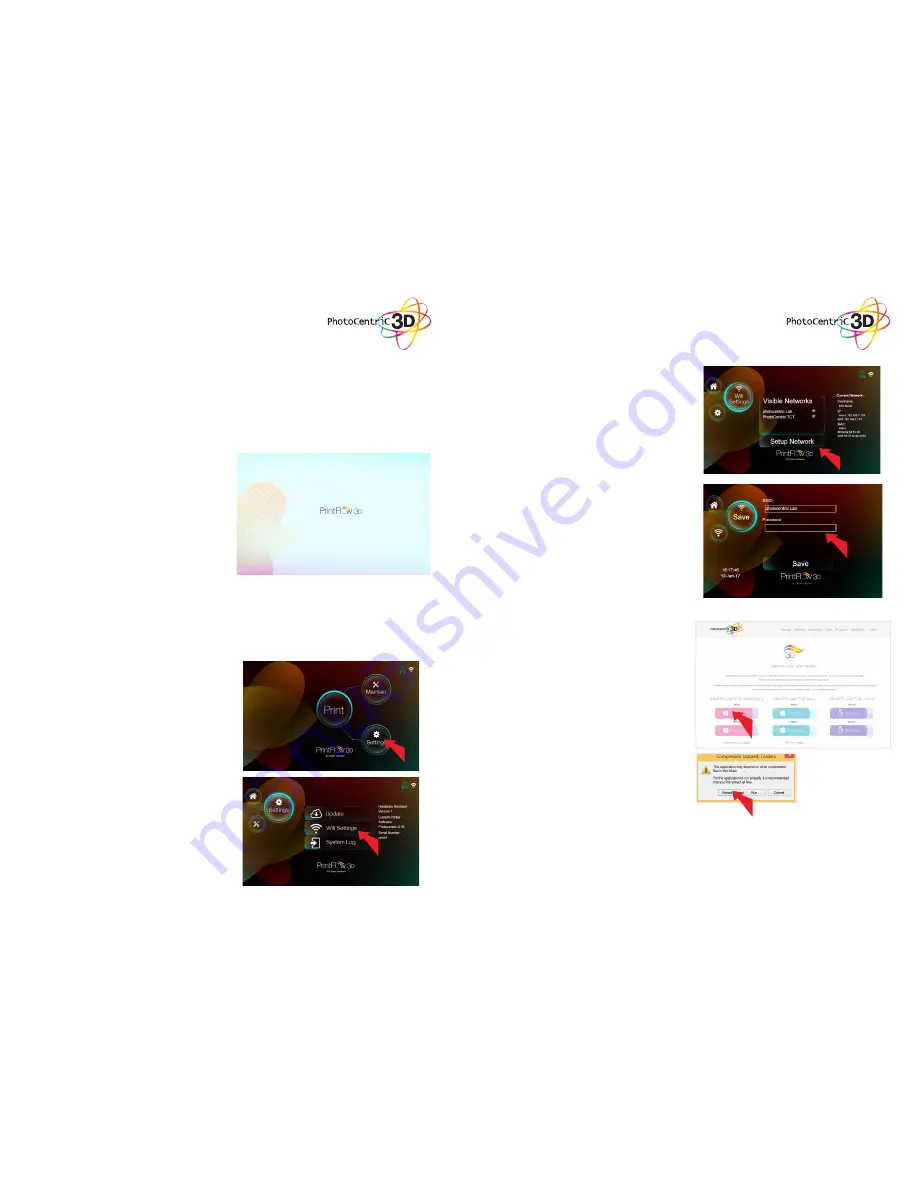
2. Download the desktop software called
“Printflow3D_opener” for your operating system
from www.photocentric3d.com/printflow.
3. Move the Printflow3D_opener.exe onto your
desktop, double click and start the software.
17
18
9.1. SETTING UP A
NETWORK CONNECTION
The LCHR supports two different types of network
connection: Ethernet and WiFi.
To set up ethernet, simply plug the ethernet cable
into the back of the printer and connect it to your
router.
Steps to set-up Wifi:
1. Power on the printer with the rocker switch at
the back of the printer.
2. Click “Settings” on the touchscreen on the front
of the printer.
3. Once booted click “Wifi Settings”.
4. Wait untill your desired Wifi network shows.
5. Select the desired network and press the
button “Setup Network”.
6. Enter your Wifi Password and press “Accept”.
7. Finish by pressing “Save”.
8. Press “Home” to get back to the main screen.


