


AXC 3050
56
PHOENIX CONTACT
8686_en_01
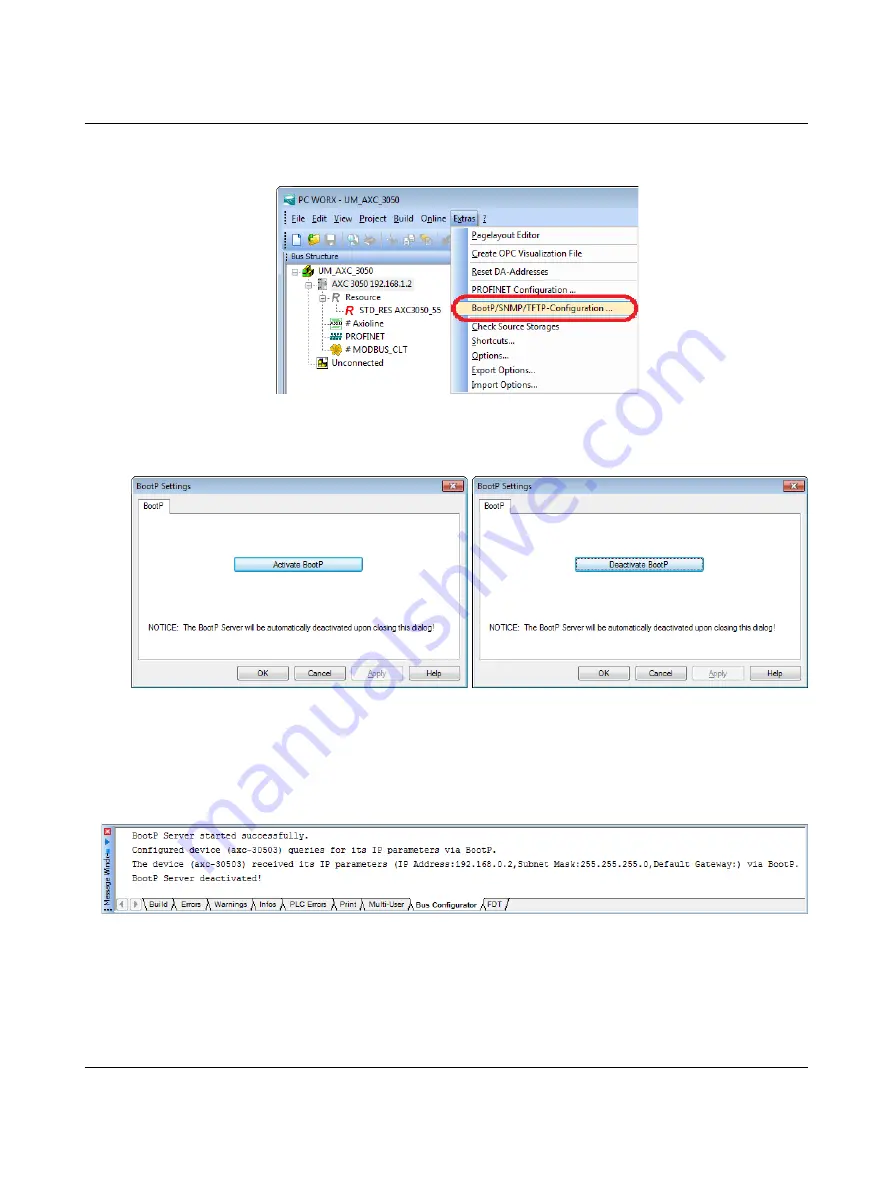
Calling/activating BootP
•
In the PC Worx menu bar, select the
“Extras, BootP/SNMP/TFTP-Configuration...” menu.
Figure 4-8
“Extras, BootP/SNMP/TFTP-Configuration...” menu
•
Activate the BootP server by clicking “Activate BootP” (A).
Figure 4-9
“Activate BootP” (A) and “Deactivate BootP” (B) buttons
Applying the IP set-
tings/cold restart
•
Perform a cold restart for the controller. To do this, switch the supply voltage off and
then on again after about two seconds.
The controller is assigned the IP address which is specified in the project for the controller.
The following message appears in the “Message window” in the “Bus Configurator” tab.
Figure 4-10
Message window following BootP
The IP address is now permanently stored on the controller parameterization memory.
Repeat the above described process for additional Ethernet interfaces, if you also wish to
assign IP address settings to these.
A
B
Summary of Contents for AXC 3050
Page 1: ...User manual Installation and operation of the AXC 3050 controller UM EN AXC 3050...
Page 8: ...AXC 3050 8 PHOENIX CONTACT 8686_en_01...
Page 10: ...AXC 3050 10 PHOENIX CONTACT 8686_en_01...
Page 34: ...AXC 3050 34 PHOENIX CONTACT 8686_en_01...
Page 94: ...AXC 3050 94 PHOENIX CONTACT 8686_en_01...
Page 110: ...AXC 3050 110 PHOENIX CONTACT 8686_en_01...
Page 136: ...AXC 3050 136 PHOENIX CONTACT 8686_en_01...
Page 144: ...AXC 3050 144 PHOENIX CONTACT 8686_en_01 U Updating the firmware 133...


