AXC 3050
66
PHOENIX CONTACT
8686_en_01
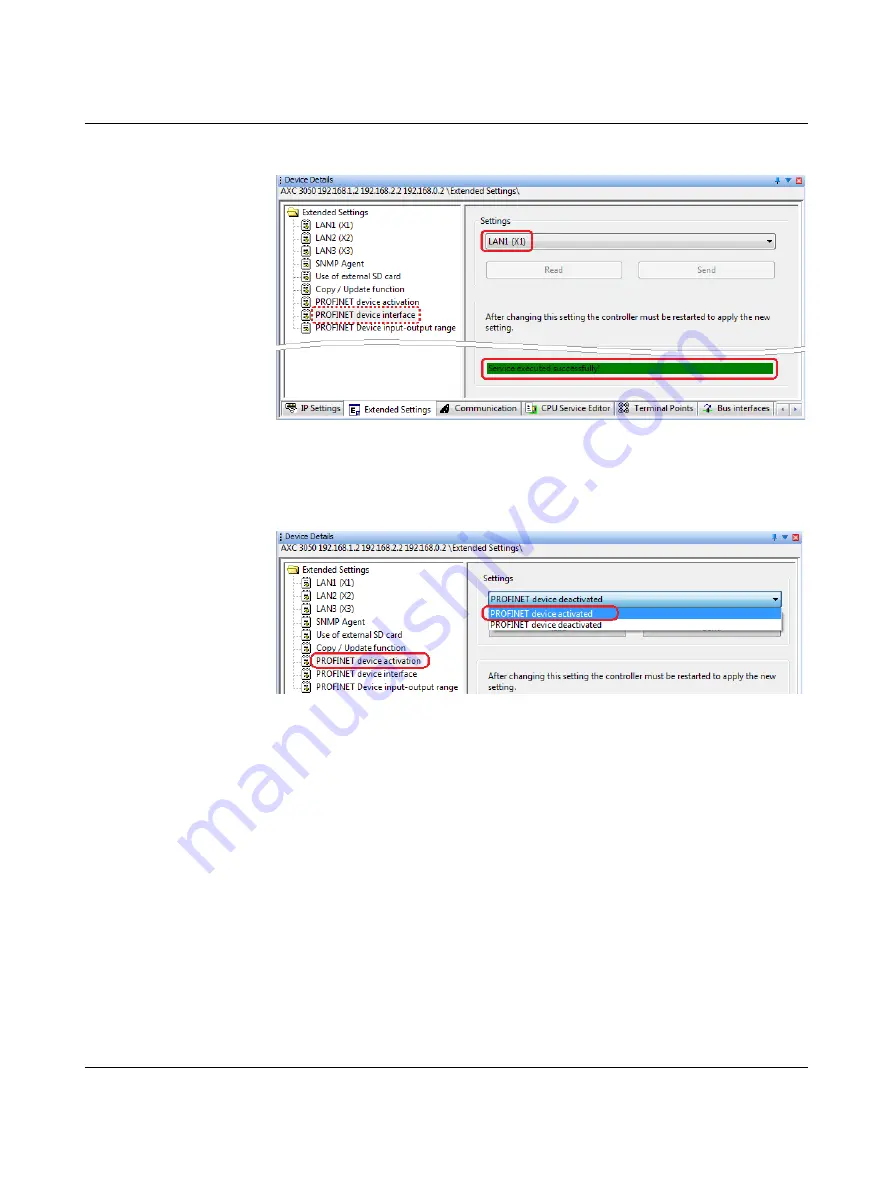
Successful execution of the service will be displayed in the status window.
Figure 4-26
Device interface selection executed successfully
•
In the “Device Details” window, select the “PROFINET device activation” item under
“Extended Settings”.
•
Under “Settings”, select “PROFINET device activated”.
Figure 4-27
Settings: Activating PROFINET device
•
Click on the “Send” button in the “Settings” area.
•
In the “Settings Communication Path” dialog box, confirm the suggested USB connec-
tion with “OK” (refer to Figure 4-25 on page 65).
Successful execution of the service will be displayed in the status window (see Figure 4-26
To activate the above settings on the AXC 3050, the controller must be restarted.
•
In the “Activate Network Settings” area, click on the “Restart Controller” button (refer to
•
If a prompt appears asking whether you really want to restart the controller, confirm the
dialog box with “Yes”.
•
In the “Settings Communication Path” dialog box, confirm the suggested USB connec-
tion or a communication path suitable for your application with “OK” (refer to
Successful execution of the service will be displayed in the status window (see Figure 4-26
Summary of Contents for AXC 3050
Page 1: ...User manual Installation and operation of the AXC 3050 controller UM EN AXC 3050...
Page 8: ...AXC 3050 8 PHOENIX CONTACT 8686_en_01...
Page 10: ...AXC 3050 10 PHOENIX CONTACT 8686_en_01...
Page 34: ...AXC 3050 34 PHOENIX CONTACT 8686_en_01...
Page 94: ...AXC 3050 94 PHOENIX CONTACT 8686_en_01...
Page 110: ...AXC 3050 110 PHOENIX CONTACT 8686_en_01...
Page 136: ...AXC 3050 136 PHOENIX CONTACT 8686_en_01...
Page 144: ...AXC 3050 144 PHOENIX CONTACT 8686_en_01 U Updating the firmware 133...


