background image

Preparing a DVD+RW for

playback on another DVD player

– making edits compatible

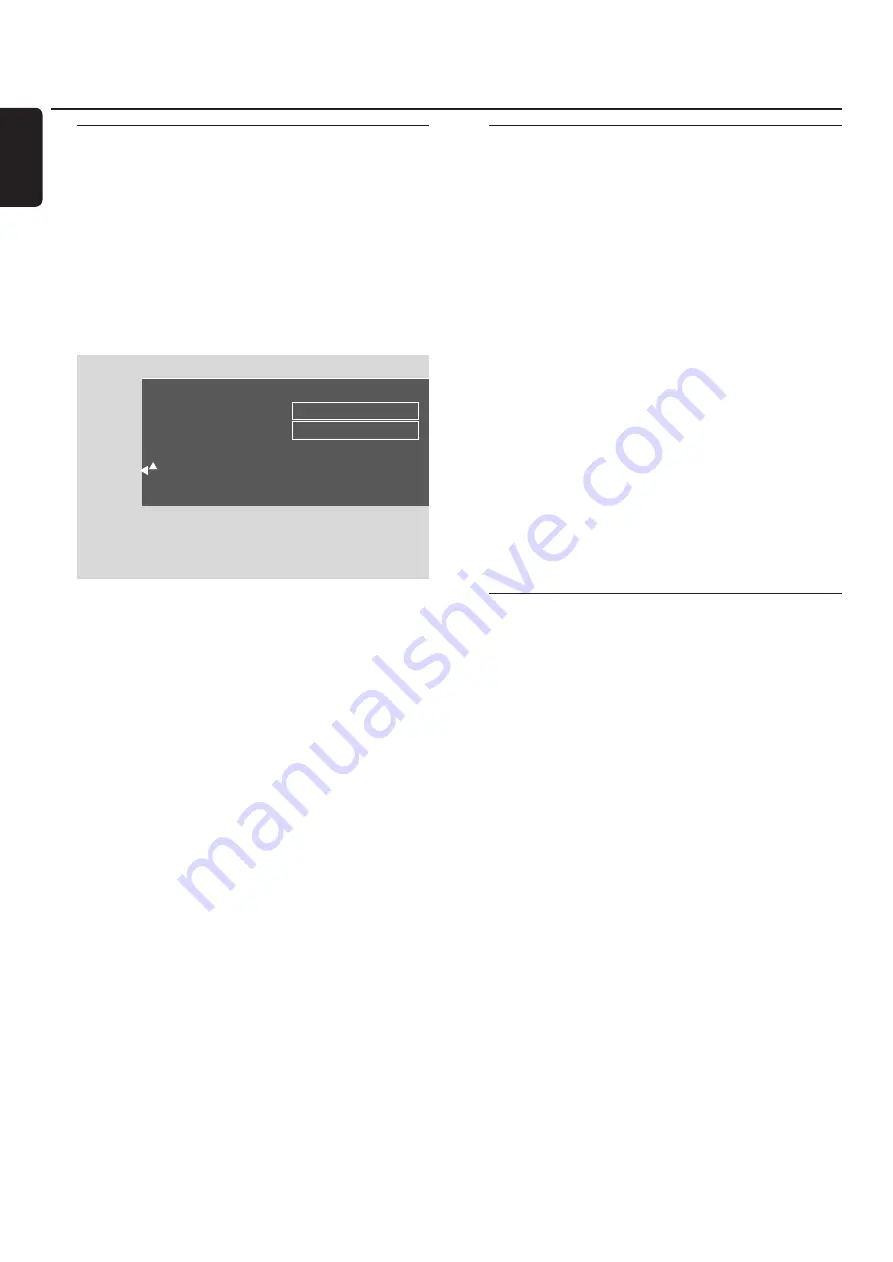
If one title or several titles have been edited (chapter
markers have been inserted or deleted, or chapters have
been hidden) a standard DVD player may still show the
original title.You can prepare your disc in such a way that a
standard DVD player will be able to read the edited title.

1

Select the 

Settings for

menu. See “Settings for a disc”.

2

Press 

4

or 

3

as often as necessary to select the line

Make

edits compatible, Press OK

.

Note: If your disc is already compatible,

Make edits

compatible

will not be displayed and a conversion is not

needed.

3

Press OK to confirm.

This will take

plus the time needed for this process

and 

Press OK to confirm

are displayed.

4

Press OK again to start the process.

Working

is displayed and the process is started.

A bar moving from left to right indicates the current
status of the converting progress.

Finalising a DVD+R disc

Finalising is a simple process that completes the recording
of a DVD+R disc necessary to play it on a standard
DVD player. DVD+R discs are “locked” once they are
finalised. No further recordings or erasure can be made.

Note: If the disc has been recorded on another DVD recorder
system,

Settings for

may not be displayed. In this case, use

the function 

Finalise disc

in the 

A

menu, in the 

s

Disc

features

submenu.

1

Select the 

Settings for

menu. See “Settings for a disc”.

2

Press 

4

or 

3

as often as necessary to select the line

Finalise disc

.

Note: If there is no DVD+R disc inserted or the disc is already
finalised,

Finalise disc

will not be displayed.To go back to the

disc information screen? press 

1

. Next, press 

4

.

3

Press OK to confirm the selection.

This will take

plus the time needed for this process

are displayed.

4

Press OK again to start the process.

Working

is displayed and the process is started.

A bar moving from left to right indicates the current
status of the finalising progress.

Erasing an entire DVD+RW disc

1

Select the 

Settings for

menu. See “Settings for a disc”.

2

Press 

4

or 

3

as often as necessary to select the line 

Erase

disc, Press OK

.

3

Press OK to confirm.

This will erase all titles, Press OK to confirm

is

displayed.

0

0

To exit, in case you do not want to erase, press 

1

.

4

Press OK again to start erasing.

Erasing disc

is displayed and erasing is started.

When erasing is finished, the empty space left on the
disc will be shown on the index picture screen.

Editing a disc

42

English

Settings for My DVD

Disc name

My DVD

Protection

Unprotected

Erase disc

Make edits compatible

Press OK

Summary of Contents for LX7500R

Page 1: ...DVD Recorder Home Theater System User manual LX7500R 01 04 ...

Page 2: ...ION VISIBLE AND INVISIBLE LASER RADIATION WHEN OPEN AVOID EXPOSURETO BEAM ADVARSEL SYNLIG OG USYNLIG LASERSTRÅLING VED ÅBNING UNDGÅ UDSÆTTELSE FOR STRÅLING ADVARSEL SYNLIG OG USYNLIG LASERSTRÅLING NÅR DEKSEL ÅPNES UNNGÅ EKSPONERING FOR STRÅLING VARNING SYNLIG OCH OSYNLIG LASERSTRÅLNING NÄR DENNA DEL ÄR ÖPPNAD BETRAKTA EJ STRÅLEN VARO AVATTAESSA OLET ALTTIINA NÄKYVÄLLE JA NÄKYMÄTTÖMÄLLE LASER SÄTBI...

Page 3: ...g 19 Selecting an S Video recorder connected to EXT 2 AUX I O 19 Volume and sound Adjusting the volume of all speakers 20 Adjusting the volume of the rear speakers and of the subwoofer 20 Adjusting bass and treble 20 Volume balance between the speakers 20 Selecting a surround effect 21 ClearVoice 21 Night mode 21 Disc playback Loading a disc 22 Playing a DVD DVD R or DVD RW disc 22 Disc menu 22 Pl...

Page 4: ...V shape 46 Horizontal video shift 46 Video output 47 Component video output 47 Black level shift 47 u Language 47 Playback audio 47 Recording audio 47 Subtitle 47 Menu 47 Country 47 w Features 48 Status box 48 Standby 48 Display 48 System settings continued x Remote control settings 48 s Disc features 49 Access control 49 Auto resume 49 PBC 49 Finalise disc available only for unfinalised DVD R dis...

Page 5: ...rosive effect Do not expose the set batteries or discs to humidity rain sand or excessive heat caused by heating equipment or direct sunlight Always keep the tray of your DVD recorder system closed to protect the lens from dust Do not use any commonly available lens cleaning discs as they may damage the optical unit of the set The lens may fog up when the set is moved from cold to warm surrounding...

Page 6: ...ded erased and re recorded many times and played on DVD RW compatible DVD players and DVD recorders if finalised Discs unsuited for playback or recording DVD RAM DVD Audio Region code DVDs and DVD players are released for specific regions around the world To play a DVD on this DVD recorder system the DVD must be labelled for all regions or for the region shown on the bottom of this set e g Region ...

Page 7: ...h this remote control you can control the DVD recorder system as well as other Philips equipment such as a PhilipsTV VCR or CD player 1 Press the source button which corresponds to your Philips equipment TV SAT CAM 1 2 CD CDR orVCR 2 Now you can control the equipment with some of the remote control buttons On a Philips CD player for example start playback with PLAY 2 or select a track with the num...

Page 8: ...mcorder inputs on the front CD selects a connected CD player CDR TAPE switches between a connected CD recorder and tape deck or similar VCR GAME switches between a connectedVCR and game console 4 SHIFT press and hold to select secondary functions of the remote controls buttons with blue labelling 5 T C switches on the title chapter selection for discs 6 REC PLAY MODE selects different playback mod...

Page 9: ... on a PhilipsTV PLAY 2 starts playback closes the disc tray SEARCH 4 skips to the beginning of the current or previous chapter title track searches backwards tunes to a radio station with a lower frequency STOP 9 stops playback or recording press and hold to open close the disc tray PAUSE pauses playback or recording advances to next still picture SEARCH skips to the beginning of the next chapter ...

Page 10: ...chapter title track of the inserted disc searches backwards TUNER skips to the previous preset radio station 9 RECORD starts recording aTV channel or from an external video source while recording the button will be illuminated 0 VOLUME adjusts the volume Connections on the front CAM 1 S VIDEO connect to the S video output of your Hi 8 or S VHS camcorder CAM 1 VIDEO connect to the video CVBS output...

Page 11: ...ternal equipment e g tape deck CD changer 9 AUDIO LIN2 L R connect to the analogue audio output of external equipment e g tape deck CD changer 0 AUDIO OUT L R connect to the analogue audio input of external equipment e g tape deck OUT DIGITAL connect to the digital coaxial input of digital equipment IN DIGITAL connect to the digital coaxial output of digital equipment IN OPTICAL connect to the dig...

Page 12: ...nect the FM antenna socket of an outdoor FM antenna or that of your cableTV system to ANTENNA FM on the DVD recorder system with the supplied FM antenna cable 2 Assemble the supplied MW loop antenna as shown below and connect it to ANTENNA MW Notes After finishing the hookup and the initial setup move the MW antenna in various directions to achieve best reception Keep the antenna as far away as po...

Page 13: ... Scart only See Case 1 Scart connection If yourTV supports Progressive Scan connect both the Scart and the ComponentVideo output to yourTV See Case 2 ComponentVideo Progressive Scan connection Case1 Scart connection If several Scart sockets are available on yourTV select one that is suited for RGB input to achieve the best picture quality Connect theTV directly to the DVD recorder system without a...

Page 14: ... on the speakers of the DVD recorder system With the Scart connection this is not necessary Please be aware that someTVs switch automatically from the Progressive Scan input to the Scart input as soon as a signal is available on the Scart input In this case you have to select the Progressive Scan input on yourTV again If your TV repeatedly switches from the Progressive Scan input to the Scart inpu...

Page 15: ... connect its digital output to the DVD recorder system See Digital connection for sound playback Connecting additional audio equipment Please consult the user manual of your audio equipment on which connections are possible Analogue connection for audio playback Connect the left and right analogue output sockets of your tape deck CD player or similar to AUDIO LIN1 L R or LIN2 L R on the DVD record...

Page 16: ... reproduced through the headphones only Note With connected headphones no surround sound is available If you press SURR DISCONNECT HEADPHONES will be scrolled on the display of the DVD recorder system Mains The type plate is located on the bottom of the set 1 Check whether the mains voltage as shown on the type plate corresponds to your local mains voltage If it does not consult your dealer or ser...

Page 17: ...to select the language in which subtitles should preferably be displayed if subtitles in the language are available on the disc Next press OK Note Some DVDs may override your audio and subtitle language selection In this case you have to select the audio and subtitle language in the DVDs Disc Menu 7 The menu TV Shape appears Press 3 or 4 to select the screen format This setting will have an effect...

Page 18: ... radio stations and stores them in its memory After the search INSTALLATION COMPLETE is scrolled and a radio station is played 15 If you connected other equipment to the DVD recorder system the following standard settings will be used equipment is connected to TV EXT 1TOTV I O satellite receiver EXT 2 AUX I O VCR EXT 2 AUX I O game console EXT 2 AUX I O CD player IN DIGITAL CD recorder LIN1 tape d...

Page 19: ...tween CDR andTAPE press the button again to play the sound of or to record from a connectedVCR or game console To switch betweenVCR and GAME press the button again 2 If the selected video source does not show on yourTV switch off any other video equipment connected to EXT 2 AUX I O and set yourTV to the correct audio video channel Such channels may be called AUX AUXILIARY IN AUDIO VIDEO or A V IN ...

Page 20: ...nce between the speakers 1 Press and hold DVD MON for 1 second 2 Press SYSTEM MENU 3 Press 1 as often as necessary to select A 4 Press 4 or 3 as often as necessary to select y Installation Next press 2 to confirm 5 Press 4 or 3 as often as necessary to select Audio setup Next press 2 to confirm 6 Press 4 to select Speaker balance Next press 2 to confirm Test tone is highlighted 7 Press 2 as often ...

Page 21: ... or IN OPTICAL on the DVD recorder system to appreciate the digital surround sound see Connecting additional audio equipment Please keep in mind that recording from a digital input IN DIGITAL and IN OPTICAL is not possible for copyright reasons Therefore recording of digital surround sound is not possible Recording is possible only from the inputs EXT 1TO TV I O EXT 2 AUX I O CAM 1 and CAM 2 and i...

Page 22: ... etc These channels are often near channel 00 2 Load the disc in the tray Notes If the child lock was activated for the inserted disc PIN will be displayed see Child lock If a menu appears use 4 3 1 or 2 or press the appropriate numerical button to select a menu option Press OK to confirm 3 If playback does not start automatically press PLAY 2 to start playback Playback starts The chapter number a...

Page 23: ...ecessary to select the line PBC Next press 2 to confirm 6 Press 4 or 3 as often as necessary to select On 7 Press OK to confirm the selection PBC is activated 0 0 To switch off the system menu bar press SYSTEM MENU Playing an audio CD 1 Load an audio CD in the tray Playback starts automatically If theTV set is switched on the audio CD screen appears The current track number and its elapsed playing...

Page 24: ...ning of the current title chapter Press 4 twice during playback to skip to the beginning of the previous title chapter Playback continues with the previous title chapter Searching not on MP3 CDs You can search in forwards or backwards direction with different speeds 1 Keep 4 or pressed for 1 second during playback to find a particular passage in backwards or forwards direction Searching starts wit...

Page 25: ...scanning and to resume normal playback press STOP 9 and then PLAY 2 Repeat and playback in random order Depending on the disc type you can select different types of playback 1 Select the desired chapter title or disc and start playback 2 Press REC PLAY MODE repeatedly during playback to select either if available 2 The current chapter is played repeatedly on DVD Video discs only 3 The current titl...

Page 26: ...AY 2 Slow motion 1 Press PAUSE during playback to pause playback The still picture is shown 2 While playback is paused keep 4 or pressed to switch to slow motion in backwards or forwards direction Playback is started in slow motion 0 0 To switch to another speed press 4 or again 0 0 To resume playback press PLAY 2 Normal playback continues Slow motion via the menu bar 1 Press PAUSE during playback...

Page 27: ...m menu bar press SYSTEM MENU Note On some DVDs you can change the subtitle language only in the Disc Menu of the DVD F Camera angle Some DVDs contain scenes recorded from different camera angles In this case you can select among the different angles 1 Press SYSTEM MENU during playback to enter the system menu 2 Press 2 as often as necessary to select F Note If F is not selectable the current scene...

Page 28: ...ht holders Before you start recording For each recording on a DVD RW or DVD R disc the following information will be stored automatically Name of the recording If aTV station transmits the name of a programme e g Superman it will be stored automatically If the programme s name is not transmitted the channel number or channel name and the time when recording has been started will be stored as the n...

Page 29: ...VD recorder system from which you wish to record Note If a TV channel transmits a channel name it will be displayed If you want to record from the video equipment you connected to the DVD recorder system Keep SAT CAM1 2 VCR GAME pressed for 1 second to select the source you want to record see also Selecting a source on page 19 0 0 The recording quality and the time available for recording depends ...

Page 30: ...C OTR 30 minutes will be added The actual recording time left is displayed 0 0 To cancel the set recording time press CLEAR while the recording time is displayed 3 After the chosen time has elapsed recording stops automatically Lining up recordings within a title assemble cut DVD RW discs only On a recorded DVD RW you can add a further recording to an already existing title The recording will be a...

Page 31: ... mode M3 offers S VHS picture quality and a maximum recording time of 3 hours Record mode M4 offers a better picture quality than VHS and a maximum recording time of 4 hours Record mode M6 offersVHS picture quality and a maximum recording time of 6 hours Record mode M8 offers a maximum recording time of 8 hours Selecting the recording mode via the menu You can also select the desired recording mod...

Page 32: ...rd 1 Make sure the function Direct Record is switched on 2 Make sure a recordable disc is loaded into the tray 3 Press 2 to switch the DVD recorder system to standby 4 On theTV select theTV channel that you wish to record 5 Press REC OTR to start recording theTV channel you are watching READING EXT1 is displayed and the DVD recorder system searches theTV channel selected on theTV among its storedT...

Page 33: ...g of the timer recording a message will be displayed on the DVD recorder system reminding you to switch the set to standby VPS and PDC With Video Programming System and Programme Delivery Control theTV station controls the start and the duration of recordings The DVD recorder system switches itself on and off at the right time even if aTV programme starts earlier or ends later than scheduled Usual...

Page 34: ...been allocated to the ShowView programming number Select the appropriate programme number of the TV channel using 1 2 or the numerical keys on the remote control and confirm by pressing OK If daily recording was entered for a wrong day Weekend programming not possible is displayed Make sure to enter a day from Monday to Friday 0 0 To change the timer programme you can go back at any time Use 1 or ...

Page 35: ...et 2 is selected 9 Press 2 to select the entry field Start 10 Use 4 3 or the numerical buttons to enter the start time 0 0 To switch onVPS PDC press RETURN as often as necessary until 8 lights up VPS PDC is switched on 11 Press 2 to select the entry field End 12 Use 4 3 or the numerical buttons to enter the time to end 0 0 To change the recording mode press RETURN as often as necessary to select t...

Page 36: ...RGB capable Scart cable i e a Scart cable with all pins wired 2 Press and hold DVD MON for 1 second 3 Press SYSTEM MENU 4 Press 1 as often as necessary to select A 5 Press 4 or 3 as often as necessary to select z Record settings Next press 2 to enter the menu 6 Press 4 or 3 as often as necessary to select the line Sat record 7 Use 1 or 2 to select EXT2 0 0 To switch off automatic recording from a ...

Page 37: ...eted title on a DVD RW can be used for a new recording However a deleted title on a DVD R is only marked as deleted but not physically deleted This means the deleted title will be skipped during playback but no new recording can be made Once the DVD R has been finalised no further changes can be made 1 Press STOP 9 when playback is stopped or press DISC MENU during playback 2 Press 4 or 3 as often...

Page 38: ...rting chapter markers is not possible then 3 Press FSS to end Note You can insert chapter markers during recording by pressing FSS Deleting chapter markers You can delete particular chapter markers or all chapter markers within a title For DVD R discs this function will only work when the disc is played on this DVD recorder system When the DVD R disc is played on a standard DVD player deleted chap...

Page 39: ...2 to select Visible The picture changes from dark to bright The chapter is visible again 8 Press FSS to end Playing the entire title including hidden chapters If you have hidden certain chapters of a title this feature enables you to watch the entire title including the hidden chapters 1 Press STOP 9 when playback is stopped or press DISC MENU during playback 2 Press 4 or 3 as often as necessary t...

Page 40: ...mpleted successfully the index picture screen with the new index picture appears Dividing titles on DVD RW discs only You can divide a title into several parts Each new part will become a new title with its own index picture Please note that the division of a title cannot be reversed 1 Play the title you want to divide 2 Press PAUSE where you want to divide the title 3 Press FSS The menu Favorite ...

Page 41: ...ed 4 Use 4 or 3 or the number buttons to select a new character symbol or number 0 0 To switch between upper and lower case press SELECT 0 0 To delete a character press CLEAR 5 Repeat steps 3 4 until the name of the recording is changed as desired 6 Press OK to confirm the new name Storing name is displayed 7 Press 1 to end Activating or deactivating the write protection You can prevent a recordin...

Page 42: ...disc has been recorded on another DVD recorder system Settings for may not be displayed In this case use the function Finalise disc in the A menu in the s Disc features submenu 1 Select the Settings for menu See Settings for a disc 2 Press 4 or 3 as often as necessary to select the line Finalise disc Note If there is no DVD R disc inserted or the disc is already finalised Finalise disc will not be...

Page 43: ... a lower or equal level 1 2 3 4 and 5 will play If the scene s rating is higher e g 8 than the set filter value an alternative scene if available will be played If there is no alternative scene available playback is stopped and the 4 digit code has to be entered again 1 Press and hold DVD MON for 1 second 2 Press SYSTEM MENU 3 Press 1 as often as necessary to select A 4 Press 4 or 3 as often as ne...

Page 44: ...3 Press OPEN CLOSE on the set or press and hold STOP 9 on the remote control to close the drawer 4 Press 4 or 3 as often as necessary to select either Play once The disc is authorised for single playback only If the DVD recorder system is switched off the 4 digit code must be entered again Play always The disc is authorised for playback and is stored in a memory with space for 50 child safe discs ...

Page 45: ... the line Change code Next press 2 to confirm 8 Use the numerical buttons to enter the new 4 digit code 9 Enter the same code again as confirmation 10 Press SYSTEM MENU to switch off the system menu bar If you have forgotten your 4 digit code 1 Follow steps 1 5 as described above 2 Press STOP 9 4 times when prompted for the 4 digit code The old 4 digit code is deleted Note After pressing STOP 9 4 ...

Page 46: ...n as necessary to select the desired function Next press 2 to confirm 6 Press 4 3 as often as necessary to select the desired setting You can choose as follows TV shape The picture signal from your DVD recorder system can be set to match yourTV screen This setting will have an effect only with DVDs supporting different screen formats 4 3 letterbox for a wide screen picture with black bars at the t...

Page 47: ...cs for NTSC playback can be adjusted On The colour contrast during disc playback will be improved Off The colour contrast during disc playback remains unchanged 7 Press OK to confirm the new setting 8 Press 1 to end u Language 1 Press and hold DVD MON for 1 second 2 Press SYSTEM MENU 3 Press 1 as often as necessary to select A 4 Press 4 or 3 as often as necessary to select u Language Next press 2 ...

Page 48: ...to standby by pressing 2 the clock display is still visible Demo mode A list with the most important features scrolls on the display when the DVD recorder system is switched to standby Display Select a level for the display brightness Note You cannot switch off the display completely 7 Press OK to confirm the new setting 8 Press 1 to end x Remote control settings You can set the remote control typ...

Page 49: ...he disc format and thus correct the problem Visible only if the disc format of the inserted DVD RW can be changed z Record settings 1 Press and hold DVD MON for 1 second 2 Press SYSTEM MENU 3 Press 1 as often as necessary to select A 4 Press 4 or 3 as often as necessary to select z Record settings Next press 2 to confirm 5 Press 4 3 as often as necessary to select the desired function You can choo...

Page 50: ...epeatedly to select CH or S CH if you want to enter the channel number Freq if you want to enter the frequency of theTV channel 2 Press 4 to select Entry search 3 Press 0 9 repeatedly to enter the channel number or the frequency of the desiredTV channel 0 0 If you do not know the channel number or frequency press 2 to start automatic search Repeat this step until the desiredTV channel is found 4 P...

Page 51: ... will not be used on the DVD recorder system If NOTV is displayed make sure that the Scart cable is connected properly to the TV and the DVD recorder system If necessary connect the DVD recorder system to another Scart socket on the TV because the Scart socket in use might not support Follow TV If the problem still persists Follow TV is not available 3 Repeat step 2 for all programme numbers of th...

Page 52: ...t steps 1 and 2 for all characters of the channel name Note Channel names are limited to 5 characters 4 Press OK to store theTV channel name 5 Press SYSTEM MENU to end TV system If theTV system of theTV channel and that of yourTV are not the same the sound and or the picture may be distorted or missing Usually theTV system is detected automatically 1 Press 2 repeatedly to select theTV system PAL B...

Page 53: ...ional information about the time and date The DVD recorder system uses this information to set the time and date automatically If the time and date are not set correctly select a different TV channel for setting the time and date or set the time and date manually 1 Press and hold DVD MON for 1 second 2 Press SYSTEM MENU 3 Press 1 as often as necessary to select A 4 Press 4 or 3 as often as necessa...

Page 54: ...or both AV source and Additional audio 1 Press 2 to enter the menu AV Source is highlighted 2 Press 2 as often as necessary to select EXT1 or EXT2 the AV input to which you connected the equipment The DVD recorder system will use this input for recording from the equipment None if you did not connect this kind of equipment or if you connected it to one of the audio inputs only In this case recordi...

Page 55: ...t of the DVD recorder system Off if you do not use the digital output PCM if you connected equipment which only supports PCM to the digital output 8 Press OK to store the settings or SYSTEM MENU to exit without storing Speaker setup For optimal surround sound please set which speakers you connected to the DVD recorder system the distance between a speaker type and your listening position Note We r...

Page 56: ...dio reception If you are listening to an FM radio station with a weak signal you may wish to switch from stereo to mono for better sound quality WhileTUNER is selected pressTUNER repeatedly to select FM M 0 To switch back to stereo reception pressTUNER repeatedly to select FM RDS Radio Data System Some FM radio stations broadcast additional information Press DIM DISPLAY repeatedly to select the fo...

Page 57: ...ith step 4 7 Press SYSTEM MENU to end Changing the order of favourite radio stations 1 Press and holdTUNER for 1 second to select the radio tuner 2 Press SYSTEM MENU AUTO INST MENU is displayed on the DVD recorder system 3 Press 4 repeatedly to select RESHUFFLE MENU Next press 2 4 Press CH or CH repeatedly or use 0 9 to select the radio station of which you want to change the preset number 5 Next ...

Page 58: ...lost 1 Disconnect the set from power supply 2 Press and hold down 2 STANDBY ON on the set and reconnect the set 3 Release 2 STANDBY ON after 5 seconds 4 Continue as described in chapter Initial installation Set does not work The DVD recorder system has become too hot and the overheating safety and is in standby circuit has been activated Let the DVD recorder system cool down then press 2 STANDBY O...

Page 59: ...write protection or load another non write protected disc Make sure no finalised DVD R disc has been inserted Make sure the time forVPS PDC has been entered exactly to the minute Check the aerial connection WrongTV channel was recorded after 1 Enter the ShowView programming number of the desiredTV channel you programmed a recording using 2 Press OK to confirm ShowView system 3 Check the programme ...

Page 60: ...utes M2 10 minutes M2x 13 minutes M3 15 minutes M4 20 minutes M6 30 minutes M8 40 minutes On some DVD players DVD RW recordings cannot be played You can use the following special function to solve this problem for certain DVD players However please note that there is a risk that you can no longer play the DVD RW disc on other DVD players after this procedure Therefore apply this function with part...

Page 61: ...No bass sound Connect the supplied subwoofer No sound on one of the speakers Check if the speaker is connected properly Check if the speaker cable is damaged No sound on the centre Press SURR repeatedly to select another surround effect and or rear speakers Make sure you have connected all speakers Make sure you have selected Yes for Centre connected and Rear connected in the menu Installation Aud...

Page 62: ...nections Analogue AUDIO LIN 1 2 900 mV 47 kΩ Digital optical toslink Digital coaxial 75 Ω acc IEC60958 Scart EXT 1 EXT 2 TV antenna 75 Ω FM antenna 75 Ω MW antenna loop antenna S Video CAM 1 front 1V 75 Ω Video CAM 1 CVBS front 1V 75 Ω Analogue CAM 1 AUDIO front 2 2V 10 kΩ Digital CAM 2 DV IN front acc IEEE 1394 MPEG2 Output connections Scart EXT 1 EXT 2 ComponentVideo out Y PB PR Analogue AUDIO O...

Page 63: ... ELETRONICS Servizio Consumatori Via Casati 26 20052 Monza Milano ITALY Phone 199 11 88 99 PHILIPS CONSUMENTENLIJN t a v betreffende afdeling Postbus 102 5600 AC Eindhoven NETHERLANDS Phone 0900 8406 PHILIPS NORGE AS Sandstuveien 70 PO Box 1 Manglerud N 0612 Oslo NORWAY Tlf 22 748 250 PHILIPS PORTUGUESA S A Consumer Information Centre Rua Dr António Loureiro Borge nr 5 Arquiparque Miraflores P 279...

Page 64: ...English Meet Philips at the Internet http www philips com W LX7500R CLASS 1 LASER PRODUCT 3103 605 2221 3 VieChr0445 ...

Page 65: ...s delivered with 1 2 front 1 centre and 2 rear speakers see page 2 2 1 subwoofer 3 6 speaker cables 4 1 remote control with 2 AA batteries 5 1 Scart cable 6 1TV antenna cable 7 1 FM antenna cable 8 1 cinch audio cable red and white plugs 9 1 digital audio cable black plugs 0 1 ComponentVideo cable red green and blue plugs 1 MW loop antenna ...

Page 66: ...2 Quick use guide LX7500R Speakers click FRONT L REAR L FRONT R REAR R click 1 3 4 2 or ...

Page 67: ...T COMPONENT FOR PLAYBACK Front left Front right Center Subwoofer Rear left Rear right Front left Front right Center Subwoofer Rear left Rear right After finishing all other connections connect the mains cable to the wall socket FM antenna cable TV antenna cable ...

Page 68: ...try where you use the DVD recorder system Next press OK 9 Make sure theTV antenna or cableTV system is connected to the DVD recorder system Next press OK The DVD recorder system will search for availableTV channels This may take several minutes 10 Check the time and date If necessary use 4 3 1 2 to set the time date correctly Next press OK TheTV screen will turn blank for about 1 2 minute Next the...

Page 69: ...lect the radio tuner 2 Press CH or CH repeatedly to skip to a preset radio station Or use 0 9 to enter the number of a preset radio station To enter a preset number with two digits press 0 9 twice within 2 seconds With the source buttons you select what you want to play and what to record Press and hold a source button for 1 second to select a source DVD selects the disc inserted into the DVD reco...

Page 70: ...stem Recording starts at the end of all existing recordings Note for DVD RWs If you press REC OTR briefly the recording will start at the position where you stopped playback Previous recordings may be overwritten 0 0 To interrupt recording press PAUSE 0 0 To resume recording press PAUSE again 6 Press STOP 9 to stop recording The recording mode determines the picture quality of a recording and the ...

Reviews: