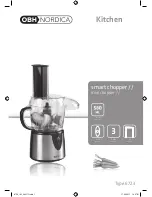
General description
(fig. 1)
A
Motor unit
B
Bowl
C
Cover of bowl
D
Ridge of cover (locks and unlocks the
built-in safety lock)
E
Safety lock
F
Metal blade
£
G
Slicing disc
§
(double-sided)
AA
= thin slicing
[
= thick slicing
H
Grating disc
¶
(double-sided)
AA
= extra fine grating
[
= fine grating
I
Kneading accessory
^
J
Whisk
ß
K
Drive shaft
L
Food chute
M
Pusher
N
Switches
I
I
= On / Off
M = "Moment" (release = stop)
Y
1 = minimum speed
W
2 = maximum speed
O
Cord storage
Graphic instructions
Left to the symbols of the various applications
you can see a picture of the accessory to be
used.
On the top line is adviced to switch on selecting
either M (“Moment”) or
I
I
(“Continuous”), in
combination with speed setting
Y
1 (“minimum
speed”) or
W
2 (“maximum speed”).
Please also refer to the tables.
Positioning the bowl
- Position the bowl as indicated in fig. 2.
- Move the handle in the direction of the arrow
until it stops (fig. 3).
English
Important
• Read the instructions in conjunction with
the illustrations before using the
appliance. Keep page 3 folded out when
reading.
• Do not leave the appliance operating
unattended.
• Do not allow children to operate the
appliance.
• Care must be taken when handling the
metal blade and the slicing disc as these
are very sharp.
• Remove the protective cap from the
metal blade before use.
• Let the rotating parts come to a complete
stop before opening the cover.
• Never put your fingers or e.g. a spatula
into the food chute while operating.
• Remove the mains plug from the wall
socket after use.
• If the mains cord of this appliance is
damaged, it must only be replaced by
Philips or their service representative, as
special tools and/or parts are required.
• Prior to initial use, wash all the parts
which come into contact with food.
• Never immerse the motor unit in water or
any other liquid. Do not rinse either.
• When mixing or blending fluids, do not
fill above the maximum level indication
on the bowl.
• Do not exceed the maximum quantities
and processing times indicated in the
tables.
• Place the lid on the bowl in the right
manner. The built-in safety lock then
becomes unlocked and the appliance can
be switched on.
• Keep these instructions for future
reference.
4
2
3
Summary of Contents for HR 7712
Page 1: ...HR 7712 ...