Recording a Cue or Look
75
Light Palette Lighting Control Console
Installation & Setup Guide
If you select "Block new values into cue range," each cue in the range will get the new values as determined by the
Record Options you selected with [S3] in the "Record" dialogue box. This may result in Redundant Data which may
or may not be desirable (normally only desirable in multiple cue list environments where you want to be sure each
cue will be in total control of those lights, regardless of what other cue lists are doing). By default, [S2] "Track new
values through cue range" is selected (so pressing [ENTER] will close this dialogue box using this option). If you
select this option, the values will be recorded in the first cue in the range and they will track until the end of the range.
You can still check [S10] "Cue Only Mode" in the "Record" dialogue box to not track beyond the end of the range,
even when using the [S2] "Confirmation" option.
Tips:
• You can use the [WHEEL] to change many of the controls in this dialogue box. Holding down [SHIFT] while
using the Wheel changes numeric values by 0.1.
• You can quickly record a cue to a cue list that is not currently selected by pressing [REC] [SELECT].
Detailed Description
These versions work via the command line as opposed to the Record Cue dialogue box. Access to all options within
the dialogue box can be found in the softkeys.
If a softkey is showing a green arrow, clicking on this softkey will enable more softkeys directly above it on the M-
keys.
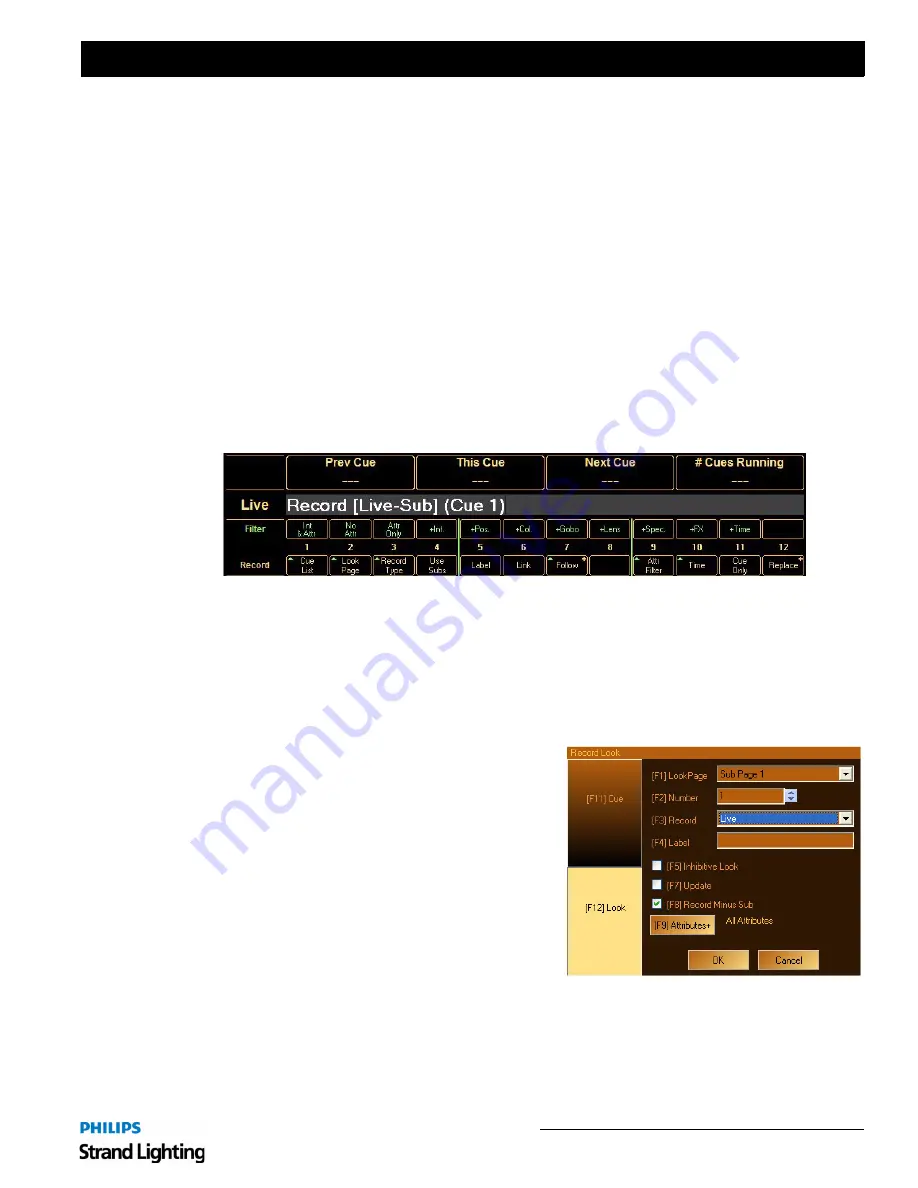
2. Recording a Look (Submaster)
Look Masters (Submasters) can be set up and recorded in either the Live (Active) or Blind.
From Live Display:
Step 1. Select [LIVE] button from channel Grid Tool Bar.
Step 2. Select channels to be assigned to Look Master.
Step 3. Set levels for channels.
Step 4. Press [REC] then the Look # and press [ENTER]
or
press [REC] then press Bump button at desired
submaster.
Step 5. Press [SHIFT] [REC] [LOOK] or [S12] to open the
Look dialogue record box.
Step 6. Enter number of the Look Master you wish to
record.
Step 7. Enter a Look Master label in the text box
(optional).
Step 8. From drop down list box, select which channels
will be recorded in this Look Master.
a. Live - will record the entire output of the desk. Will include or exclude subs based on the setting in
Hardware Setup.
b. Delta - only channels that have been changed.
Summary of Contents for 91816 Light Palette Classic 1500
Page 1: ......
Page 4: ...Installation Setup Guide Light Palette Lighting Control Console ii Notes ...
Page 68: ...Installation Setup Guide Light Palette Lighting Control Console 60 Controls Notes ...
Page 76: ...Installation Setup Guide Light Palette Lighting Control Console 68 Setup Notes ...
Page 87: ...79 Light Palette Lighting Control Console Installation Setup Guide A Specifications ...
Page 89: ...81 Light Palette Lighting Control Console Installation Setup Guide B Software Tips ...
Page 95: ...Notes ...
Page 96: ...Part No 2 450190 010 ...


